Installing the First Node in an HA Cluster
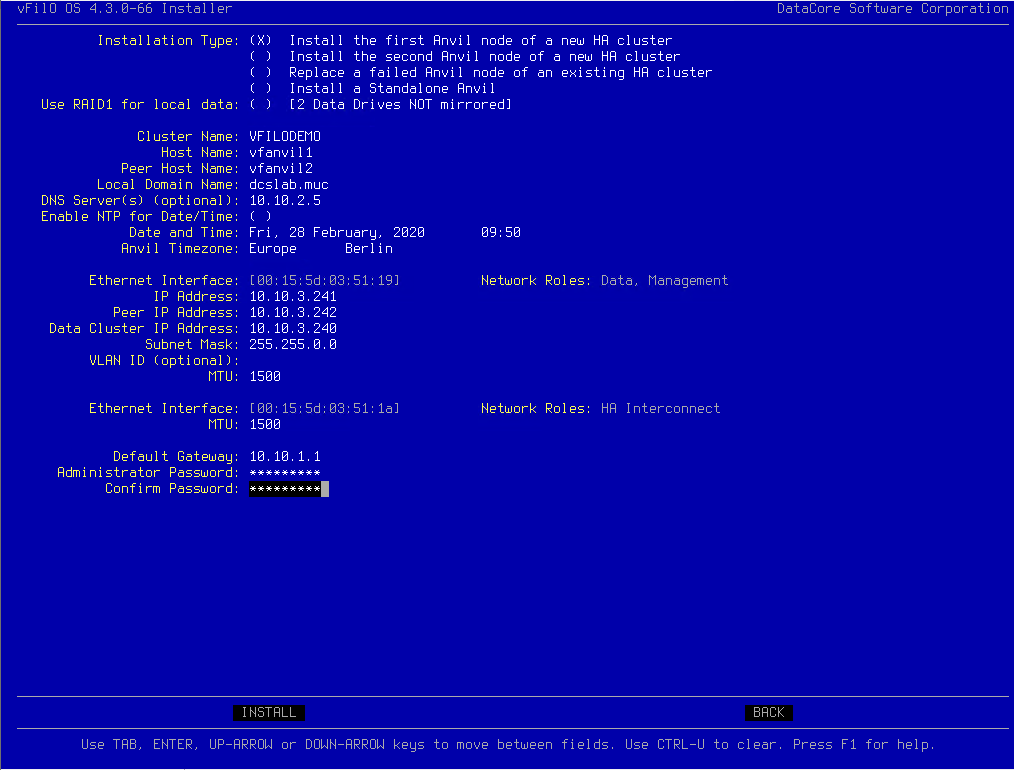
- Fill in your settings on the following screen. The installation process has been designed to ask for all the required information up-front, even before the second node is installed.
- Select the Installation Type: Install the first node of a new HA cluster
- Cluster Name. This is the SMB Server Name and the Cluster Name. Note that the SMB Server Name cannot be changed after installation.
- Host Name. Enter the host name of the first node.
- Peer Host Name. Enter the host name of the second node.
- Local Domain Name. Enter the name of the local domain.
- DNS Server(s) (optional), use comma separated entries, for multiple DNS servers.
- NTP Server(s) (optional), use comma separated entries, for multiple NTP servers.
- Timezone. Set the Timezone of the installation
- Ethernet Interface. For the Management and Data Ethernet Interfaces, configure the following:
- IP Address
- Peer IP Address
- Subnet Mask (or Prefix)
Data and management interfaces must be on different subnets.
- VLAN ID (optional)
- MTU size
The default MTU size is 1500 bytes. To use Jumbo frames, change the MTU size to match your network infrastructure; typically the correct value is 9000.
- Default Gateway IP address of the default gateway
- Administrator Password sets the password for the admin user
- Review the configuration for accuracy. If all settings are correct, select INSTALL and press Enter.
- Confirm a final time and press Enter to apply the configuration.
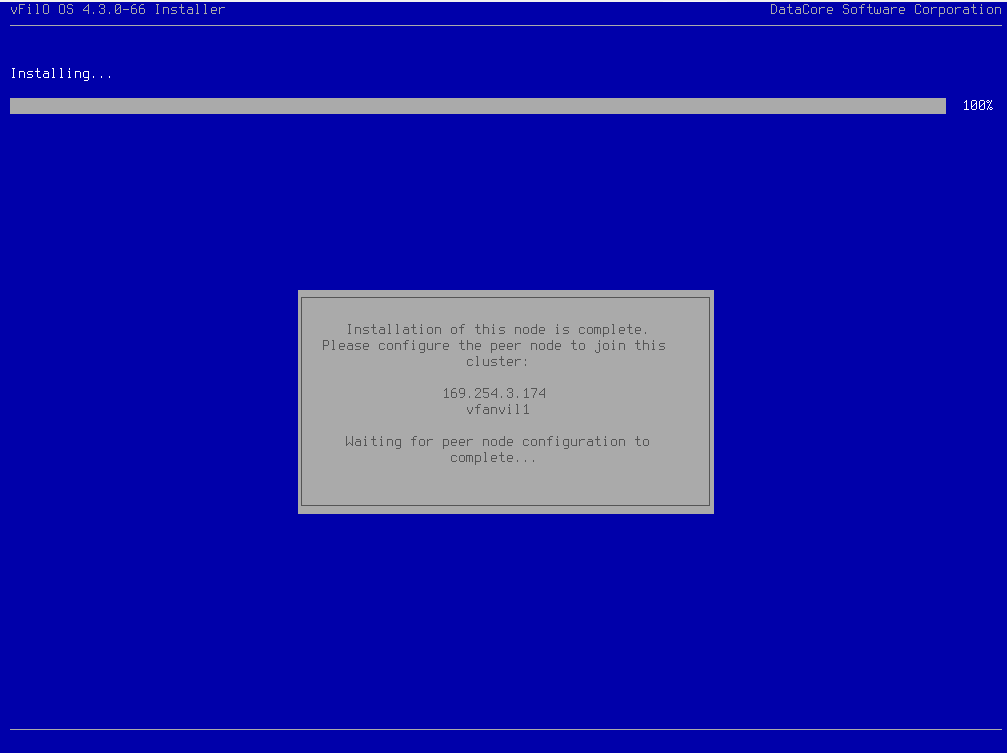
- The networking and cluster setting are applied, and the installer will now wait for the peer node to be configured. The installation is not completed until the second node of the cluster has been added. Once the installation of the first node completes the following screen is displayed:
- Continue to Installing the Second Node in an HA Cluster.