DataCore Puls8 Headlamp Plugin
Explore this Page
- Overview
- Requirements
- Installing the DataCore Puls8 Plugin in Headlamp
- Adding a Cluster
- Accessing the Home Dashboard
- Cluster Overview Dashboard
- DataCore Puls8 Dashboard
- Benefits of Puls8 Plugin in Headlamp
Overview
The DataCore Puls8 Headlamp Plugin provides a unified graphical interface for observing and managing DataCore Puls8 storage resources directly within the Headlamp Kubernetes User Interface (UI). It streamlines operational workflows by presenting real-time cluster metrics, node health, volume status, storage pool capacity, Persistent Volume Claim (PVC) bindings, and snapshot activity in a single, intuitive dashboard. The plugin supports desktop Headlamp deployments and integrates seamlessly with DataCore Puls8 environments.
This document explains how the DataCore Puls8 Headlamp Plugin works, how to install and use it, and the capabilities it provides to help you safely and efficiently manage DataCore Puls8 storage operations from the Headlamp interface.
The DataCore Puls8 Headlamp Plugin is tested and validated with Headlamp v0.36. DataCore recommends using this version to ensure full compatibility and support.
Requirements
Before installing and using the DataCore Puls8 Headlamp Plugin, ensure that both Headlamp and DataCore Puls8 environment requirements are met.
Headlamp Requirements
| Category | Requirement |
|---|---|
| Supported Deployment Modes | Desktop (Windows, macOS, Linux) |
| Supported Kubernetes Versions | Kubernetes v1.24 or higher |
| RBAC Permissions | Must have sufficient permissions to list, get, and watch Kubernetes resources (namespaces, nodes, volumes, pods, etc.) |
| Desktop Environment (if using Headlamp App) |
Supported OS: Windows, macOS (Intel and Apple Silicon), Linux (x86_64, ARM64) |
Access to kubeconfig file with cluster credentials |
|
| Network and Browser Requirements | WebSocket support enabled (used by Headlamp for live cluster updates) |
| Supported browsers: Chrome, Edge, Firefox, Safari (latest versions) |
DataCore Puls8 Requirements
Refer to the general requirements for detailed DataCore Puls8 environment and platform requirements.
- Both DataCore Puls8 components and Headlamp must connect to the same Kubernetes cluster context.
- The DataCore Puls8 Headlamp Plugin supports desktop Headlamp deployments.
Installing the DataCore Puls8 Plugin in Headlamp
To install the DataCore Puls8 Plugin in Headlamp:
- Download the bundle that contains the Headlamp application and the DataCore Puls8 Headlamp Plugin from the official DataCore Downloads page.
- Extract the compressed file to a suitable location on your system once the download is completed.
- Install Headlamp (if not already installed) from the bundle. Ensure that Headlamp version matches the version in the bundle.
- Depending on your operating system, copy or export the extracted DataCore Puls8 Plugin folder to the default Headlamp plugin directory as shown below:
- Once the plugin files are in place, restart the Headlamp application.
- After restart, the DataCore Puls8 Dashboard appears in the sidebar (left navigation panel) of Headlamp. From here, you can access cluster information, monitor nodes and volumes, and manage DataCore Puls8 storage resources directly through the Headlamp interface.
| Operating System | Default Plugin Directory |
|---|---|
| macOS | $HOME/.config/Headlamp/plugins
|
| Linux | $HOME/.config/Headlamp/plugins
|
| Windows | %APPDATA%/Headlamp/Config/plugins
|
Adding a Cluster
Before accessing the Puls8 dashboard in Headlamp, you must add a Kubernetes cluster to the interface.
To add a cluster:
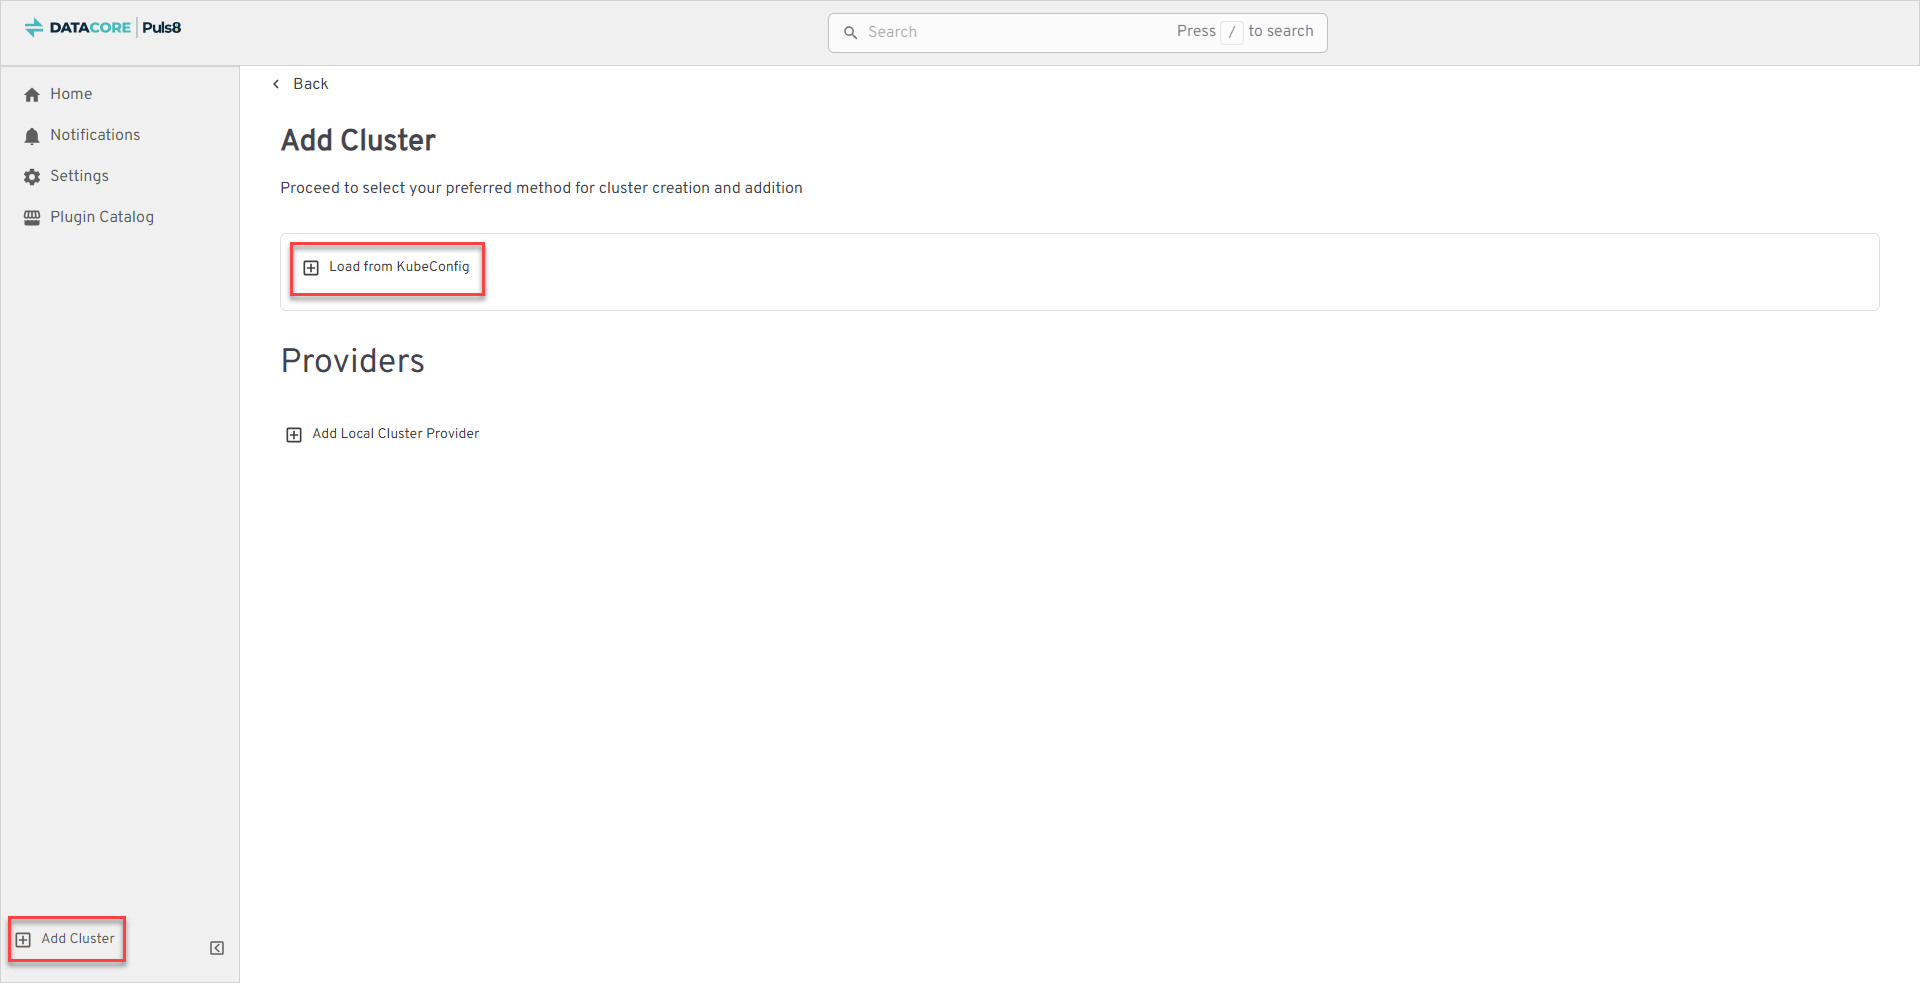
- In the bottom-left corner of the Headlamp navigation panel, click Add Cluster → Load from KubeConfig.
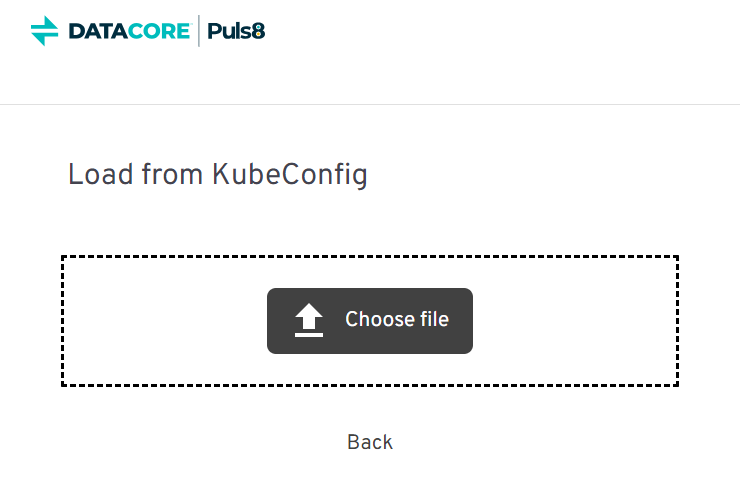
- A popup window opens. Click Choose file.
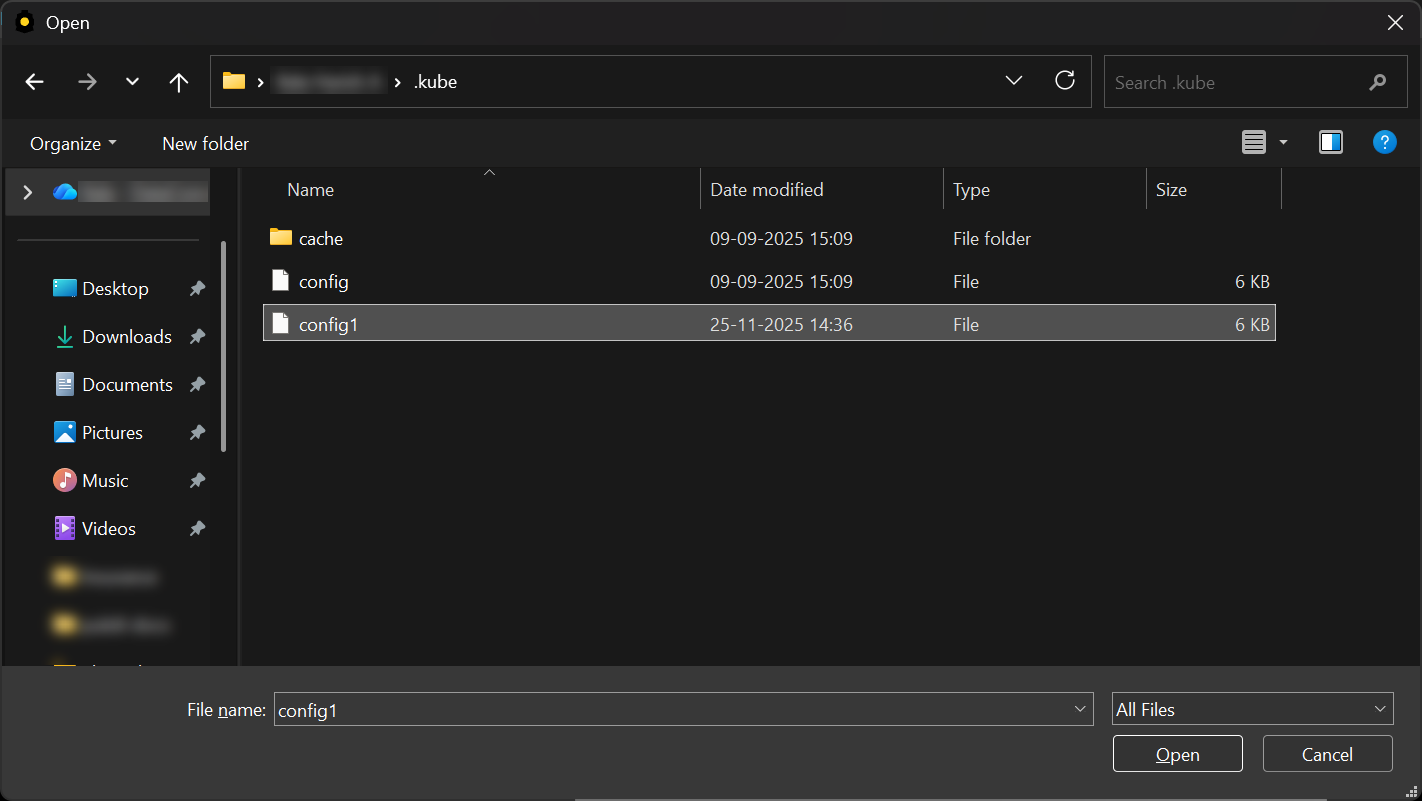
- Select your kubeconfig file (for example,
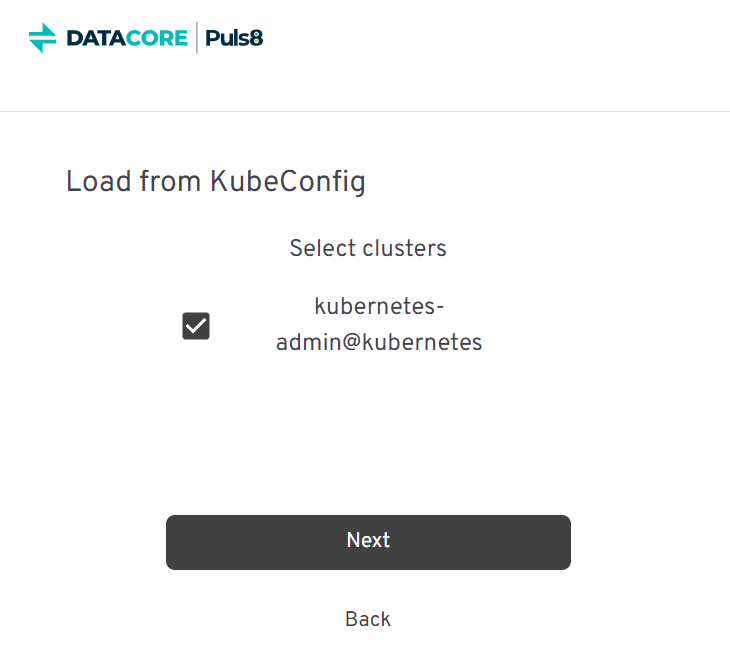
config,config1) and click Open. - A popup window appears showing the available clusters detected in the kubeconfig file.
- Select the cluster you want to add and click Next.
- A confirmation message appears: Clusters successfully set up!
- Click Finish to complete the setup.
- After the setup is complete, the newly added cluster appears in the Home Dashboard.
Once a cluster is added, the Puls8 Dashboard becomes available in the left navigation panel, allowing you to monitor and manage Puls8 storage resources.
Accessing the Home Dashboard
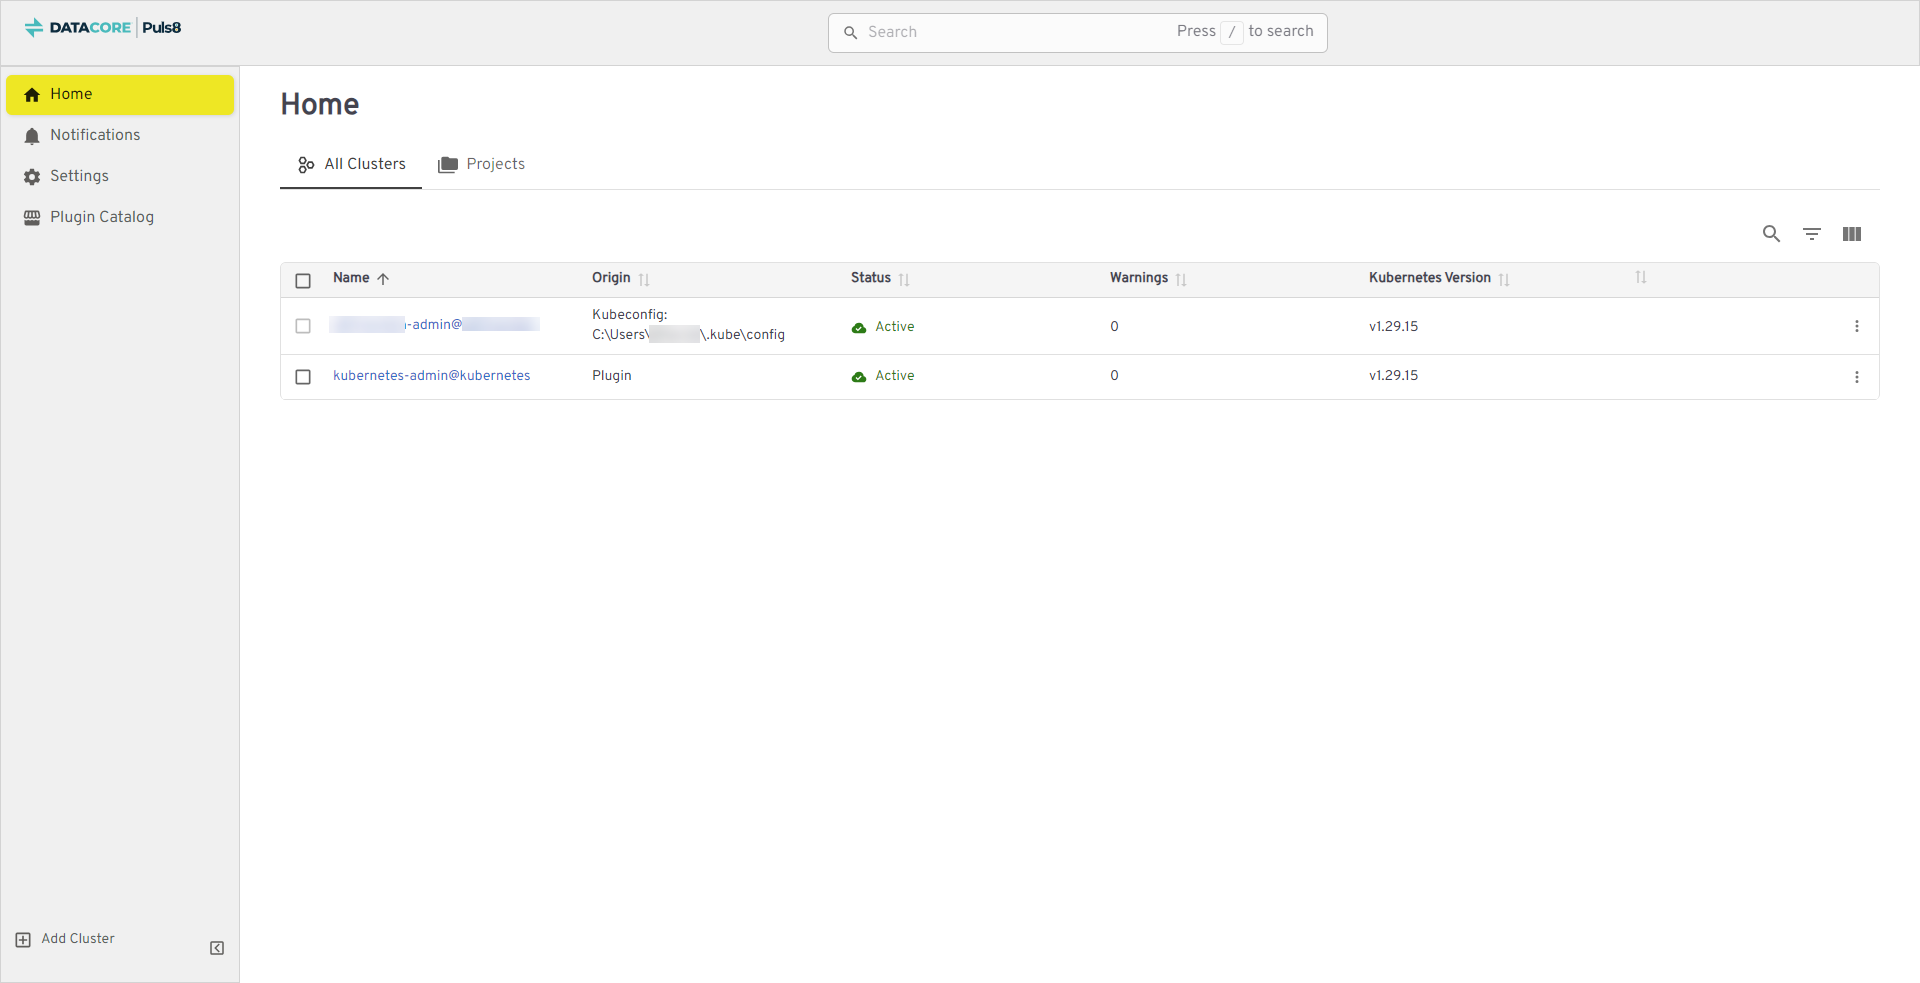
The Home Dashboard displays all connected Kubernetes clusters with their configuration details and connection status.
The dashboard provides the following information:
| Field | Description |
|---|---|
| Name | Cluster identifier (example, puls8-admin@puls8). |
| Origin | Source of the connection (example, kubeconfig path C:\\Users\\DC\\.kube\\config). |
| Status | Indicates if the cluster is Active or Inactive. |
| Warnings | Displays the number of warnings associated with the cluster. |
| Kubernetes Version | Kubernetes version of the connected cluster (example, v1.29.15). |
To access and view all connected clusters:
- From the left navigation panel, click Home.
- The Home Dashboard is displayed with a list of clusters and their details.
Cluster Overview Dashboard
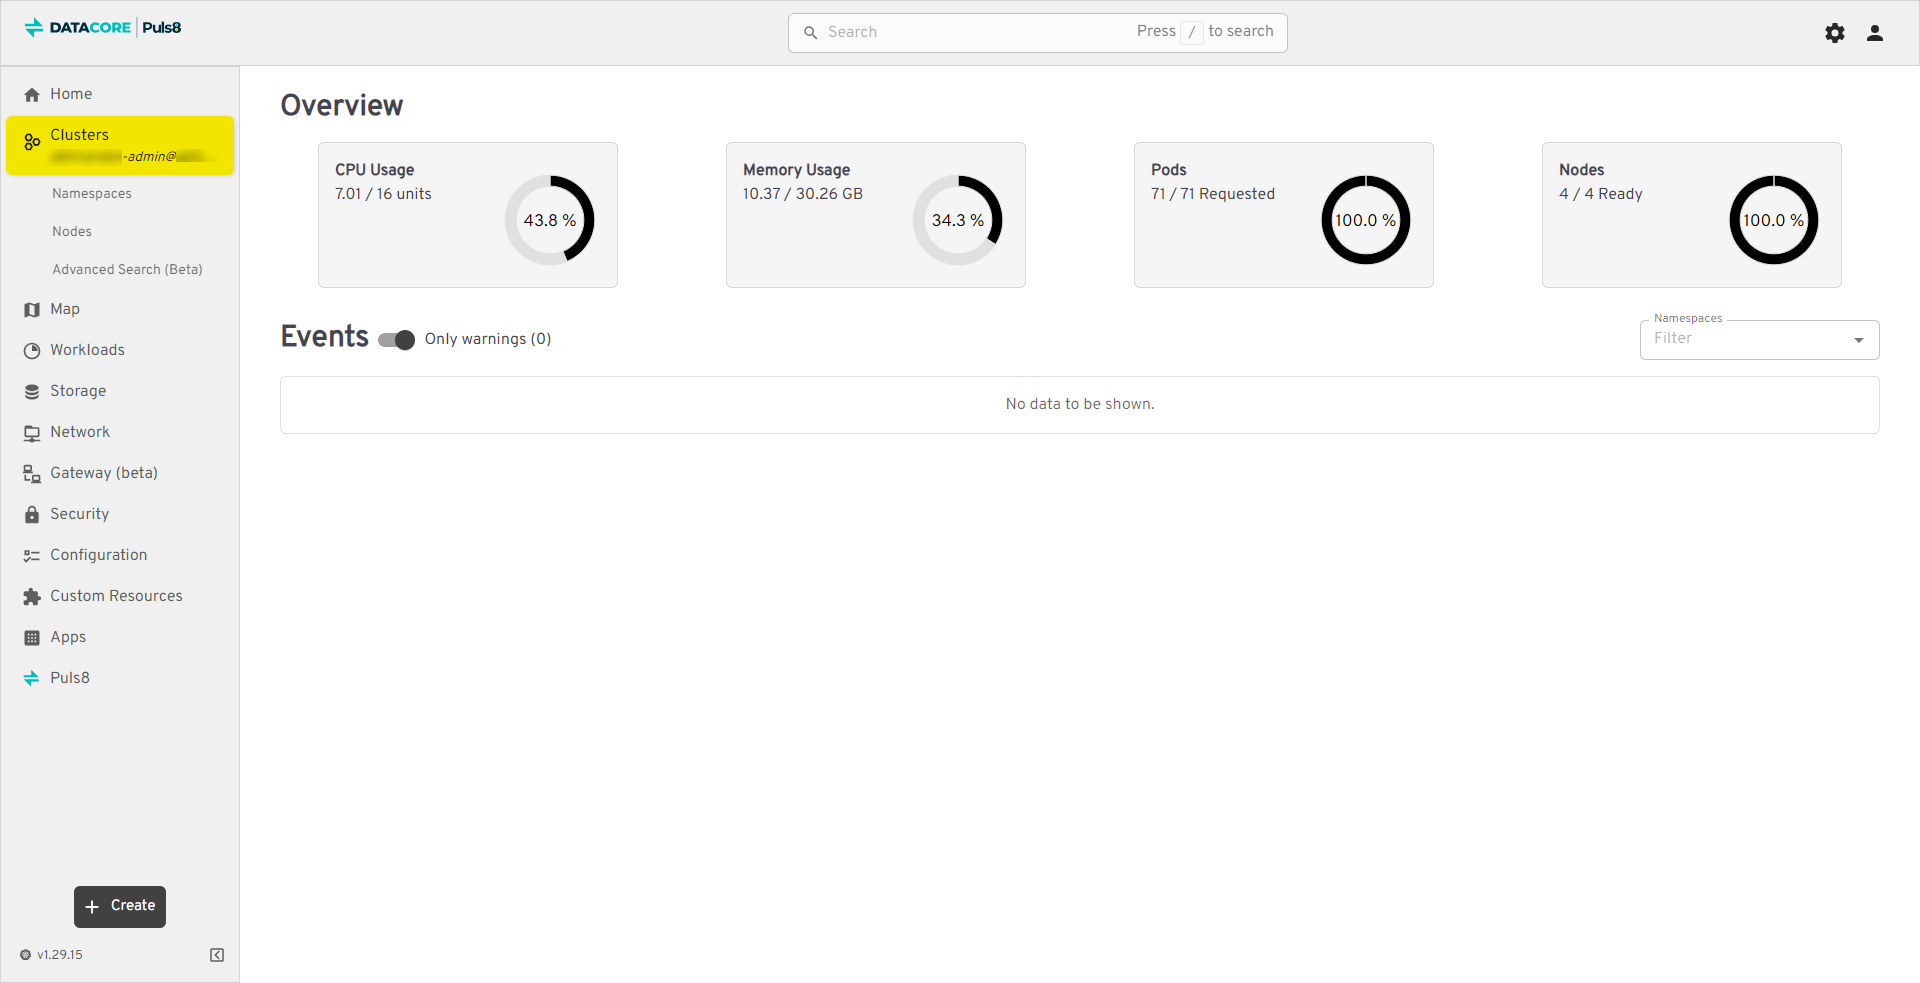
The Cluster Overview Dashboard provides real-time metrics on resource utilization and system health for the selected cluster.
The dashboard provides the following information:
| Field | Description |
|---|---|
| CPU Usage | Displays CPU utilization percentage. |
| Memory Usage | Shows memory consumption relative to total memory. |
| Pods | Indicates number of running pods vs total requested. |
| Nodes | Displays readiness state of nodes in the cluster. |
| Events | Lists cluster-level warnings and events. |
To monitor the overall health and performance of your cluster:
- From the Home Dashboard, click the cluster name you want to open (example,
puls8-admin@puls8). - The Cluster Overview Dashboard is displayed.
DataCore Puls8 Dashboard
The DataCore Puls8 Dashboard in Headlamp provides access to all DataCore Puls8 related resources, allowing monitoring and management of storage components.
The Dashboard includes the following sections that provide visibility into cluster, storage, and application resources.
| Section | Description |
|---|---|
| Nodes | Displays both Storage Nodes and Application Nodes along with their resource and status information. |
| Volumes | Lists all active storage volumes provisioned through Puls8. |
| Storage Pools | Shows all configured storage pools and their capacity utilization. |
| Persistent Volume Claims | Displays PVCs created by workloads and their associated volumes. |
| Storage Classes | Lists all available storage classes defining provisioning and reclaim policies. |
| Volume Snapshots | Displays point-in-time snapshots of volumes for backup and recovery. |
| Volume Snapshot Classes | Displays available snapshot classes used to define snapshot behavior and policies. |
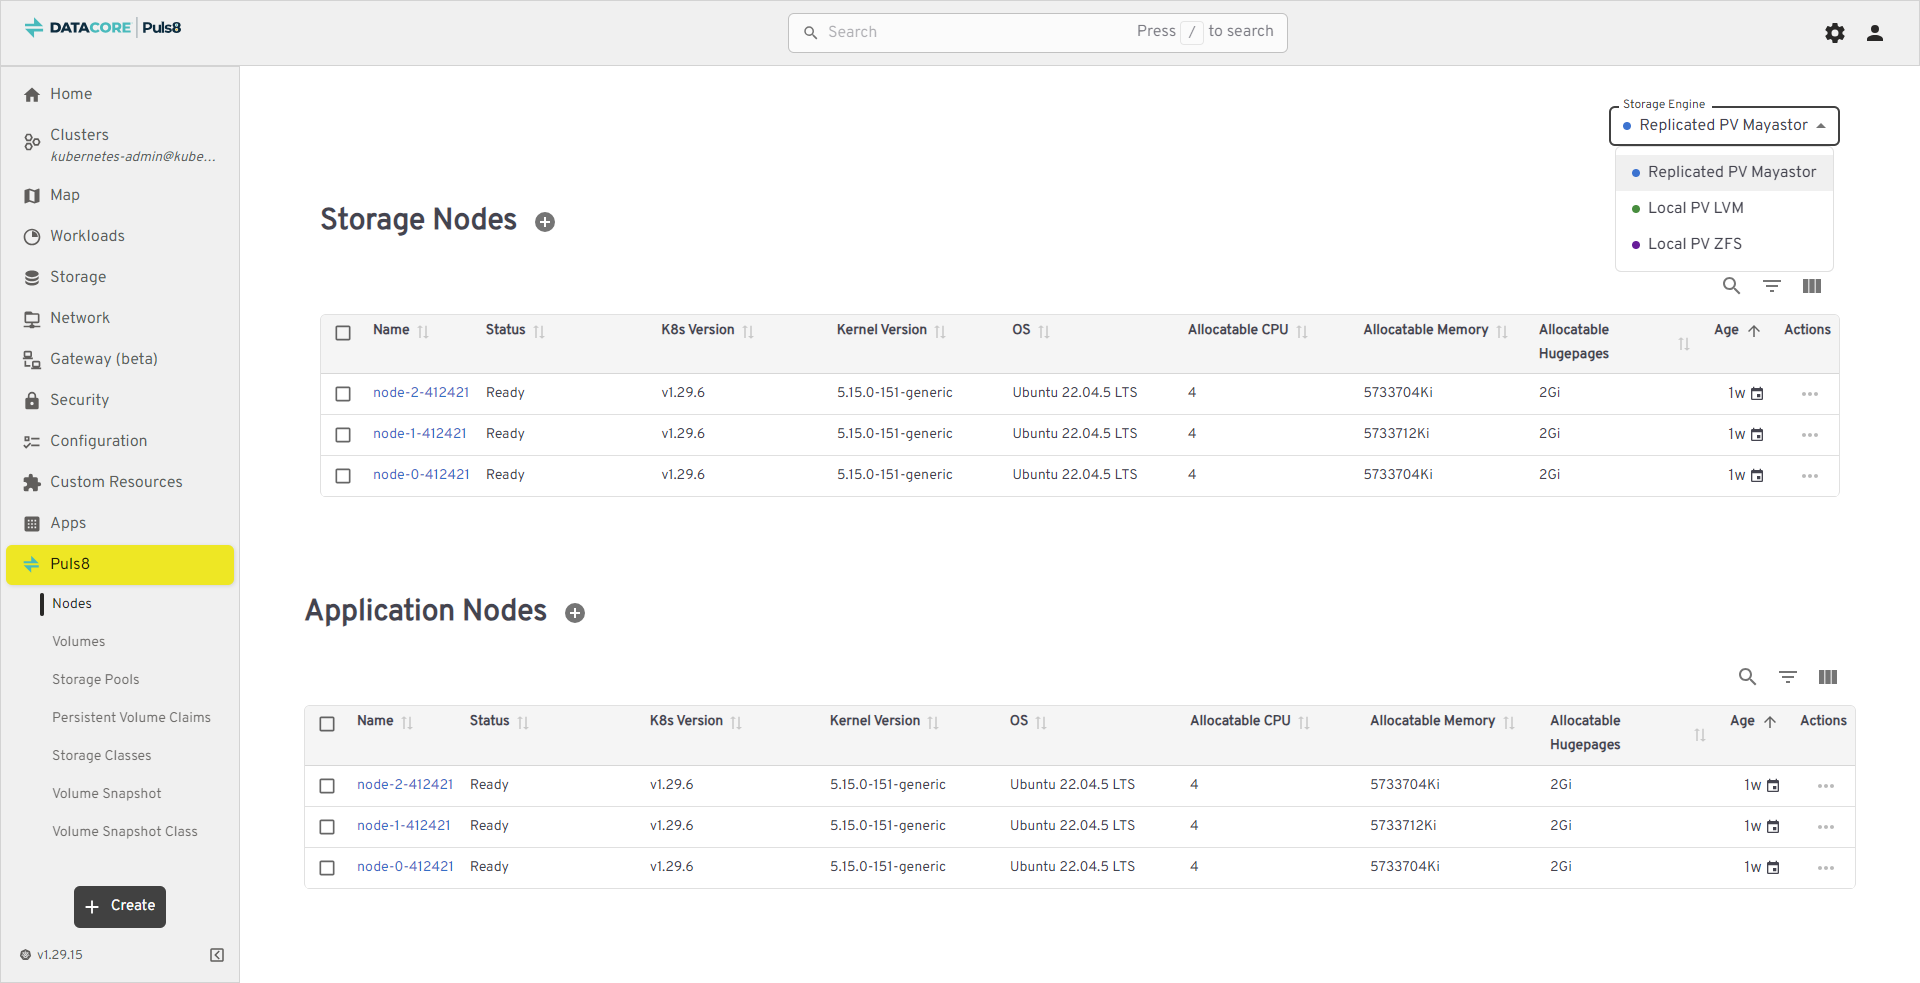
Nodes
The Nodes section provides a consolidated view of all Kubernetes worker and control plane nodes in the cluster. Nodes are categorized into two types:
- Storage Nodes
- Application Nodes
It enables you to monitor node availability, health, and configuration details at a glance. This ensures proactive detection of node-related issues and helps maintain a healthy infrastructure. The table below lists all nodes currently registered in the cluster and provides detailed information about their configuration, resource availability, and operational state.
| Field | Description |
|---|---|
| Name | Node identifier (clickable). Opens detailed node information. |
| Status | Node readiness/state (example, Ready). |
| K8s Version | Kubernetes version running on the node (example, v1.29.6). |
| Kernel Version | OS kernel version (example, 5.15.0-152-generic). |
| OS | Operating system and version (example, Ubuntu 22.04.5 LTS). |
| Allocatable CPU | Number of CPU units schedulable to pods on the node. |
| Allocatable Memory | Memory available to pods (displayed in Ki/Gi). |
| Allocatable Hugepages | Hugepage allocation available on the node (example, 2Gi). |
| Age | Time since the node object was created/registered (example, 1mo). |
| Actions | Row menu (⋮) with node-specific management actions (view logs, cordon, etc.). |
Viewing and Managing Nodes
- From the left navigation panel, click Puls8.
- Select Nodes from the list.
- Click a Name to view node details, including System Info, Conditions, and Events.
- Use the Actions (⋮) menu for node operations (where available).
- Use the Storage Engine dropdown (upper-right corner) to switch between Replicated PV Mayastor, Local PV LVM, and Local PV ZFS views.
Best Practices
- Regularly review node Status to detect readiness or scheduling issues early.
- Ensure Allocatable CPU/Memory is sufficient for upcoming workloads before deploying new applications.
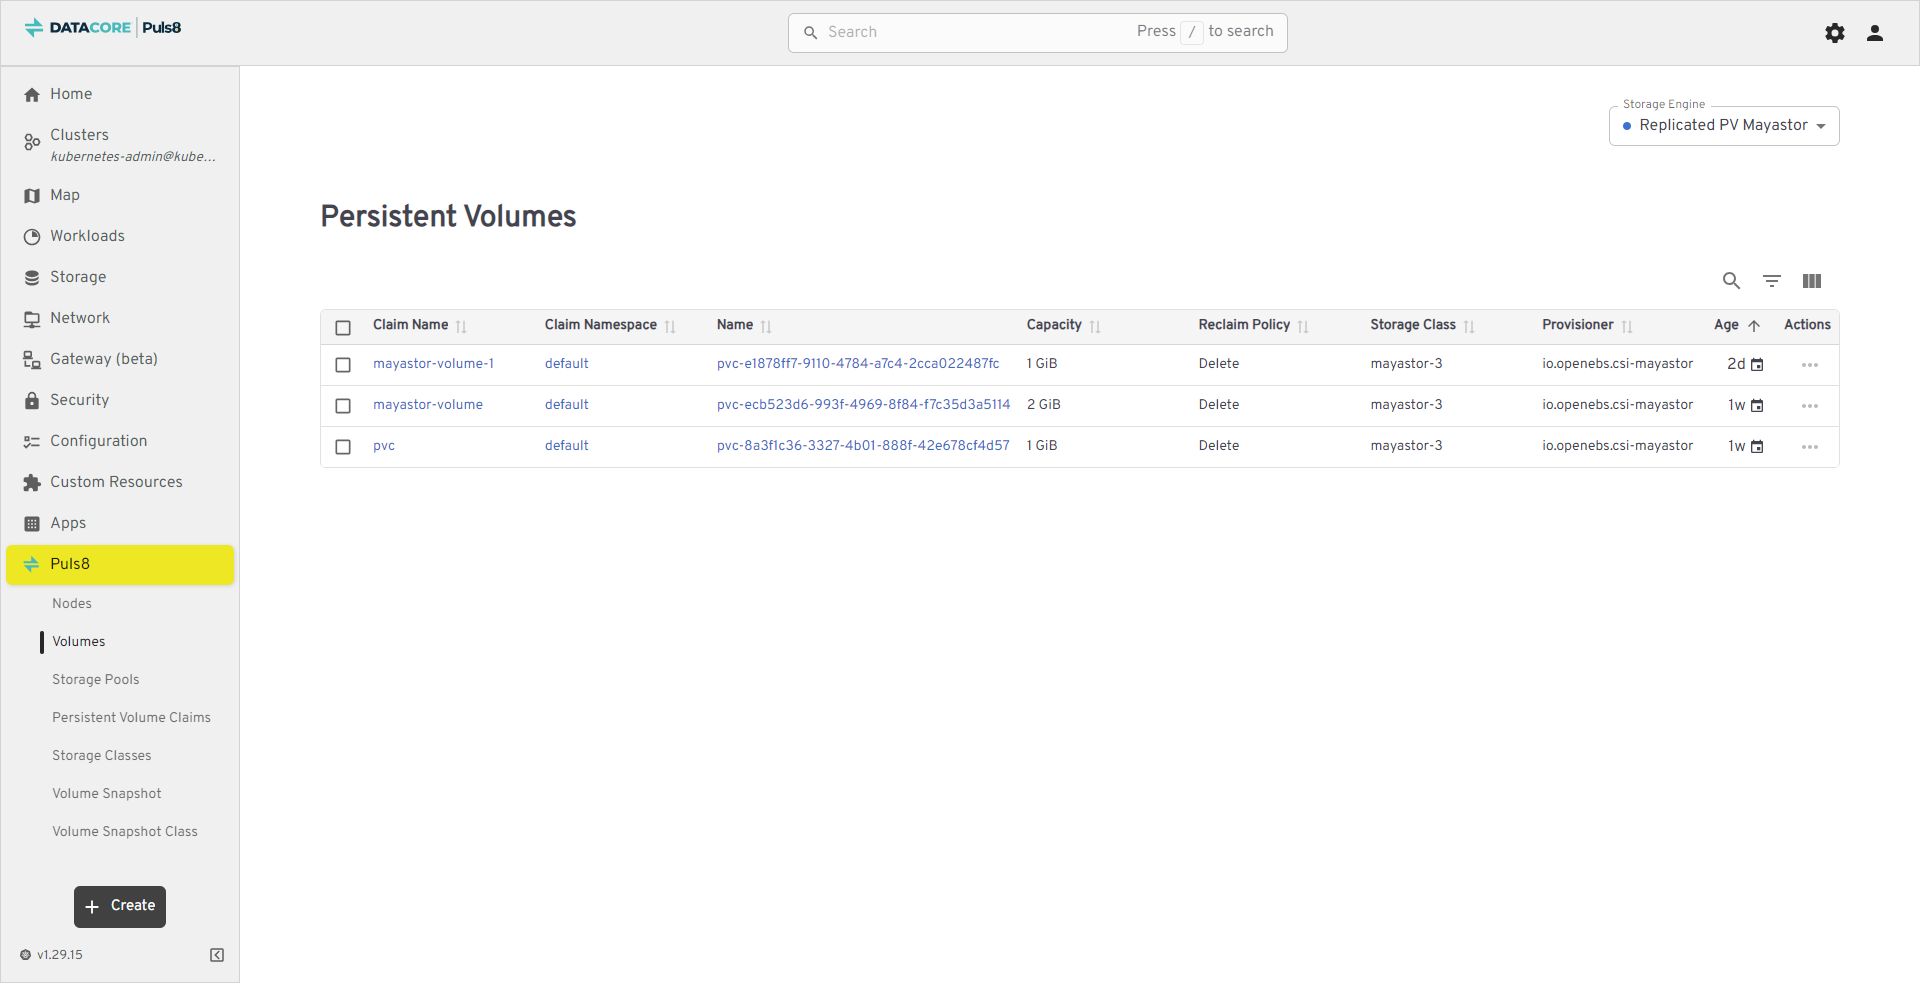
Volumes
The Volumes section provides a centralized view of all storage volumes provisioned through Puls8. It enables you to monitor storage allocations and validate that workloads have the correct volumes provisioned.
The table below lists all available volumes and provides detailed information about their claims, provisioning, and lifecycle.
| Field | Description |
|---|---|
| Claim Name | The PVC bound to this volume. |
| Claim Namespace | The namespace where the claim resides. |
| Name | Unique identifier for the PV object. |
| Capacity | Allocated storage size for the volume. |
| Reclaim Policy | Defines what happens to the volume after the claim is deleted (example, Delete). |
| Storage Class | The storage class used to provision this volume. |
| Provisioner | Identifies the provisioner plugin (example, io.openebs.csi-mayastor). |
| Age | Time since the volume was created. |
| Actions | Contextual actions available for the volume (view, edit, or manage). |
Viewing and Managing Volumes
- From the left navigation panel, click Puls8.
- Select Volumes from the list.
- Click a Name to view detailed metrics and replica distribution.
- Use the Actions (⋮) menu to manage lifecycle tasks such as deleting or viewing logs.
- Use the Storage Engine dropdown (upper-right corner) to switch between Replicated PV Mayastor, Local PV LVM, and Local PV ZFS views.
Best Practices
- Cross-check Provisioner with the corresponding StorageClass to confirm consistent driver usage.
- Review Reclaim Policy before deleting workloads to ensure data retention aligns with policy.
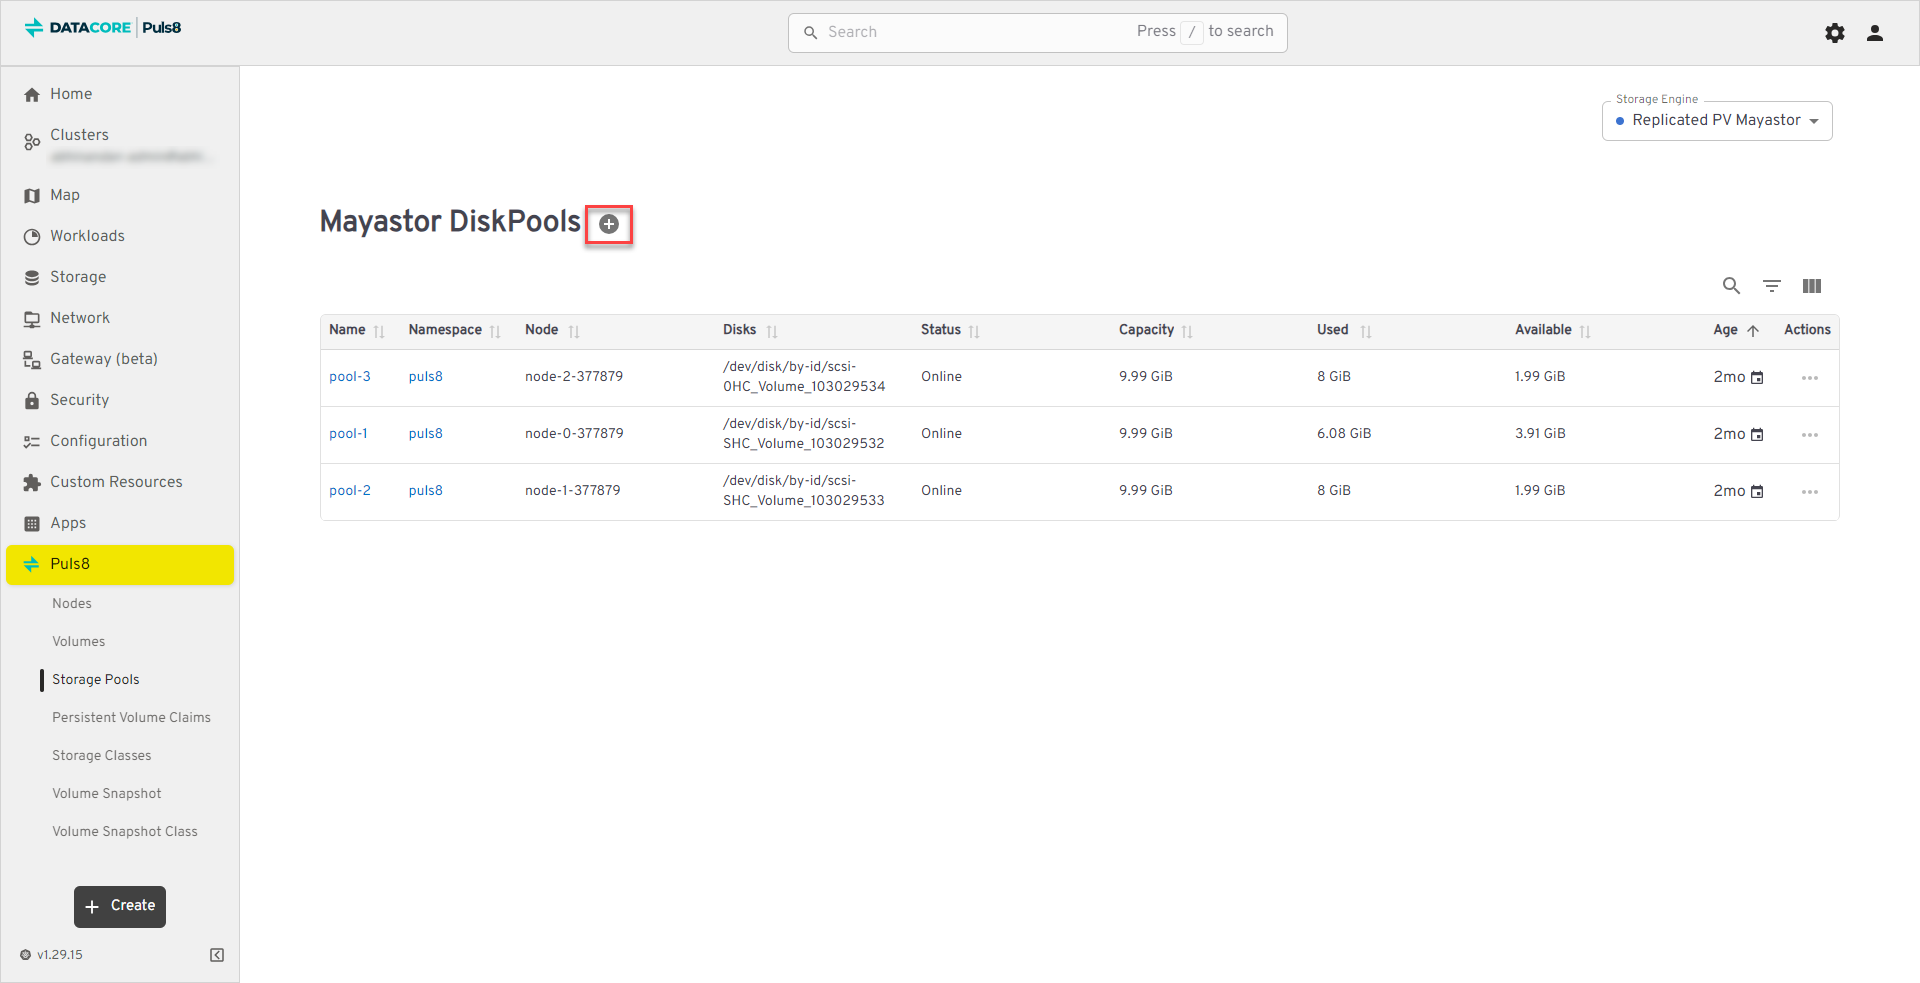
Storage Pools
The Storage Pools section provides visibility into available storage resources aggregated from underlying disks. Storage pools are the foundation for provisioning volumes and managing capacity across nodes.
The table below lists all configured storage pools and provides information about capacity utilization, node association, and operational health.
| Field | Description |
|---|---|
| Name | Name of the disk pool. |
| Namespace | The namespace in which the pool is created. |
| Node | The node where the pool is hosted. |
| Disks | Path of the underlying disk associated with the pool. |
| Status | The current state of the pool (example, Online). |
| Capacity | The total size of the disk pool. |
| Used | The amount of capacity already consumed. |
| Available | Remaining free space available in the pool. |
| Age | How long the pool has existed. |
| Actions | Contextual actions available for managing the pool. |
Viewing and Managing Storage Pools
- From the left navigation panel, click Puls8.
- Select Storage Pools from the list.
- Click a Name to view pool capacity, disk details, and node association.
- Use Used / Available to track capacity consumption.
- Use the Storage Engine dropdown (upper-right corner) to switch between Replicated PV Mayastor, Local PV LVM, and Local PV ZFS views.

Creating Storage Pools
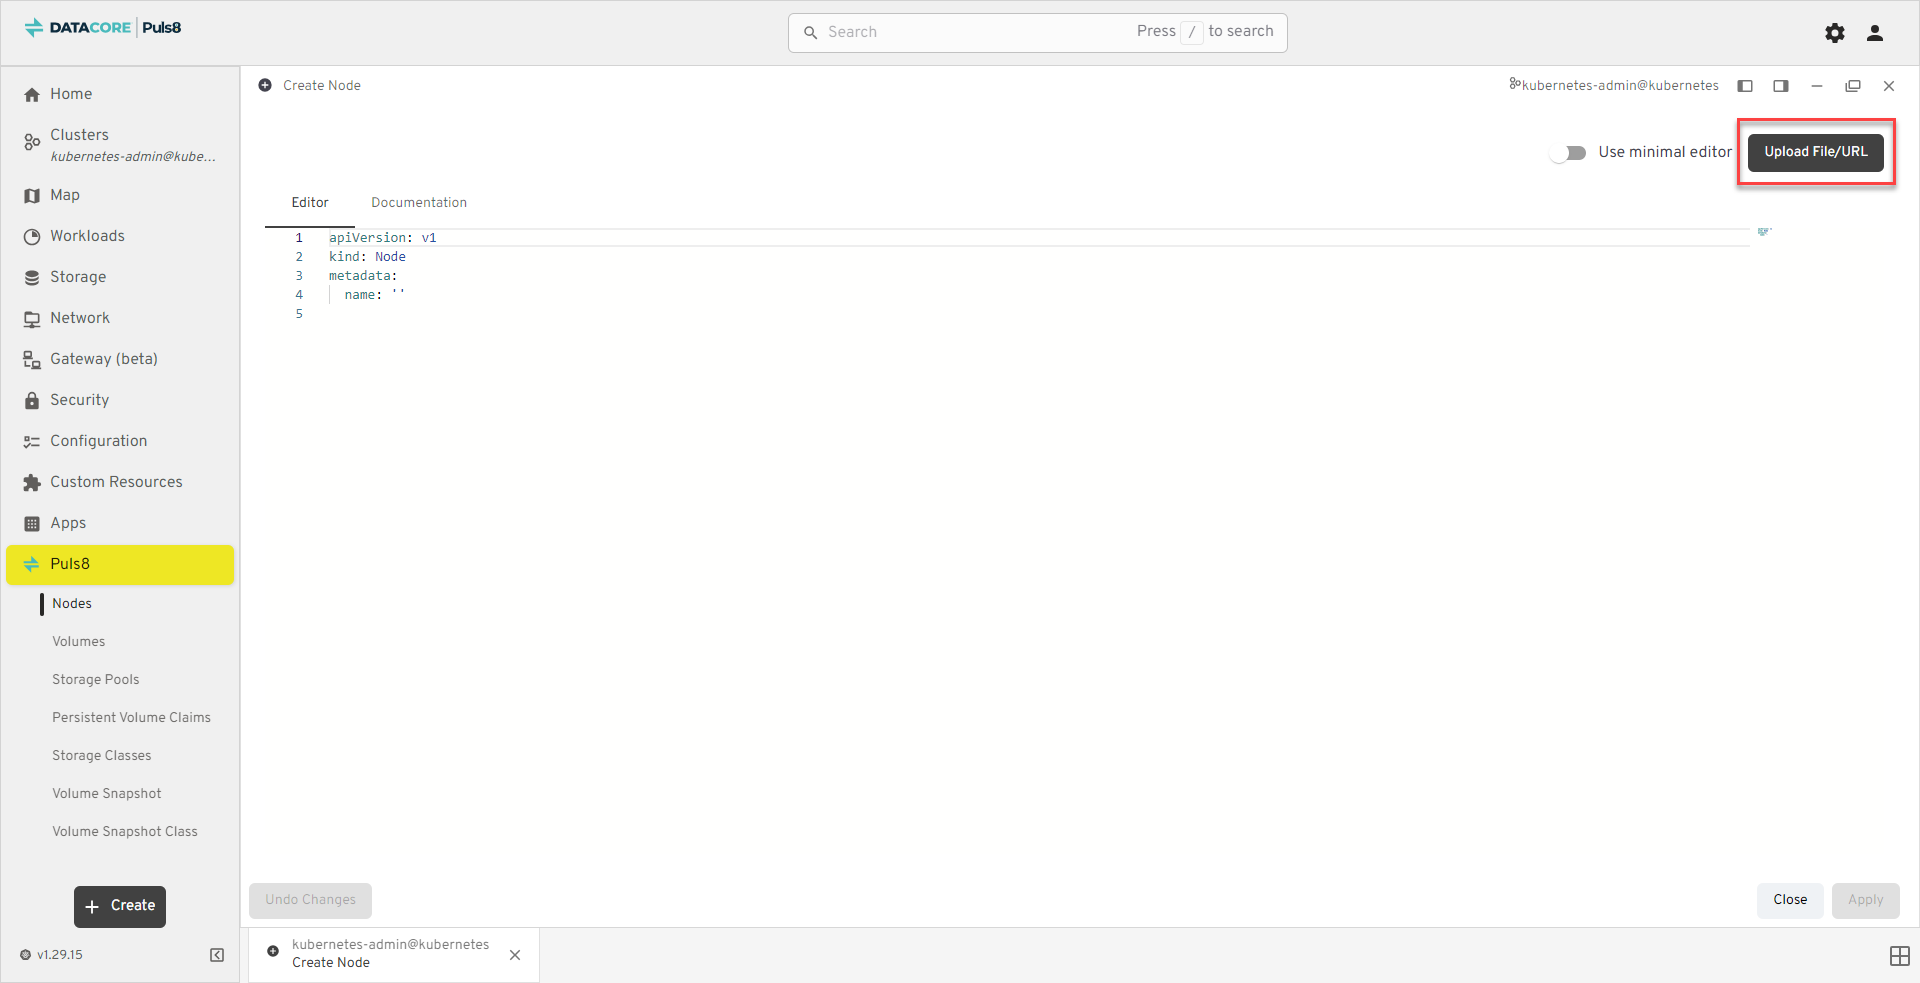
- Click the Create (+) button to create a new storage pool.
- A Create window opens with a YAML editor.
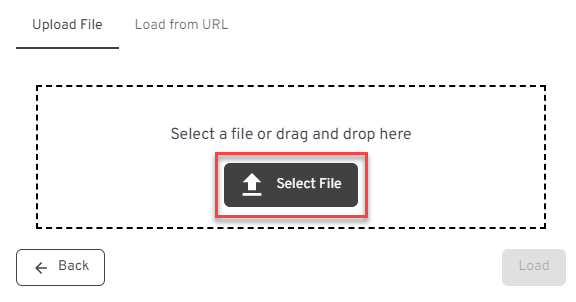
- Click Upload File/URL.
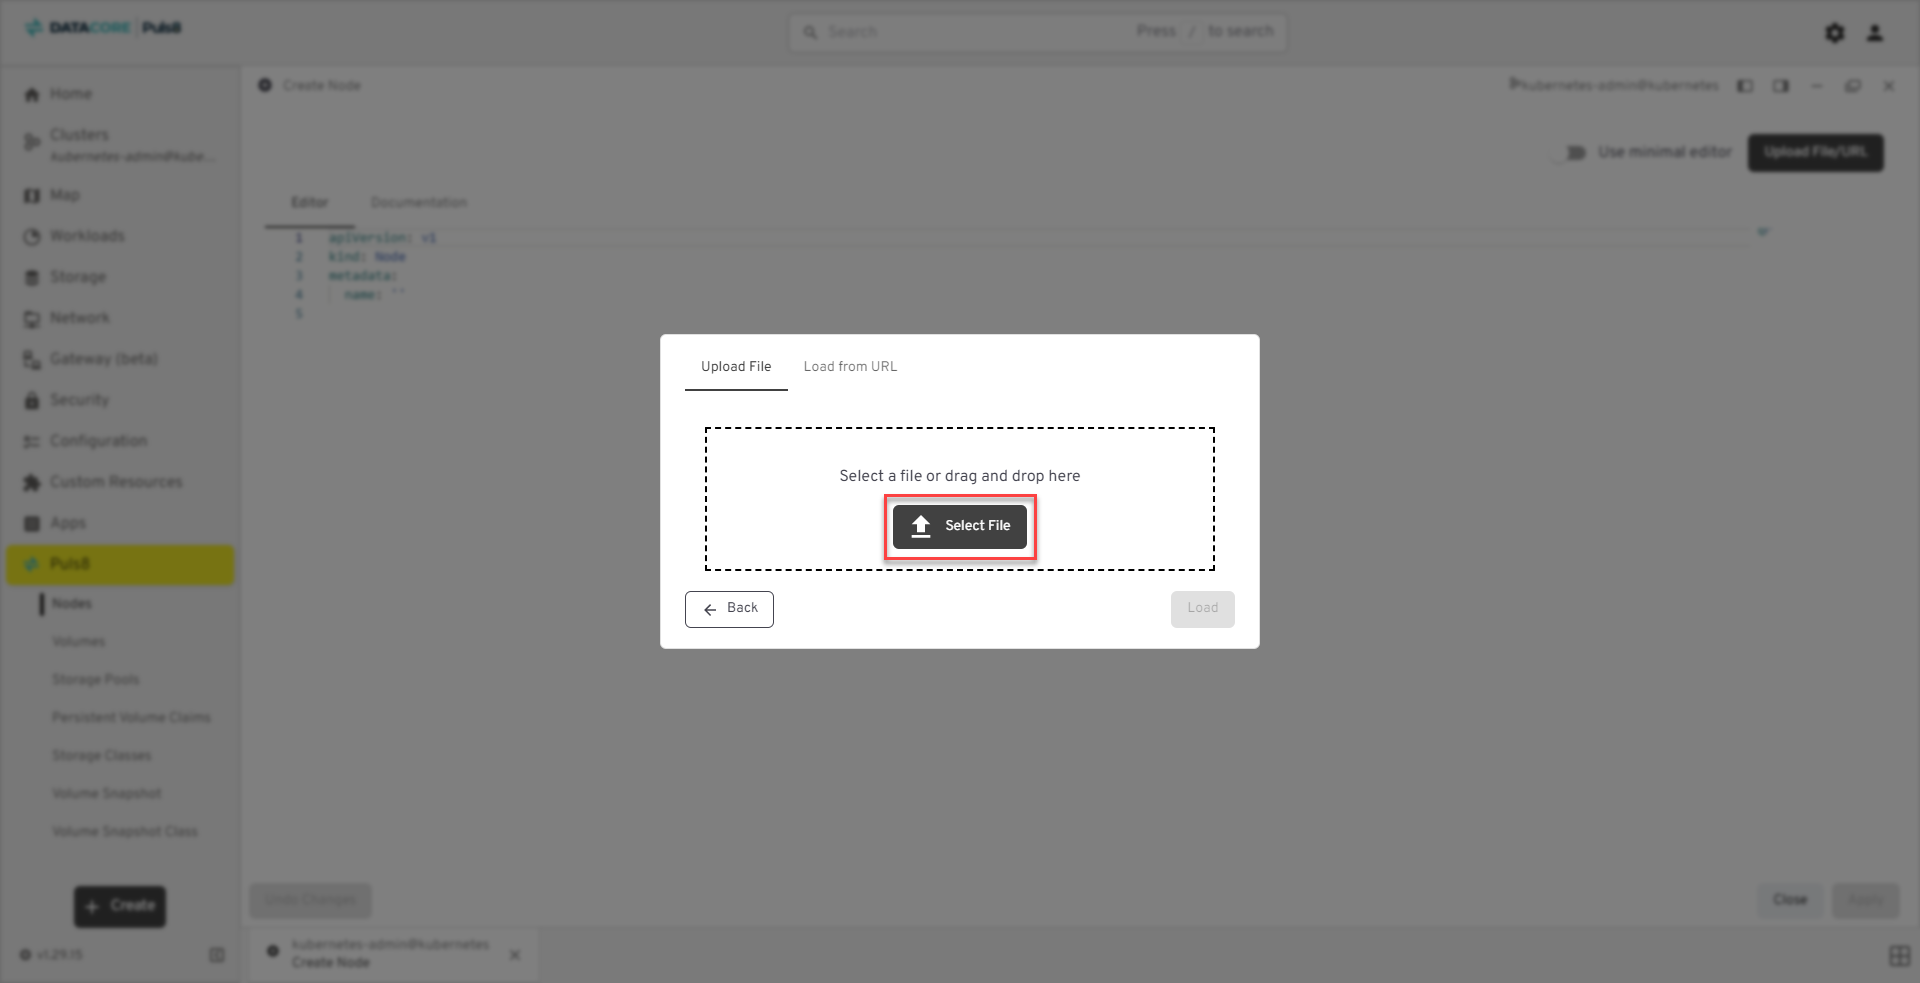
- In the popup dialog, choose one of the following:
- Upload File - Select a local YAML file defining your storage pool.
- Load from URL - Provide a direct URL to the YAML manifest.
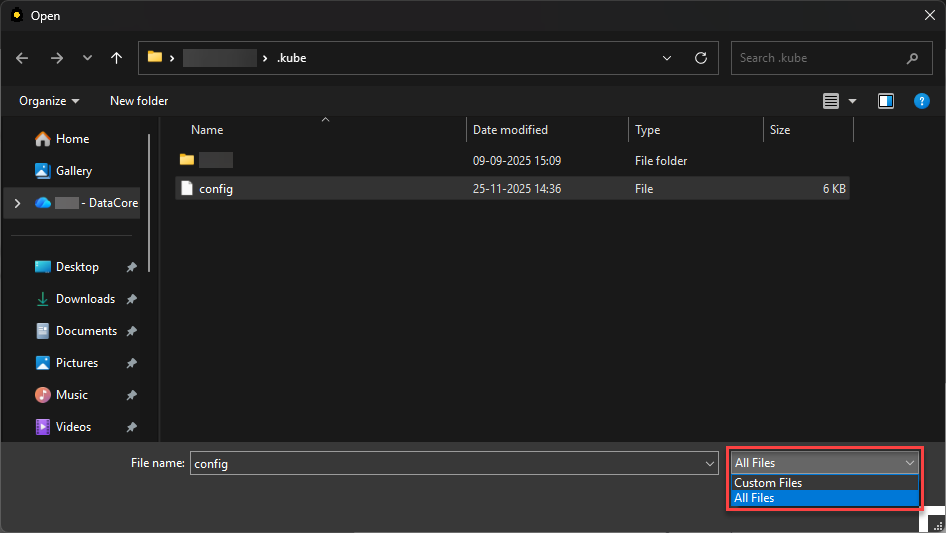
- If you choose Upload File, click Select File and navigate to your YAML file in File Explorer.
- From the file type dropdown, select All Files and choose the appropriate YAML manifest.
- Click Load to import the file.
- Review the YAML definition (for example, verify the pool name and associated node).
- Click Apply (lower-right corner) to create the storage pool.

The new storage pool appears in the table with its node, status, and capacity information.
Best Practices
- Monitor capacity utilization to prevent overcommitment and ensure adequate free space for future allocations.
- Reserve headroom for replica rebuilds and volume expansion, especially in production clusters.
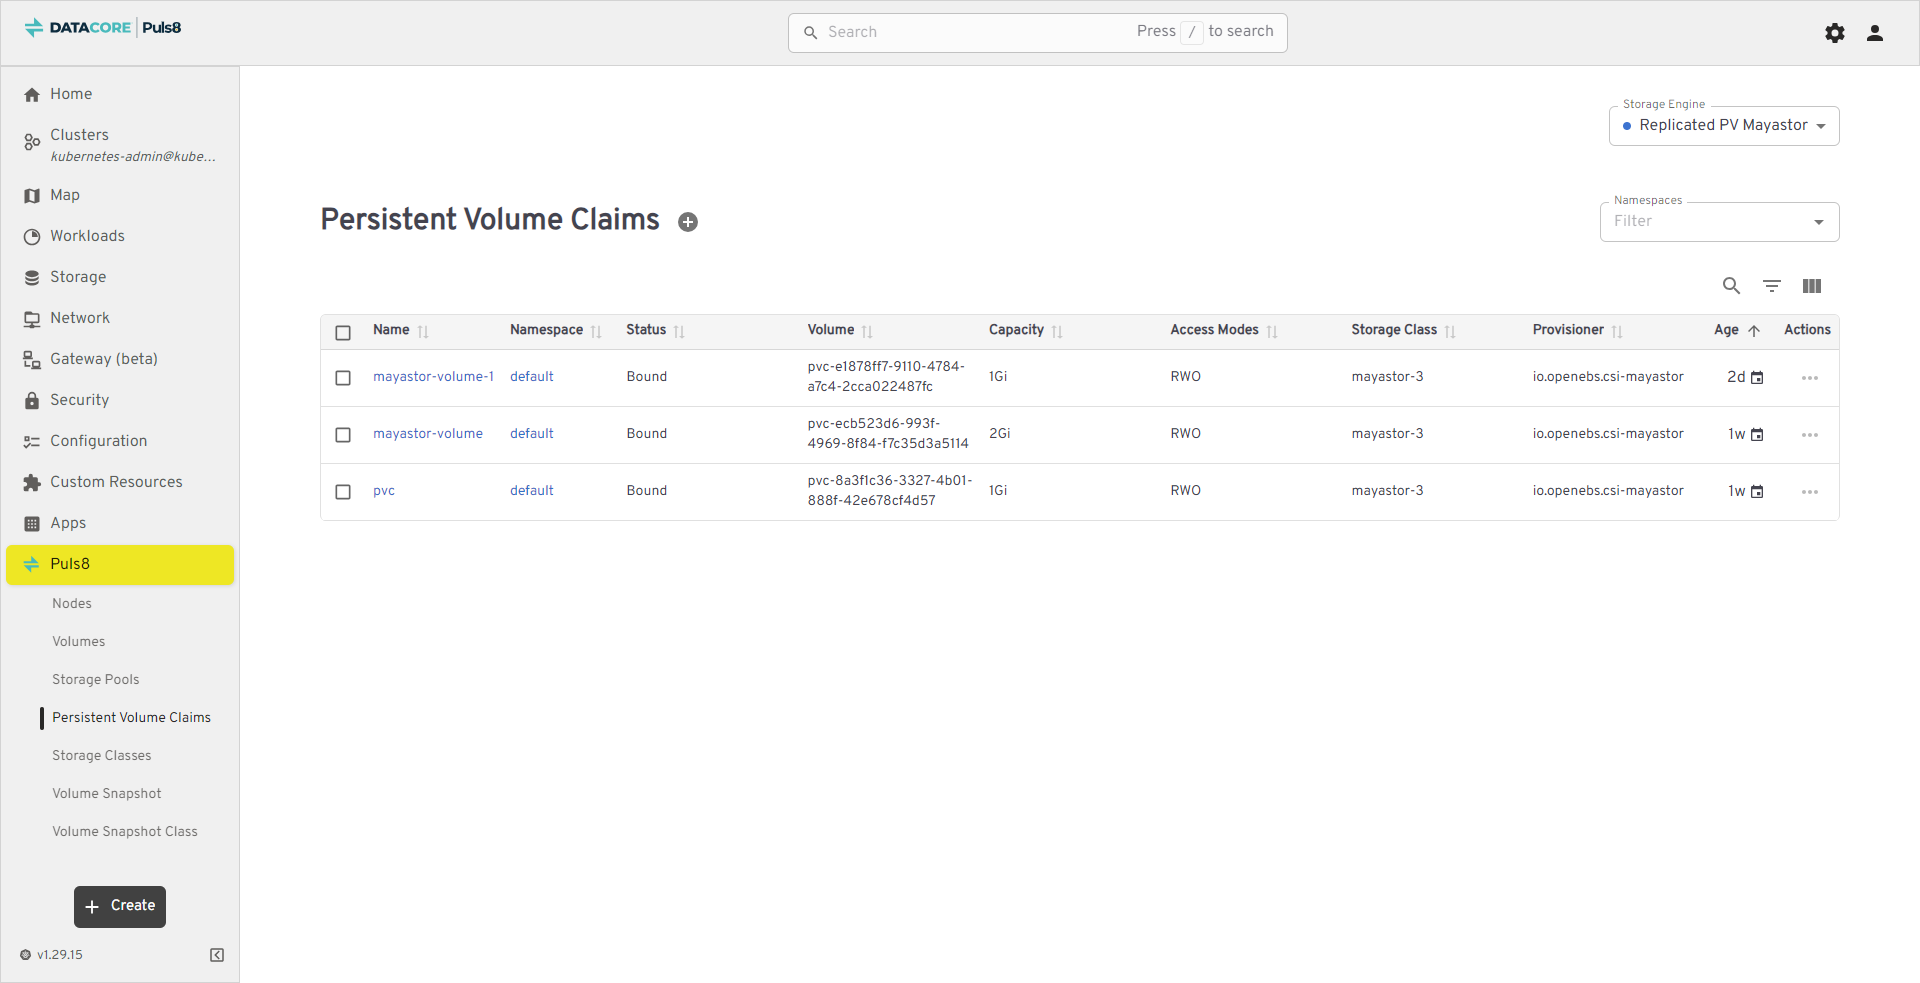
Persistent Volume Claims
The PVCs section displays all PVCs requested by applications in the Kubernetes cluster. This view helps track application-level storage consumption and binding status with underlying volumes.
The table below lists all PVCs in the cluster and provides details about their binding status, associated volumes, and storage configuration.
| Field | Description |
|---|---|
| Name | Unique identifier of the PVC. (Clickable to view claim details.) |
| Namespace | Kubernetes namespace where the claim resides. |
| Status | Current claim status (example, Bound, Pending, Released). |
| Volume | Bound Persistent Volume (PV) name. |
| Capacity | Storage capacity requested in the claim. |
| Access Modes | Access modes requested (example, RWO, RWX). |
| Storage Class | StorageClass used to provision the PVC. |
| Provisioner | CSI driver responsible for volume provisioning. |
| Age | Time elapsed since the PVC was created. |
| Actions | Row menu (⋮) for claim-level operations. |
Viewing and Managing PVCs
- From the left navigation panel, click Puls8.
- Select Persistent Volume Claims from the list.
- Click a Name to view PVC details including capacity, access modes, and bound volume.
- Use the Actions (⋮) menu for PVC-level operations.
- Use the Storage Engine dropdown (upper-right corner) to switch between Replicated PV Mayastor, Local PV LVM, and Local PV ZFS views.
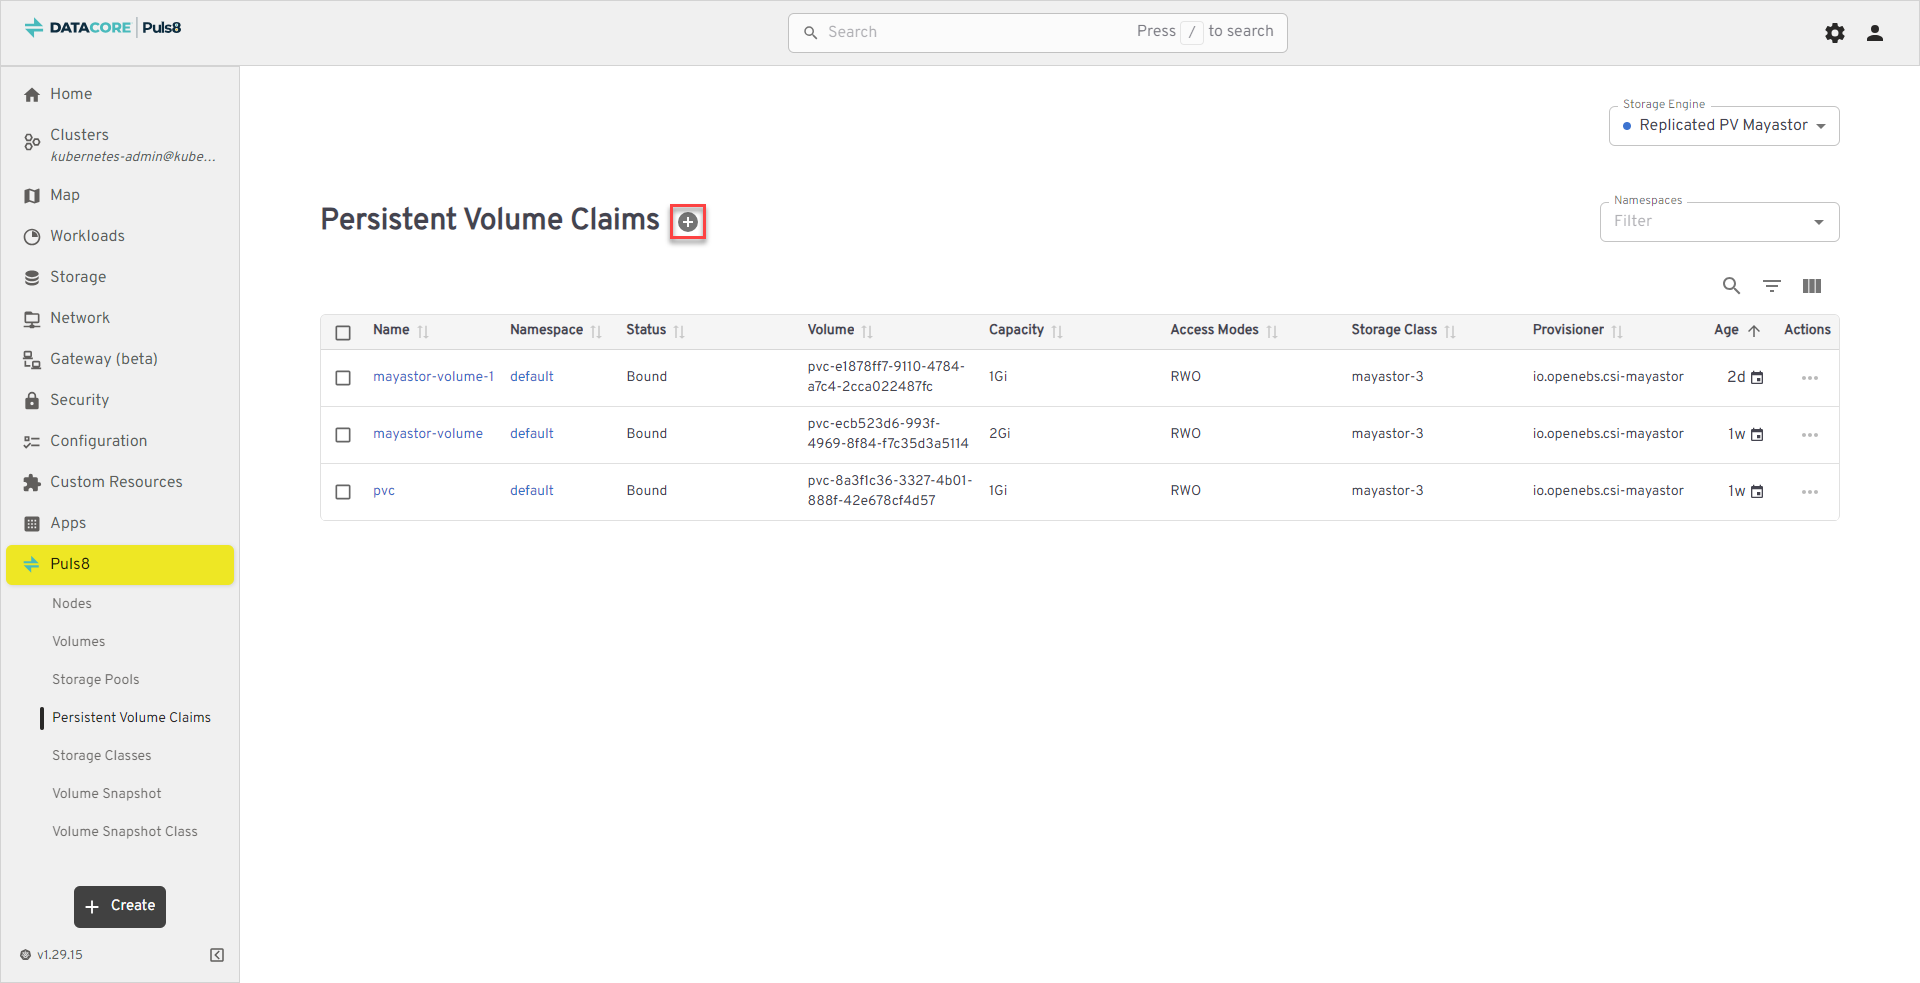
Creating PVCs
- Click the Create (+) button to create a new PVC.
- A Create window opens with a YAML editor.
- Click Upload File/URL.
- In the popup dialog, choose one of the following:
- Upload File - Select a local YAML file defining your PVC.
- Load from URL - Provide a direct URL to the YAML manifest.
- If you choose Upload File, click Select File and navigate to your YAML file in File Explorer.
- From the file type dropdown, select All Files and choose the appropriate YAML manifest.
- Click Load to import the file.
- Review the YAML definition (for example, confirm the PVC name, namespace, and requested capacity).
- Click Apply (lower-right corner) to create the PVC.
The new PVC appears in the table once successfully bound to a corresponding PV.
Best Practices
- Check Status to confirm whether PVCs are successfully bound.
- Use Namespace filtering to isolate claims for specific workloads.
- Cross-reference PVCs with Volumes to verify successful provisioning.
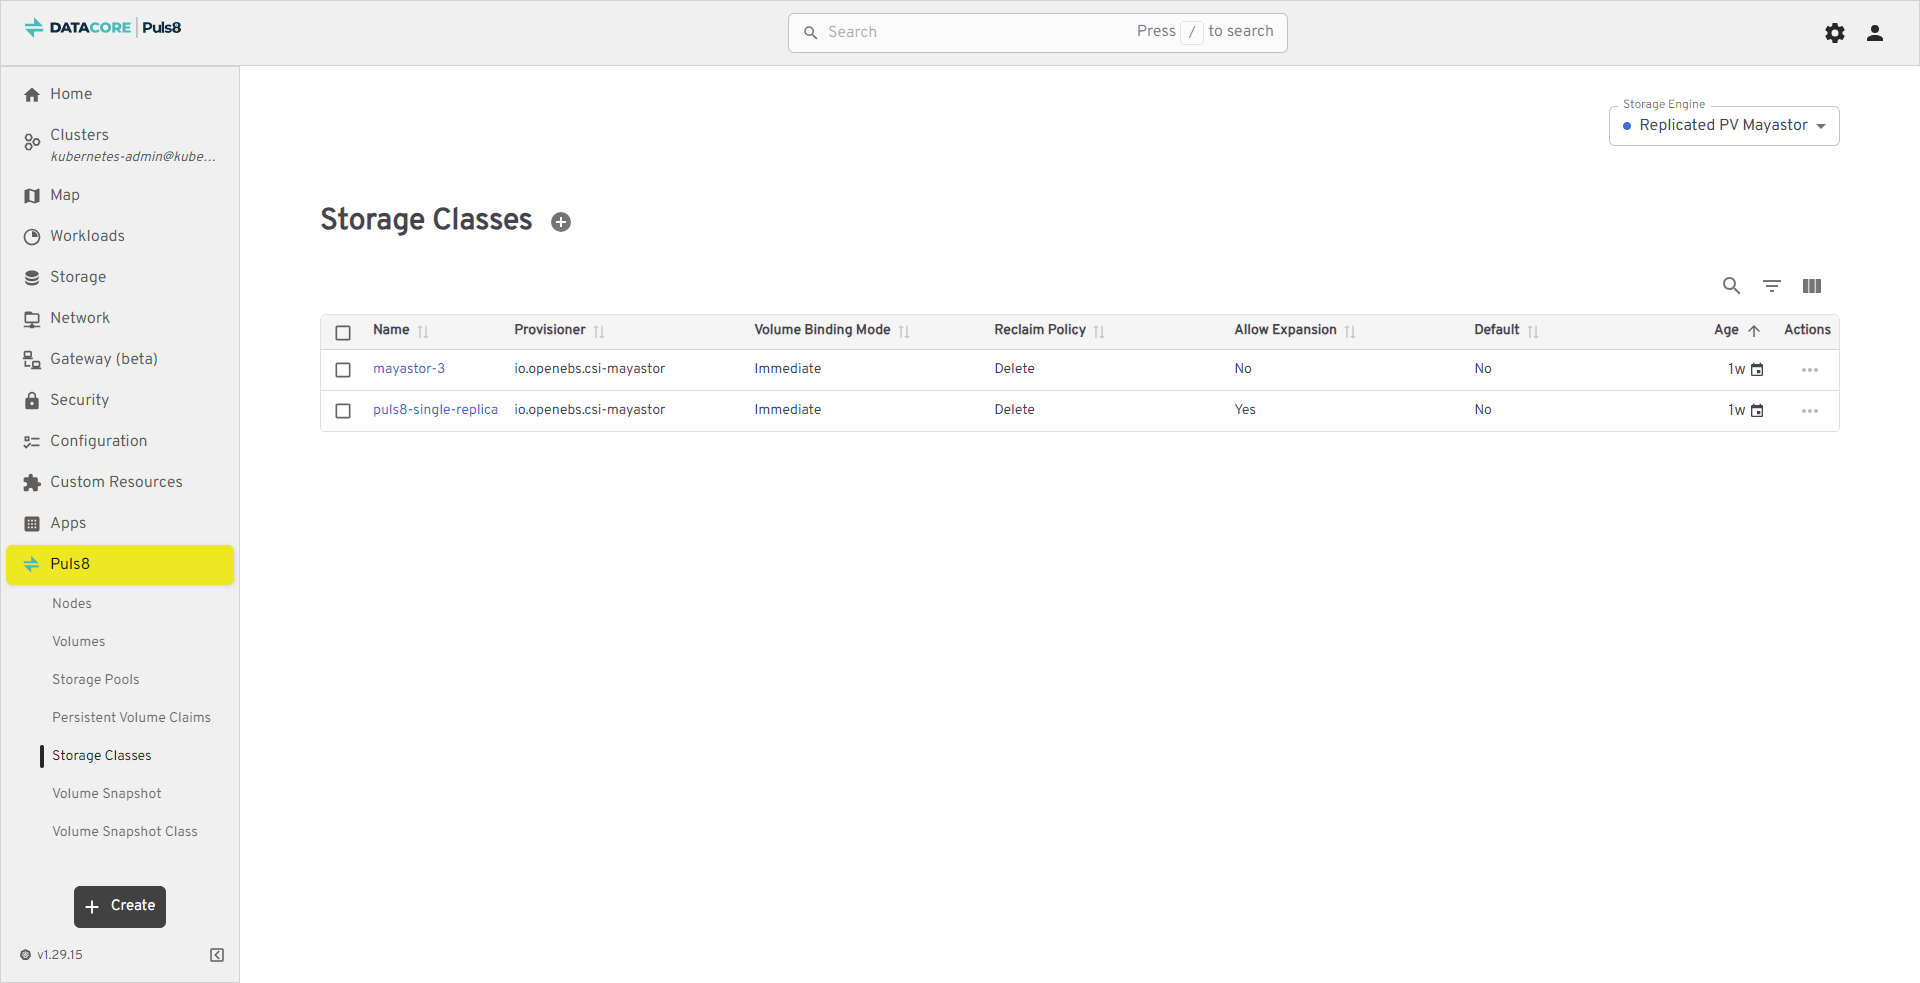
Storage Classes
The Storage Classes section provides an overview of all available storage classes configured. Storage classes define how PVs are provisioned, bound, and reclaimed, ensuring flexibility in data replication and expansion policies.
The table below lists all available storage classes and provides information about their provisioning behavior, expansion capability, and reclaim policies.
| Field | Description |
|---|---|
| Name | The name of the storage class. Click the name to view or edit its configuration. |
| Provisioner | Indicates the CSI (Container Storage Interface) provisioner responsible for dynamic volume creation. (example, io.openebs.csi-mayastor) |
| Volume Binding Mode | Specifies when volume binding and dynamic provisioning occur (example, Immediate or WaitForFirstConsumer). |
| Reclaim Policy | Defines what happens to a persistent volume when it is released from its claim (example, Delete or Retain). |
| Allow Expansion | Indicates whether the size of an existing volume can be increased. |
| Default | Specifies whether this storage class is the default for new persistent volume claims. |
| Age | Displays how long the storage class has existed since creation. |
| Actions | Contextual options to manage, edit, or delete the selected storage class. |
Viewing and Managing Storage Classes
- From the left navigation panel, click Puls8.
- Select Storage Classes from the list.
- Click a Name to view or modify configuration details.
- Use the Actions (⋮) menu to manage or delete storage classes.
- Use the Storage Engine dropdown (upper-right corner) to switch between Replicated PV Mayastor, Local PV LVM, and Local PV ZFS views.
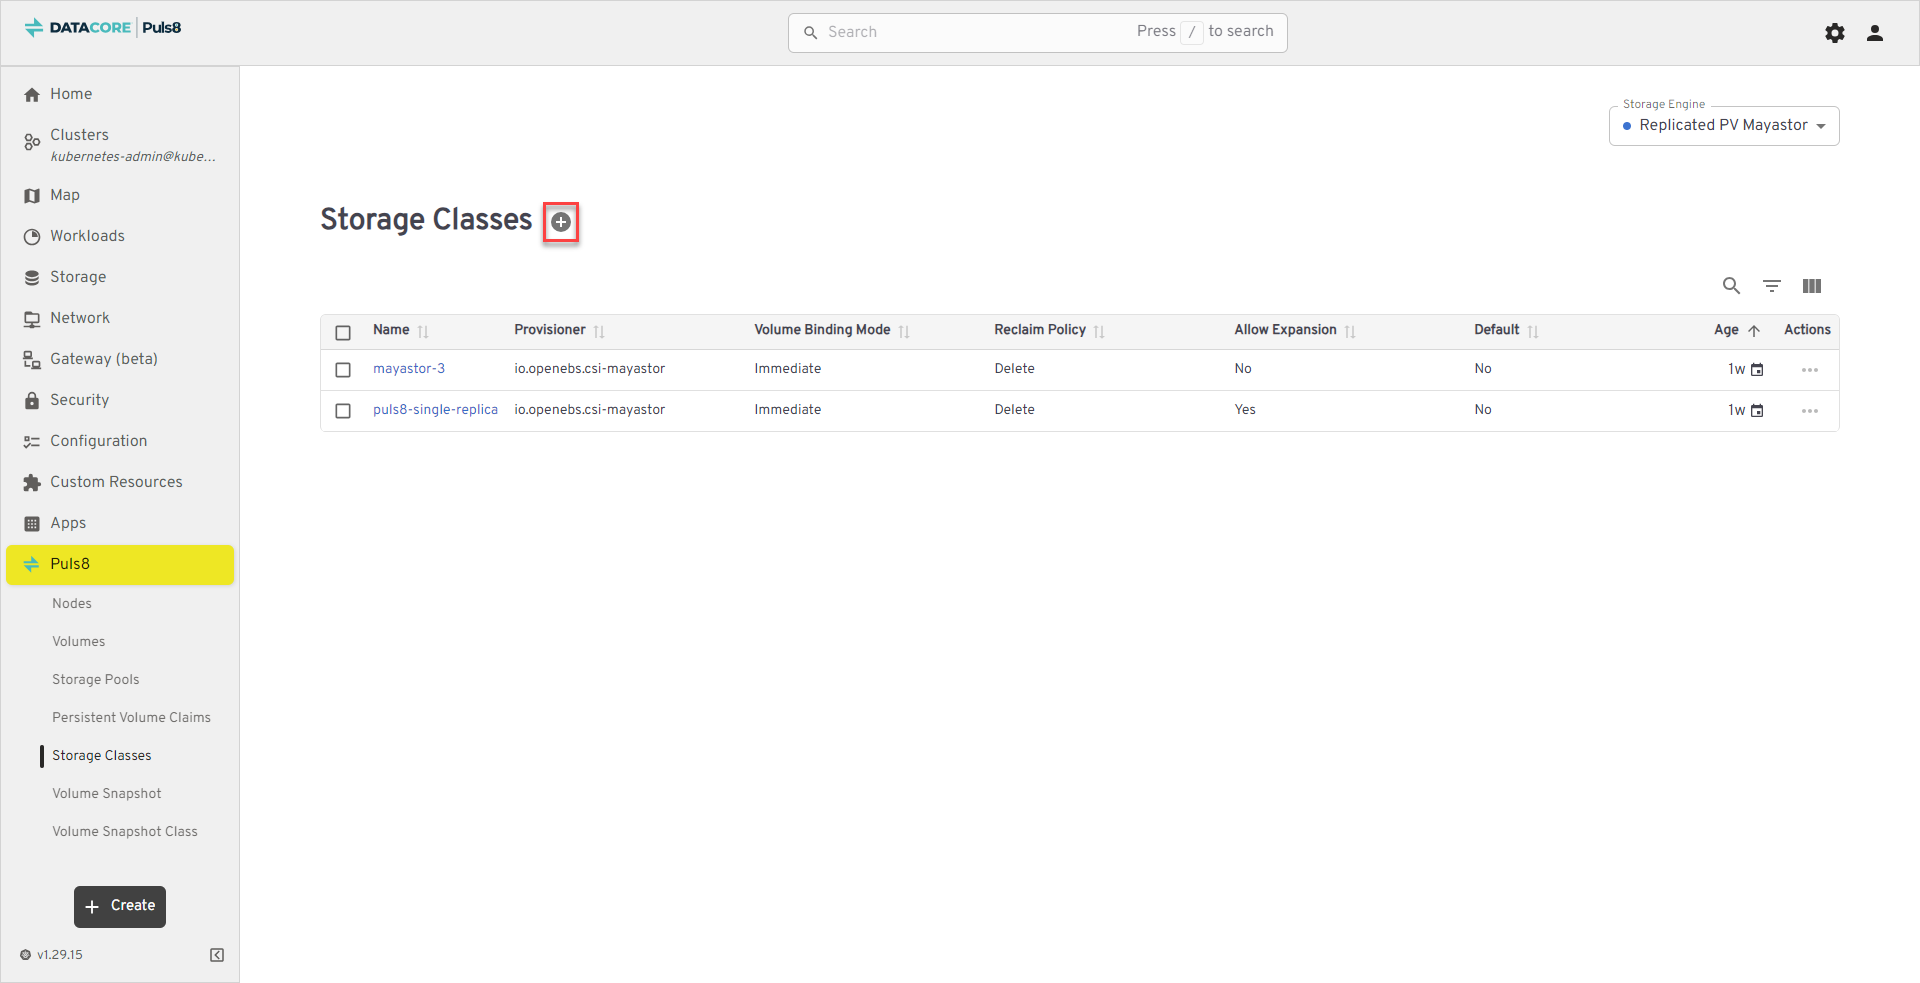
Creating Storage Classes
- Click the Create (+) button to create a new Storage Class.
- A Create window opens with a YAML editor.
- Click Upload File/URL.
- In the popup dialog, choose one of the following:
- Upload File - Select a local YAML file defining your Storage Class.
- Load from URL - Provide a direct URL to the YAML manifest.
- If you choose Upload File, click Select File and navigate to your YAML file in File Explorer.
- From the file type dropdown, select All Files and choose the appropriate YAML manifest.
- Click Load to import the file.
- Review the YAML definition (for example, verify the provisioner, reclaim policy, and binding mode).
- Click Apply (lower-right corner) to create the Storage Class.
The new storage class appears in the list with its defined provisioner, reclaim policy, and expansion settings.
Best Practices
- Use
Allow Expansion = Yesfor workloads that may require volume resizing. - Verify the Reclaim Policy aligns with your data retention requirements before deleting workloads.
- Ensure that a Default Storage Class is configured for seamless PVC provisioning.
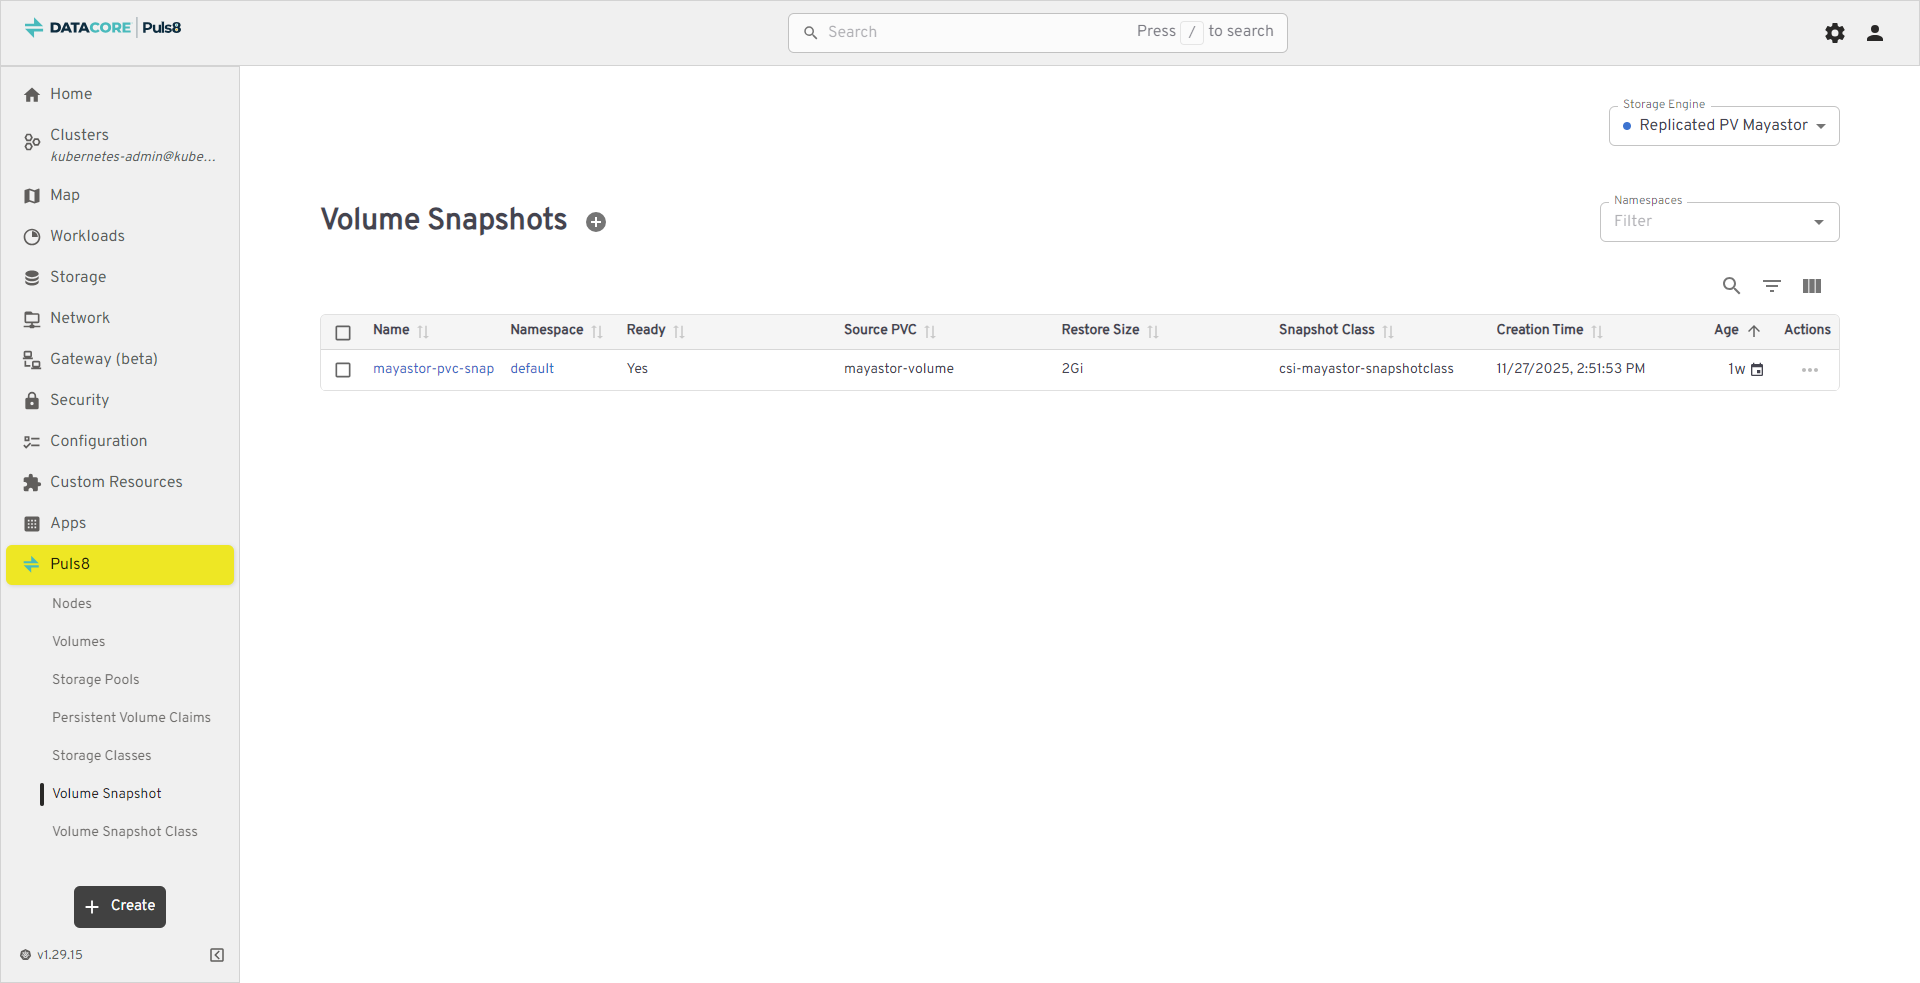
Volume Snapshots
The Volume Snapshots section provides visibility into all snapshots created for persistent volumes managed by the storage engine. Snapshots capture point-in-time copies of data, enabling quick recovery or cloning of volumes without data loss or downtime.
The table below lists all existing volume snapshots and provides information about their readiness, source PVC, and snapshot configuration.
| Field | Description |
|---|---|
| Name | The name of the volume snapshot. Click the name to view details or manage the snapshot. |
| Namespace | The Kubernetes namespace where the snapshot is created. |
| Ready | Indicates whether the snapshot is fully ready and available for use. |
| Source PVC | The name of the PVC from which the snapshot was taken. |
| Restore Size | The total size of the volume that will be restored from the snapshot. |
| Snapshot Class | The snapshot class used to define snapshot creation parameters (example, driver and deletion policy). |
| Creation Time | The timestamp indicating when the snapshot was created. |
| Age | How long the snapshot has existed since its creation. |
| Actions | Contextual options to manage or delete the snapshot. |
Viewing and Managing Volume Snapshots
- From the left navigation panel, click Puls8.
- Select Volume Snapshots.
- Click a Name to view snapshot metadata and restore size.
- Use the Actions (⋮) menu to manage snapshot lifecycle.
- Use the Storage Engine dropdown (upper-right corner) to switch between Replicated PV Mayastor, Local PV LVM, and Local PV ZFS views.
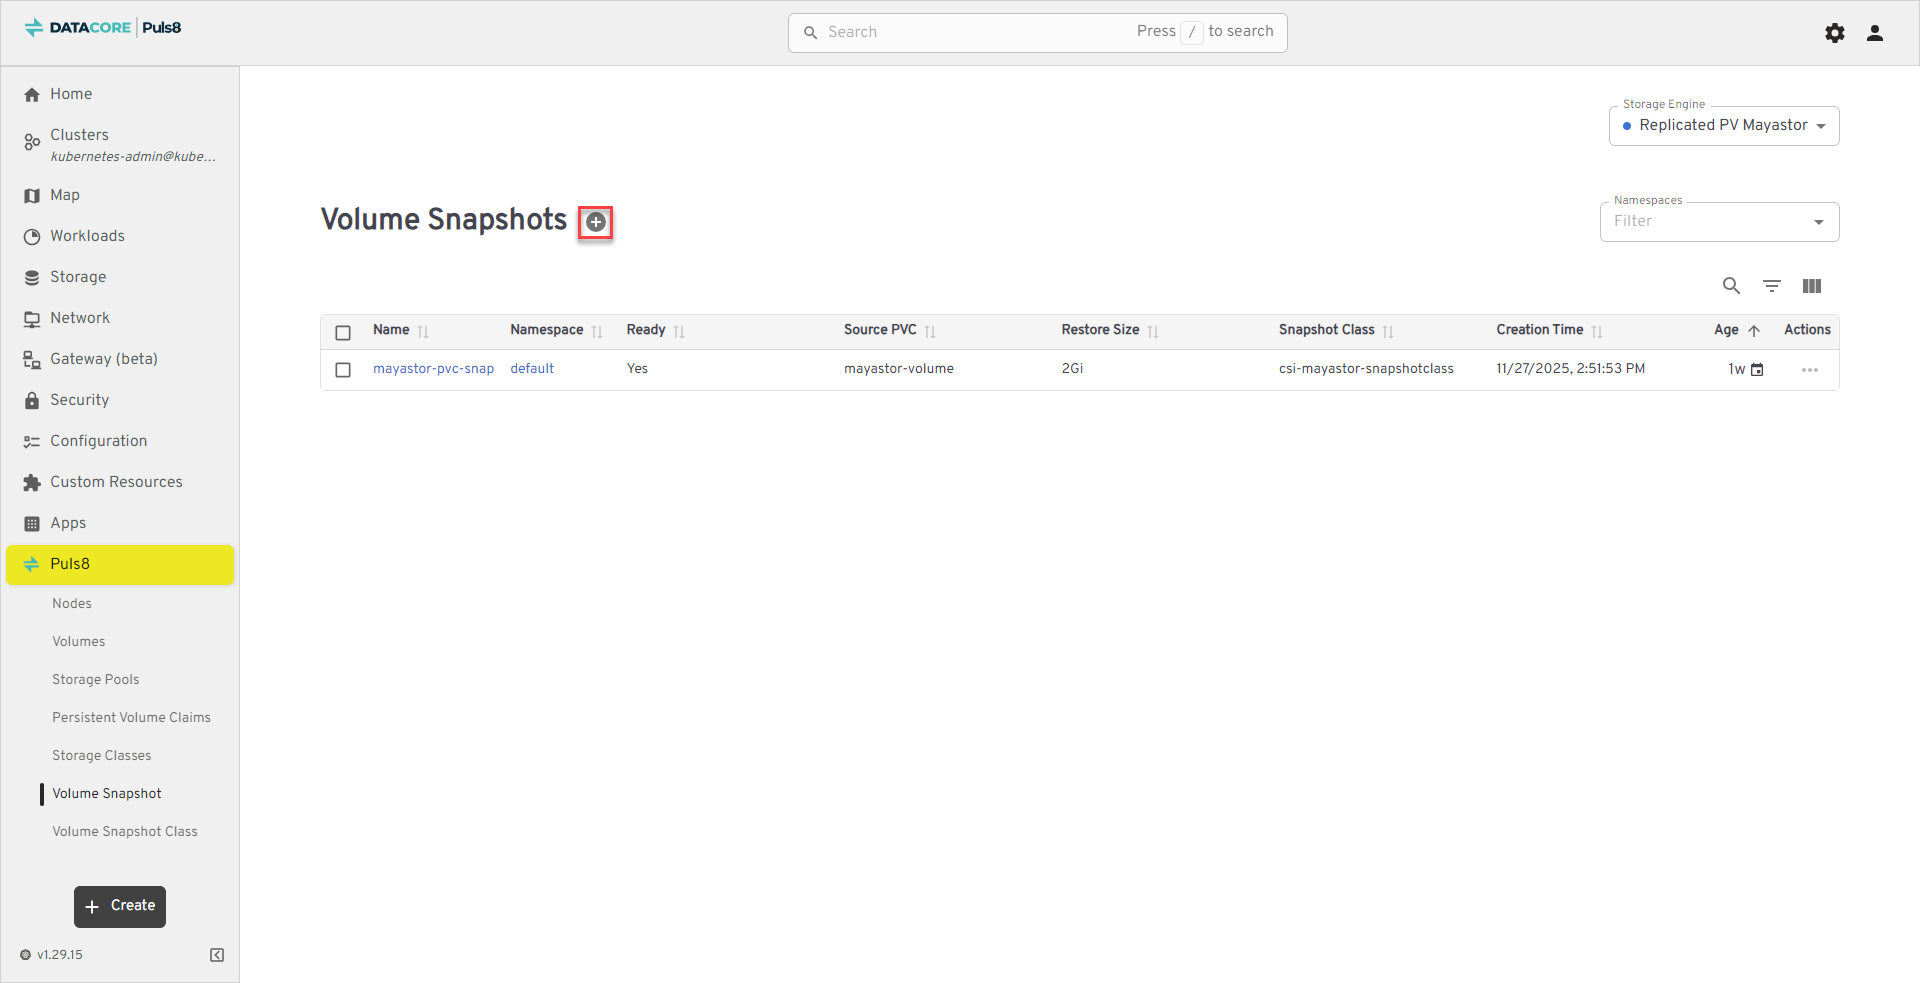
Creating Volume Snapshots
- Click the Create (+) button to create a new Volume Snapshot.
- A Create window opens with a YAML editor.
- Click Upload File/URL.
- In the popup dialog, choose one of the following:
- Upload File - Select a local YAML file defining your Volume Snapshot.
- Load from URL - Provide a direct URL to the YAML manifest.
- If you choose Upload File, click Select File and navigate to your YAML file in File Explorer.
- From the file type dropdown, select All Files and choose the appropriate YAML manifest.
- Click Load to import the file.
- Review the YAML definition (for example, verify the snapshot name and source PVC).
- Click Apply (lower-right corner) to create the Volume Snapshot.
The new volume snapshot appears in the list with its status marked as Ready once successfully created.
Best Practices
- Ensure the Source PVC is in a Bound and Ready state before creating a snapshot.
- Use snapshots to back up important data before performing upgrades or configuration changes.
- Regularly review Age and Creation Time to clean up outdated snapshots and optimize storage space.
- Use the same Snapshot Class across environments to maintain consistent backup behavior.
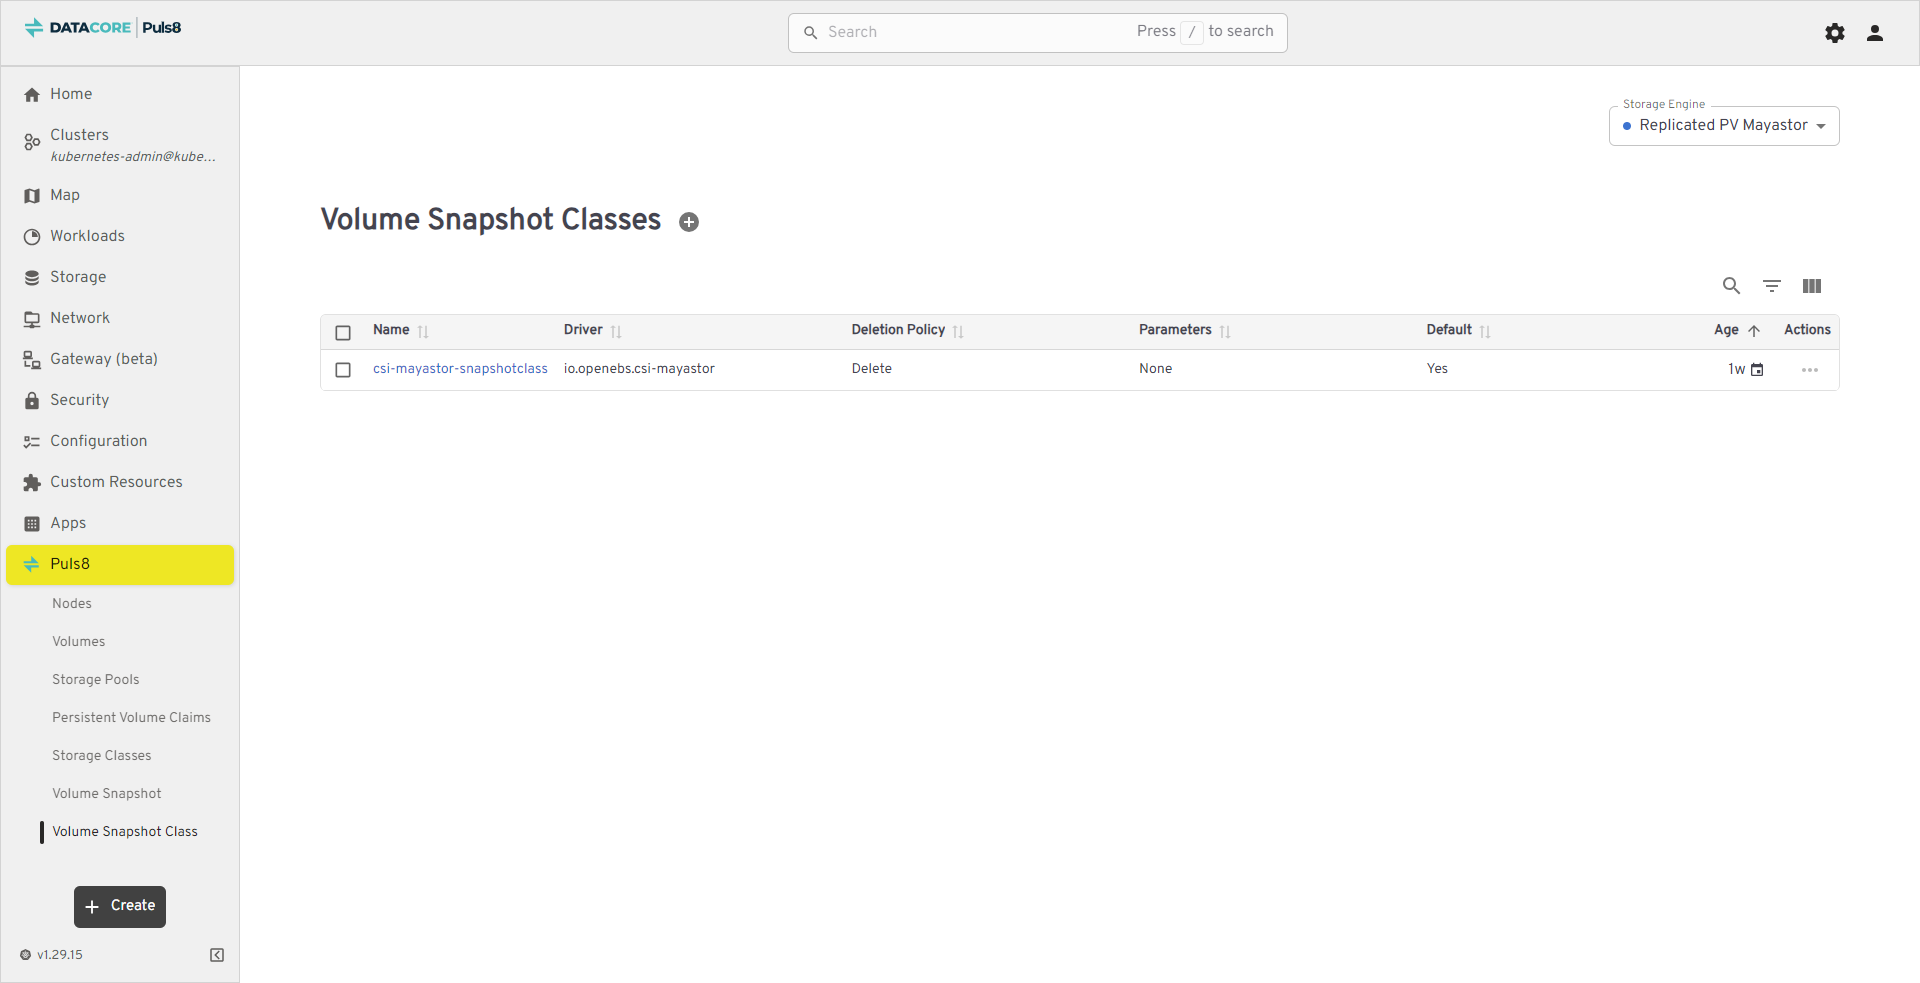
Volume Snapshot Classes
The Volume Snapshot Classes section provides information about the available snapshot class configurations used by the storage engine. A volume snapshot class defines the driver, deletion policy, and parameters applied when creating snapshots, ensuring consistency and predictable behavior across all snapshot operations.
The table below lists all available snapshot classes and provides information about their associated drivers, deletion policies, and configuration parameters.
| Field | Description |
|---|---|
| Name | The name of the snapshot class. Click the name to view or modify configuration details. |
| Driver | Identifies the CSI driver that handles snapshot creation and restoration (e.g, io.openebs.csi-mayastor). |
| Deletion Policy | Specifies what happens to the underlying snapshot data when the snapshot object is deleted - Delete (removes snapshot data) or Retain (keeps data for manual management). |
| Parameters | Lists key-value pairs defining optional configuration parameters for snapshot creation. Displays None when no parameters are defined. |
| Default | Indicates whether this snapshot class is the default for creating new volume snapshots. |
| Age | Shows how long the snapshot class has existed since its creation. |
| Actions | Contextual options to edit or delete the snapshot class. |
Viewing and Managing Volume Snapshot Classes
- From the left navigation panel, click Puls8.
- Select Volume Snapshot Class.
- Click a Name to view or edit class parameters, driver, and deletion policy.
- Use the Actions (⋮) menu to modify or delete snapshot classes.
- Use the Storage Engine dropdown (upper-right corner) to switch between Replicated PV Mayastor, Local PV LVM, and Local PV ZFS views.
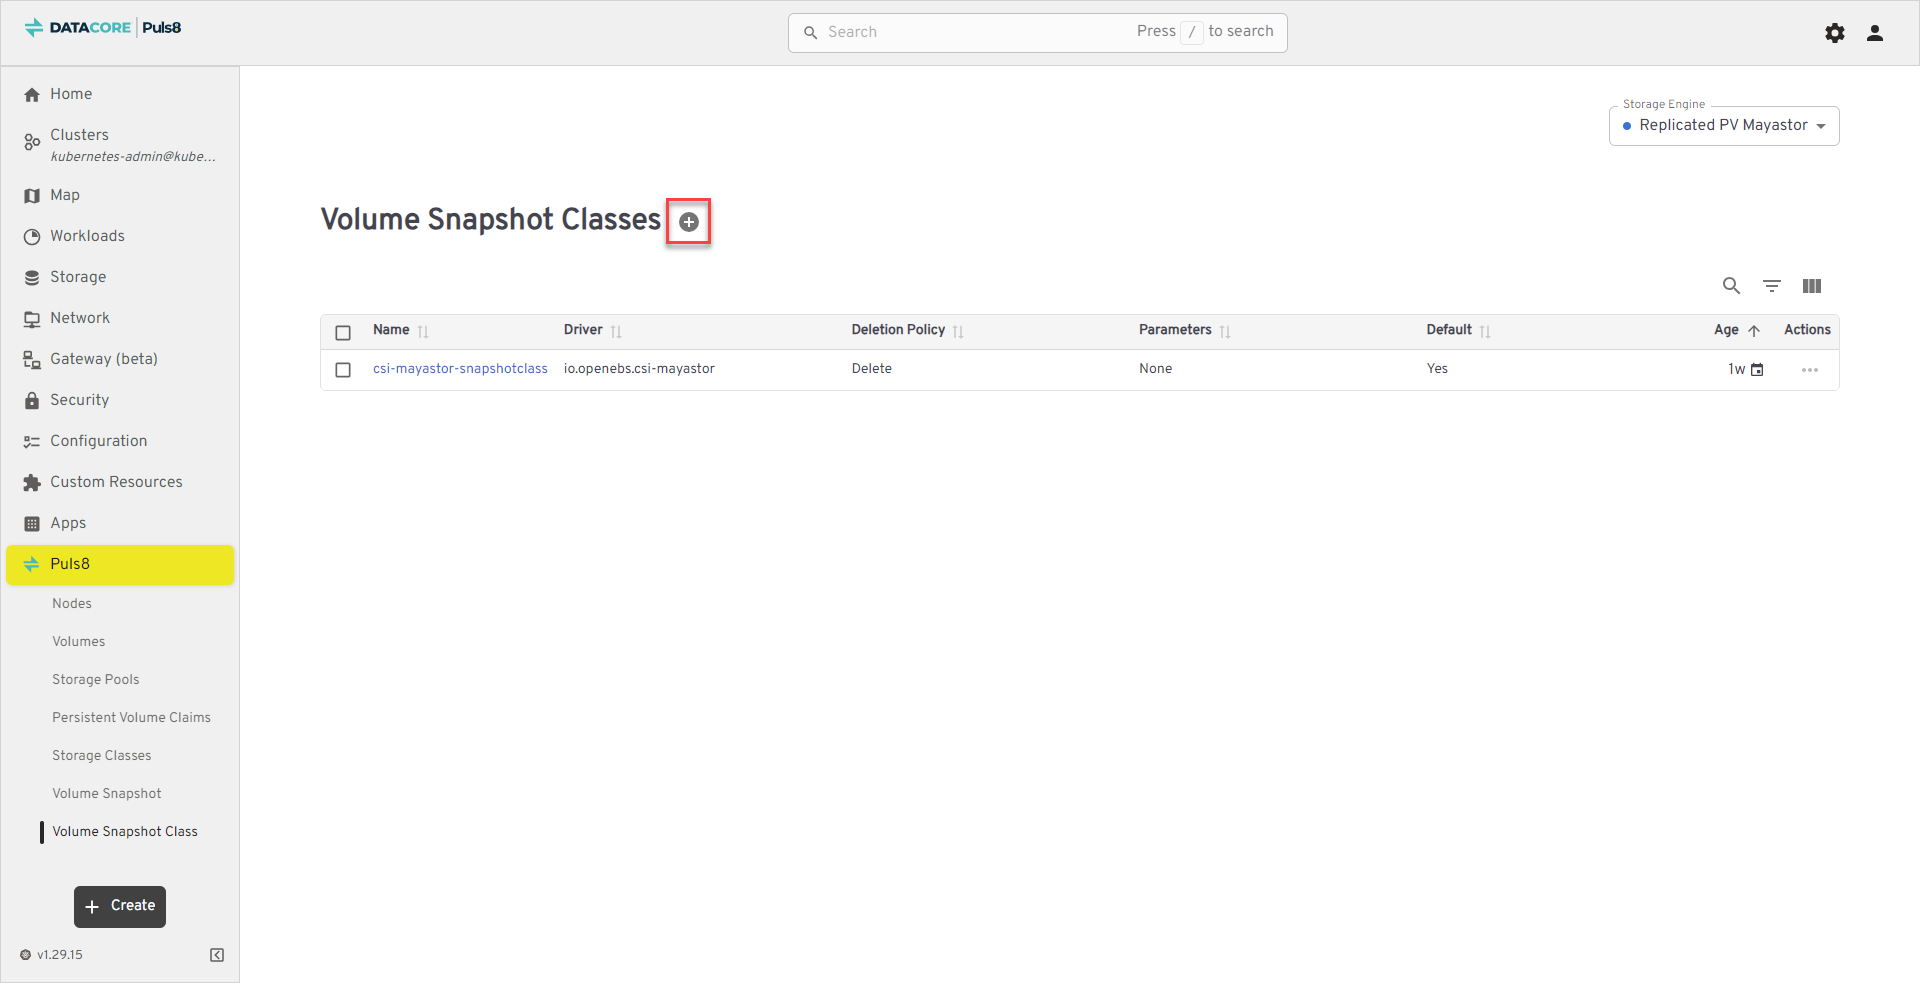
Creating Volume Snapshot Classes
- Click the Create (+) button to define a new snapshot class.
- A Create window opens with a YAML editor.
- Click Upload File/URL.
- In the popup dialog, choose one of the following:
- Upload File - Select a local YAML file defining your snapshot class.
- Load from URL - Provide a direct URL to the YAML manifest.
- If you choose Upload File, click Select File and navigate to your YAML file in File Explorer.
- From the file type dropdown, select All Files and choose the appropriate YAML manifest.
- Click Load to import the file.
- Review the YAML definition (for example, verify the snapshot class name, driver, and deletion policy).
- Click Apply (lower-right corner) to create the snapshot class.
The new snapshot class appears in the table with its corresponding driver, deletion policy, and parameters.
Best Practices
- Use Deletion
Policy = Retainfor snapshots that need to persist beyond their Kubernetes object lifecycle. - Confirm that the Driver matches the active storage engine to avoid snapshot creation errors.
- Set one snapshot class as Default to simplify snapshot creation for workloads.
- Regularly review existing snapshot classes to maintain consistency across storage policies.
Benefits of Puls8 Plugin in Headlamp
- Unified Operational Visibility: Consolidates cluster metrics, storage resources, nodes, and workloads into a single dashboard for faster decision-making.
- Accelerated Troubleshooting: Real-time health indicators, events, and drill-down views reduce the time to identify and resolve storage or node issues.
- Simplified Storage Management: Enables creation and management of volumes, pools, PVCs, Storage Classes, and snapshots directly through the UI without relying on CLI commands.
- Reduced Configuration Errors: Guided YAML workflows ensure that storage resources are provisioned with accurate and consistent parameters across environments.
Learn More