Removing Physical Disks from Pools
Explore this Page
- Overview
- Decommissioning Physical Disks
- Removing a Pool Disk Mirror
- Removing Mirrored Physical Disk Sets from Disk Pools
Overview
This section explains how to safely remove or decommission physical disks from a disk pool in SANsymphony. It covers the use of the Remove from Disk Pool command, which migrates data from the selected disk to other available disks while allowing host I/O to continue. It also provides guidance on removing mirrored pool disks, canceling ongoing removals, and ensuring sufficient free space for a successful operation. Best practices and post-removal steps, such as rescanning server ports and deleting disk aliases, are also included.
Decommissioning Physical Disks
The Remove from Disk Pool command is used to remove or decommission a physical disk from a disk pool. If data exists on the disk, this command will prevent further allocation on the disk to be removed and begin the process of copying the allocated SAUs from the disk being removed to other physical disks in the pool. Each SAU will be moved to tiers in the tier affinity of the virtual disk; if preferred tiers are unavailable, then allocation will be made in other tiers. I/O operations on the host can continue during the removal process.
- Copying data from the disk to be decommissioned can take a considerable amount of time. Large amounts of allocated space can take days to copy. Removal can be cancelled. Note: If a physical disk is in the process of being decommissioned and the server is restarted or shutdown (with or without stopping the server), the decommissioning process will continue after the server restarts.
- Multiple physical disks may be removed at a time, but the best practice is to remove one disk at a time to ensure there is sufficient free space in other disks in the pool after the removal of each disk. In this manner, each disk can be removed in the least amount of time.
- Ensure sufficient free space exists to facilitate copying the data from the disk to be decommissioned. If there is insufficient free space in all disk tiers, the command will be cancelled. If a disk is in the process of being decommissioned and space runs out in all disk tiers, the disk will stay in the "Removing" state until the migrations can be completed.
- To replace a pool disk which is mirrored, use the Remove command to remove it from the configuration, shut down the machine and swap the physical disks. Power up the machine, rescan the disks. In the DataCore Management Console, add the new disk as a mirror to the existing pool disk to regain high availability. The disks will be synchronized.
- When removing a physical disk that has been renamed and therefore has an alias, the alias must be deleted from that physical disk before the physical disk is removed. If the alias is not deleted first, when the disk is removed, it will be displayed in DataCore Servers panel > Physical Disks as failed. The alias can be deleted from the details page or by clearing the name using the Rename operation from the DataCore Servers panel or list.
Before removing physical disks as part of planned maintenance, consider using Maintenance Mode and Evacuation to minimize disruption and help maintain continuous availability.
To remove physical disks:
- In DataCore Servers panel, right-click the physical disk to remove and select Remove from Disk Pool.
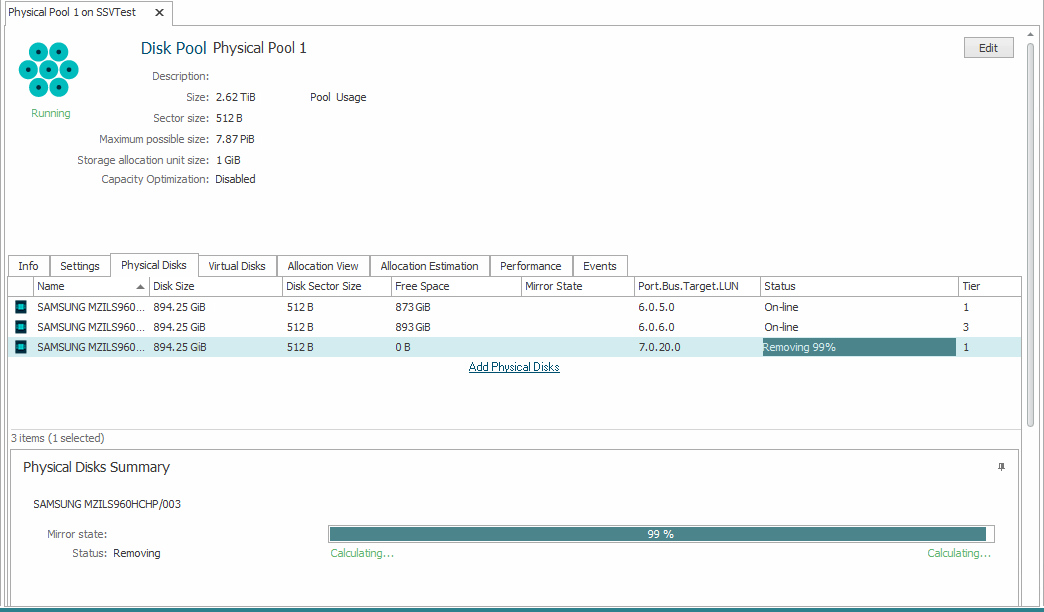
- When the removal process is complete, an alert will be posted. Wait for the alert before physically removing the disk. You can monitor the removal process from the Physical Disk Details page or Allocation View of the disk pool. The physical disk status will be shown as Removing and under Physical Disk Summary, there will be a status bar indicating the progress of the removal.
- After receiving the alert that the removal process is complete, physically remove the disk from the machine.
- Rescan the server ports to remove the disk from the server configuration.
To cancel removal:
- In DataCore Servers panel, right-click the physical disk that is being removed and select Cancel Removal.
Removing a Pool Disk Mirror
The Remove from Disk Pool command is used to remove a pool disk mirror from a pool. The pool mirror can be removed if it is healthy or in a "missing" status.
When a mirrored pool disk goes "missing" from a pool, the pool enters a Missing Disk state. To put the pool into Running state again, the missing pool mirror must be removed from the pool.
To remove a mirrored pool disk:
- Open the Details page for the pool with the pool mirror to remove.
- In the Physical Disks tab, select the mirror pair in the list. At the bottom of the tab, the Physical Disks Summary displays information and the mirror state for both disks in the pool mirror.
- In the Physical Disks Summary, click Remove from pool next to the disk to remove.
The command can also be initiated by right-clicking on the mirror pair in the panel.
- Click Yes on the confirmation message to continue. The mirror will be split and the disk will be removed from the pool.
- The disk can be physically removed from the server if desired. In this case, after removal, rescan the server ports to remove the disk from the server configuration.
For removing an entire mirrored disk set safely in a single operation, see Removing Mirrored Physical Disk Sets from Disk Pools
Removing Mirrored Physical Disk Sets from Disk Pools
This feature allows you to safely remove a mirrored physical disk set from a disk pool in a single operation.
Previously, removing disks one at a time, starting with the mirror, risked data loss because removing the parent disk in the mirrored pair could take a long time and was not handled as a single safe operation. Instant removal of one mirror member left the pool without redundancy while data migration took a long time, increasing the risk of data loss.
Now, you can remove both the Parent and Mirror physical disks together using the new “Remove Disk Pair from Pool” option in the DataCore Management Console. The system handles the removal process safely by migrating data, showing progress, and allowing you to cancel the operation if needed.
- SANsymphony preserves data redundancy during the removal process.
- If the system restarts during removal, the operation automatically resumes to prevent data inconsistency.
- Once the operation is complete, the disk pair is removed from the disk pool.
- Do not attempt to manually remove individual disks from a mirrored set during this operation.
- Ensure no active workloads are using the disks during removal to avoid performance impact.
Steps to Remove a Mirrored Disk Pair
-
In the DataCore Management Console, navigate to Disk Pools from the ribbon and select the Physical Disks tab or use the left pane: DataCore Server Group > Disk Pools.
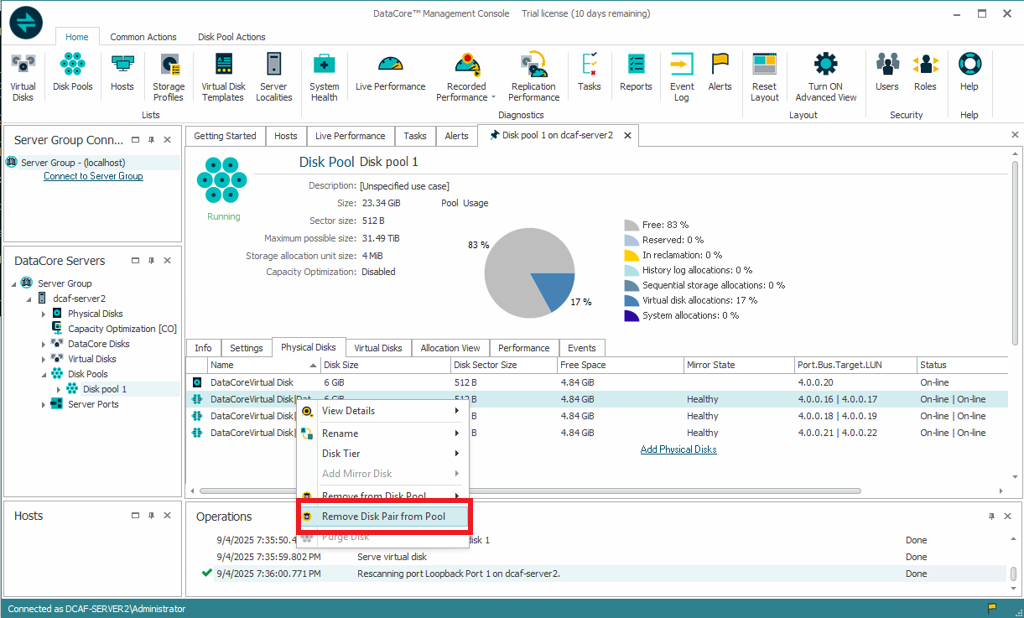
- Right-click the mirrored physical disk pair you want to remove and select Remove Disk Pair from Pool.
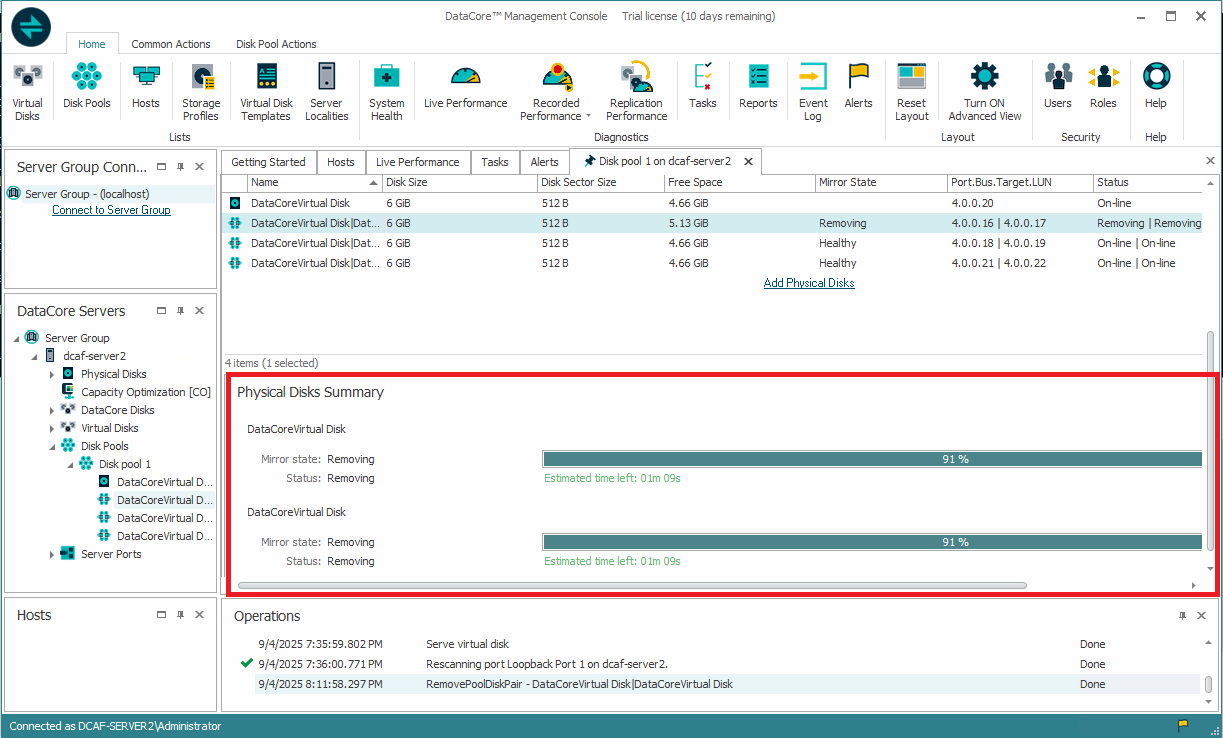
- Once the operation starts, monitor the removal progress in the Physical Disks Summary section. Cancel the operation if needed until the disks are fully decommissioned.
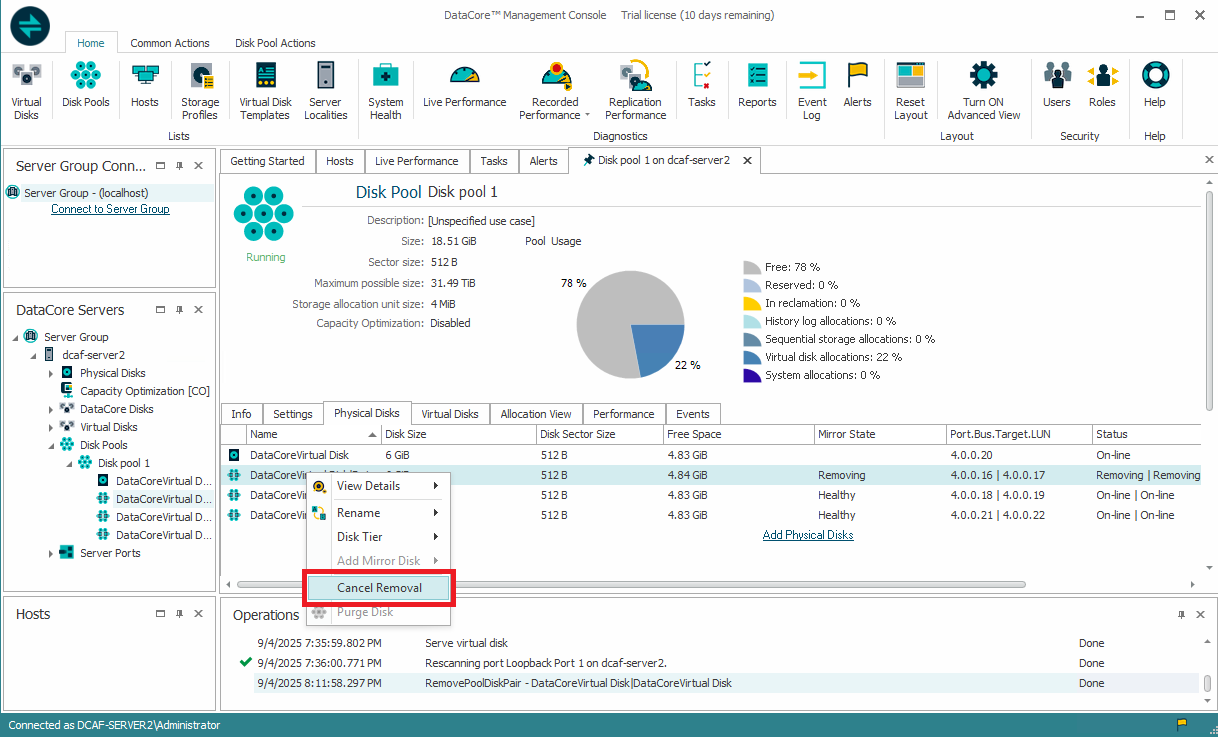
- You can cancel the removal operation at any time by selecting Cancel Removal from the context menu.
Learn More