Installing Anvil
Anvil is installed from a bootable ISO image and contains its own appliance operating system. No other operating system license is required, everything is provided by the DataCore vFilO ISO image.
The installation of a 2-node Anvil HA cluster takes approximately 20 minutes. Most of that time is spent waiting for the system image to be installed and network parameters configured. The installation of DSX can be done in parallel and does not have to wait for the Anvil installation to finish
- Confirm that the virtual machine or bare metal server meets the minimum system requirements.
- Load the Quickstart ISO image and power on the VM or bare metal server.
- The Anvil Installation screen displays. Select Install and press Enter.
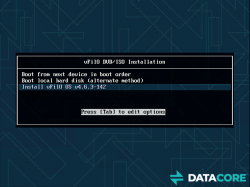
By default, the Boot from next device in boot order option will be selected in case the ISO image has been left attached after an installation. Make sure that the CDROM is ejected and ISO image removed from the virtual machine after a successful installation.
- The installation program discovers local storage devices. Select the boot device for installation and then INSTALL to continue.
All discovered block devices will be overwritten during the installation. Any existing data on these devices will be erased.

- After confirming the installation device, the installer will write the boot image and reboot the freshly installed image before any additional user input is required.
If the progress bar appears to make no progress or it is taking a long time, press D and a more detailed view will be shown.

- Review the End User License Agreement (EULA), then select Accept.
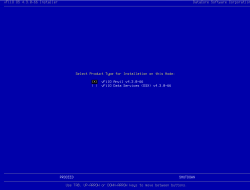
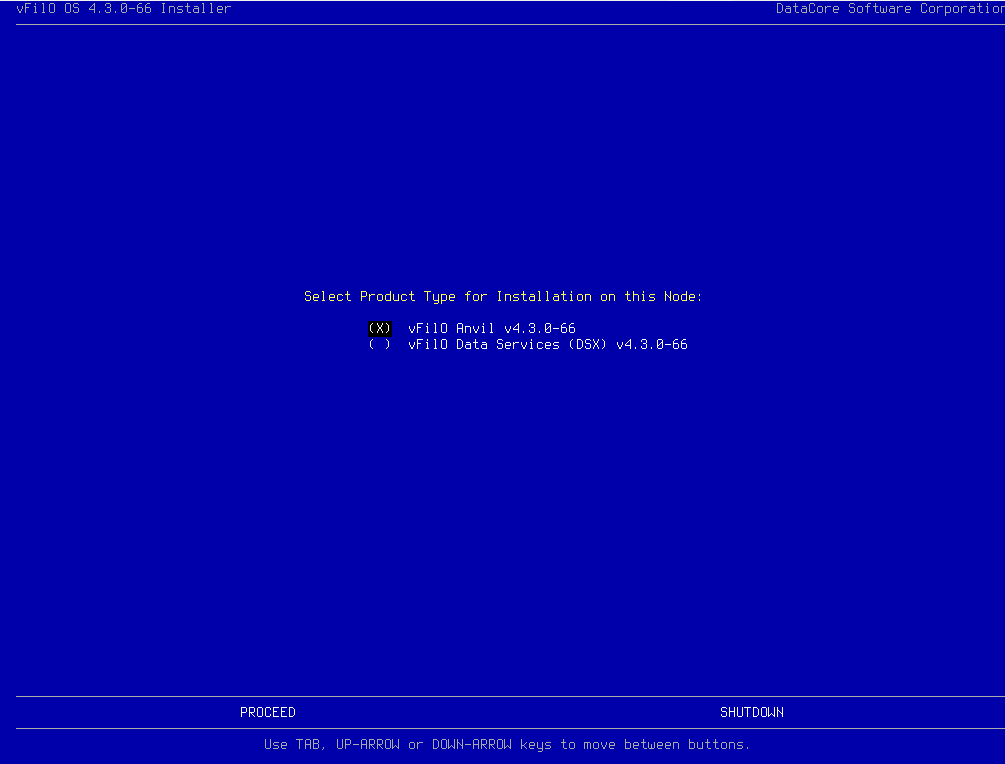
- Select which Product the installation will install and configure.
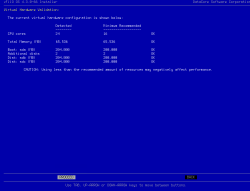
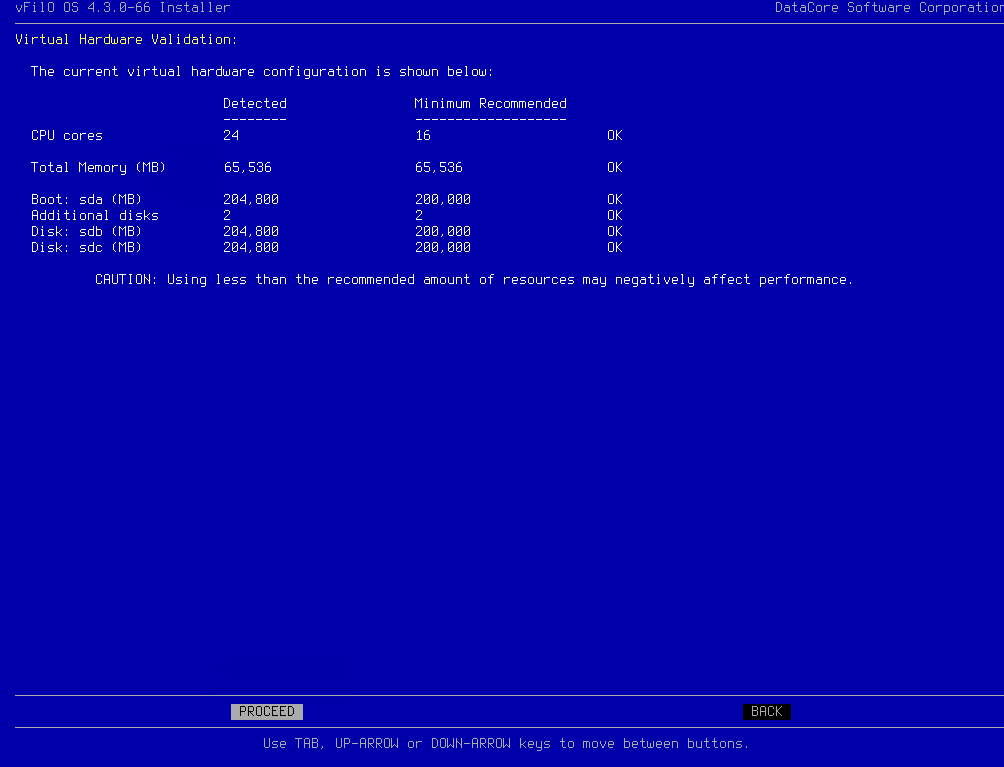
- The Virtual Hardware Validation screen displays. Confirm that the discovered hardware is validated, select PROCEED.
In the example below, the installer has flagged the caution flag for the lack of CPU and memory reservations. It is strongly recommended that a production installation always uses CPU and memory reservations. See VMware Virtual Machine Settings for recommendations.
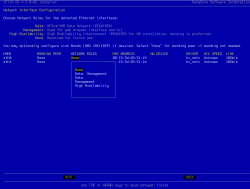
- Configure networking by optionally bonding interfaces together and then assign roles to the available network interfaces.
- To create a bond, use the tab or arrow keys to select an entry in the “BONDING PEER” column and then press Enter. Then use the arrows keys to select an interface to bond with and press Enter.
- To select the roles, use the tab or arrow keys to select an entry in the “NETWORK ROLES” column and then press Enter. Then use the arrow keys to select the role and press Enter to assign. When all roles are assigned, select NEXT and press Enter.
The network roles provide the following functionality:
- Data: Used to connect all storage clients and servers (including DSX nodes). NFS and SMB data traffic flows across the data Network, as well as some Inter-node communication.
- Management: Used for management and monitoring tasks. This role is not used for file sharing, data movement, or HA cluster communications.
- High Availability: Used for peer to peer communications between the nodes in an HA deployment. Select the interface on this network that is configured to be connected to the second node on a private interconnect. For bare metal deployments, a back-to-back network cable connection is preferred (no switch needed).


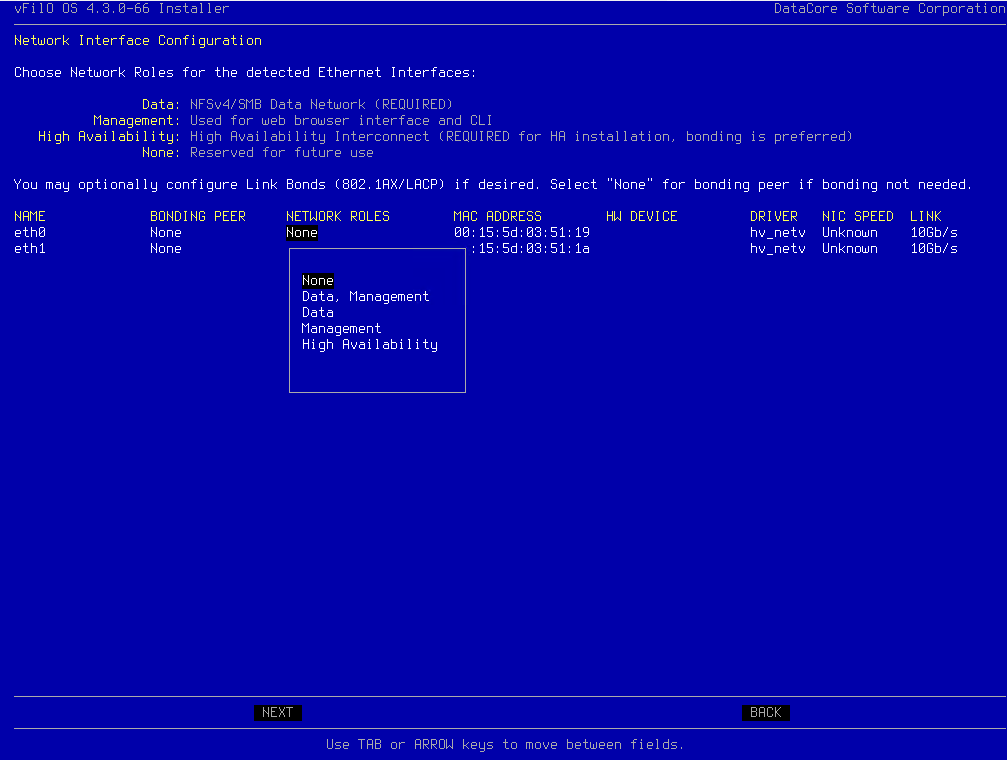
All Anvil installations require network interfaces with management, data and high availability roles. This can be configured with only two interfaces if one interface is configured to share data and management traffic and the other is dedicated for high availability traffic.
It is also possible to configure additional interfaces once the system is installed. DataCore vFilO supports floating IP addresses as well as VLAN assignment to interfaces. All of these configuration settings are accessible from the admin CLI interface after the installation has been completed.