Windows File Server Assimilation
Assimilating a Windows File Server pre-requirements
- Make sure the Windows File Server and the Anvil are joined to the same Active Directory domain.
- Make sure that the source share on the Windows File Server has NFS services turned on.
Example: Assimilating data from share MyData from Windows Server 2016
This example is using Windows Server 2016 and we will assimilate data from share MyData that is currently only exported using SMB protocol. This example workflow includes screenshots from Windows Server for a complete end-to-end example.
Workflow overview:

- Verify that the Windows File Server and Anvil are joined to the same domain
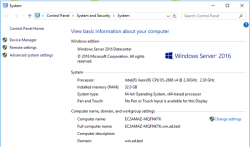
- Right-click on This PC and click Properties. Validate that the Domain is the same as for the Anvil.
- On the Anvil, click on Administration -> Active Directory

- Right-click on This PC and click Properties. Validate that the Domain is the same as for the Anvil.
- Turn on NFS services on Windows File Server
This step may not be required if the NFS services are already turned on the share. Bring up Server Manager -> File and Storage Services, click on Shares
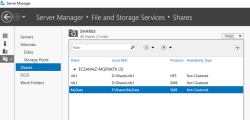
As can be seen above, the share is currently only exported via the SMB protocol.
- Export the share using the NFS protocol
DataCore vFilO uses NFS to access all data from File-type volumes, this requires any file server used with Anvil to enable NFS access to the volumes that are going to be under management. The SMB metadata is assimilated using the SMB protocol.
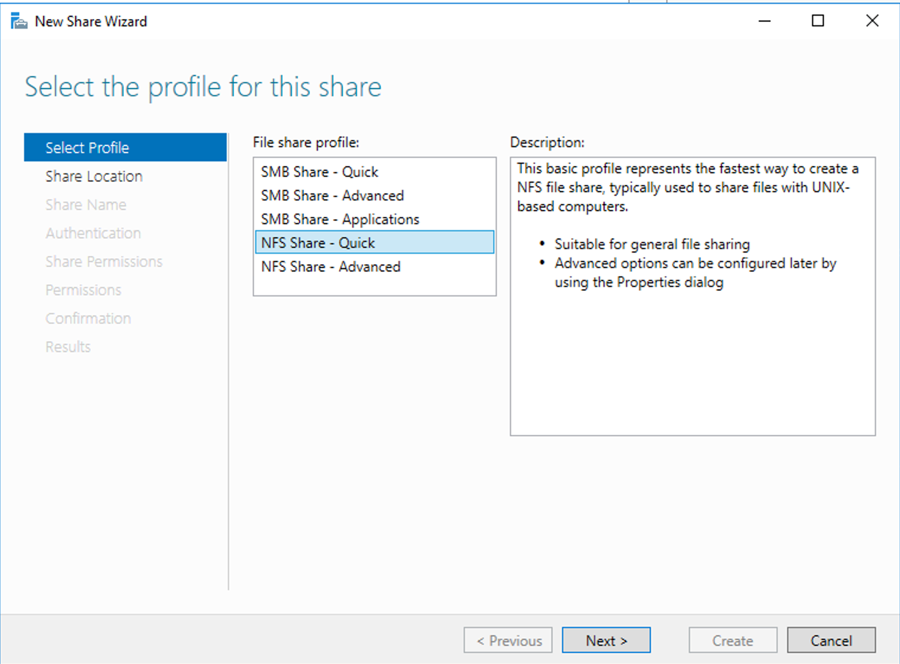
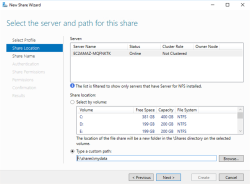
- In the File and Storage Services window, click Tasks -> New Share. This will bring up the New Share Wizard. Click NFS Share – Quick.

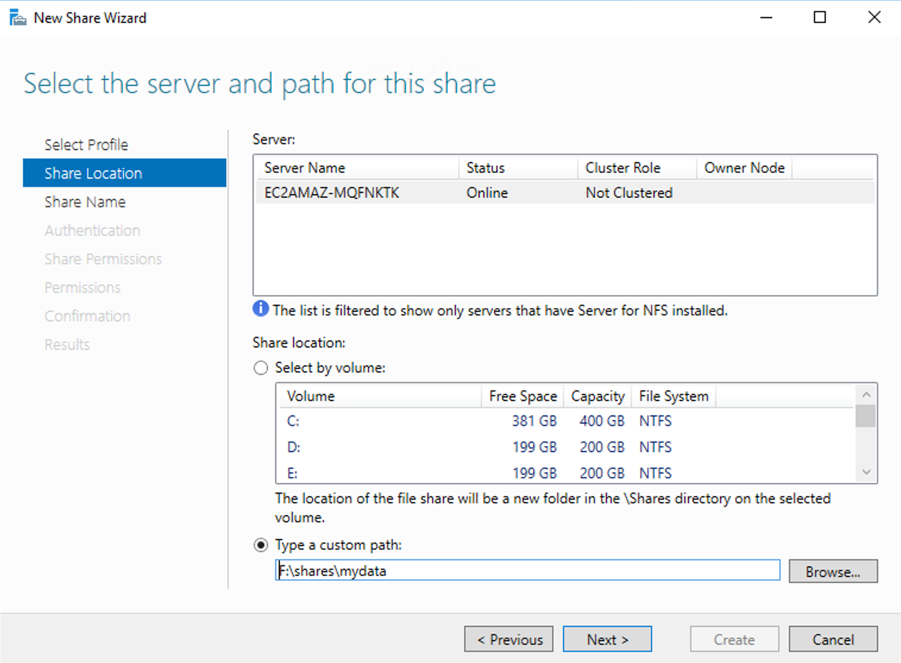
Select Type a custom path and navigate to the location of the SMB share on the file server.
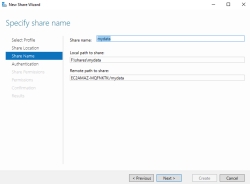
- Type in a name for the share.
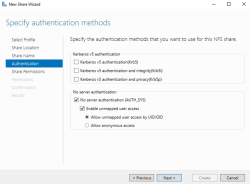
- Select AUTH_SYS as authentication and add Anvil and DSX as root clients. This securely configures the NFS export to only be accessed by the Anvil and DSX nodes.
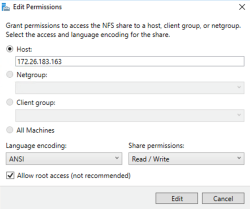
- Configure the Share Permissions to enable root data access for the Anvil and DSX.
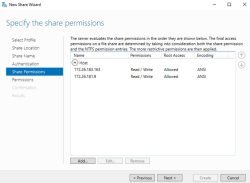
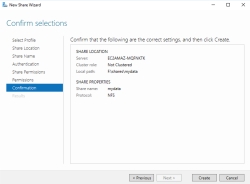
- Leave the Permissions page with the defaults settings and move forward to the confirmation page:
- In the File and Storage Services window, click Tasks -> New Share. This will bring up the New Share Wizard. Click NFS Share – Quick.
- Assimilate the data
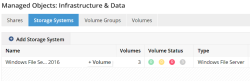
- Navigate to the Storage Systems tab and click on + Volume
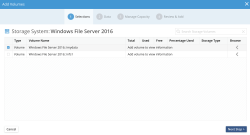
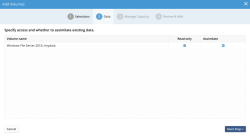
- Walk through the wizard and select theRead-Only and Assimilate checkboxes.
Read-only assimilation is the only supported mode for data in shares that have originated as SMB shares in a Windows file server.
This action does not make the data read-only. It means that DataCore vFilO cannot write back to that particular source volume. If you want to use the same Windows File Server as Read-Write storage, then a new NFS only share must be created to host the modified files.
- Select the MyData volume.
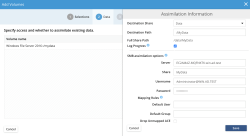
- Enter the SMB specific options. In this example the Domain is WIN.AD.TEST and the Administrator credentials are used to read the source data. Click Save when done.
- Verify that the Read only field is checked and proceed to the next step.
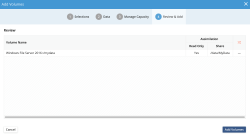
- Confirm selections and proceed with the assimilation. The assimilation will happen in the background and on-demand – in other words, the share is immediately usable and there is no wait for a migration to finish.
- Monitor progress in the task list or by looking at the Volumes page.
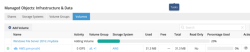
- The share is immediately available for use with the data remaining in place on the Windows File Server.
- Navigate to the Storage Systems tab and click on + Volume