Folder Mappings
To configure folder mappings:
- Log in to the vSphere Client.
- Go to Site Recovery > Open Site Recovery.
- Under the Site Pair menu options displayed on the left, click the Configure drop-down list and select Folder Mappings. The Folder Mappings page is displayed on the right.
- Click New.

A dialog box is displayed. - Under the Creation Mode option, click the applicable radio button to create mappings and click Next.

- Automatically: Site Recovery Manager (SRM) automatically maps networks and folders on the protected site to networks and folders on the recovery site that have the same name.
- Manually: To map specific networks and folders on the protected site to specific networks, folders, and resources on the recovery site.
- For a detailed understanding on the manual and automatic mappings, refer to the following article: https://docs.vmware.com/en/Site-Recovery-Manager/8.1/com.vmware.srm.admin.doc/GUID-DEA90D45-A6DE-48F5-8489-0CFA6D1DF3CB.html.
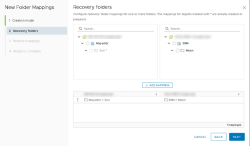
- Under the Recovery Networks option, select a folder at the Protected site and then the corresponding folder at the Recovery site.
- After selecting both folders, click Add Mappings and then click Next.

- Under the Reverse Mappings option, select the configured mapping and click Next.

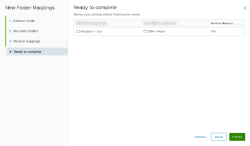
- Under the Ready to Complete option, review the settings and click Finish to complete the configuration.
