Creating a Deduplication Pool (Post-Processing)
Deduplication pools can be created from an existing DataCore SANsymphony disk pool ("storage source pool") by running a wizard in the console. The storage source pool does not need to be dedicated, but can be used for other purposes. In addition to creating the pool, the wizard also creates tasks used to maintain the pool and sets a deduplication schedule that will run background optimization.
Deduplication pools are created with the same Storage Allocation Unit (SAU) size as the storage source pool.
To create a deduplication pool:
In the DataCore Deduplication Console, click Create Deduplication Pool in the ribbon to open the wizard.
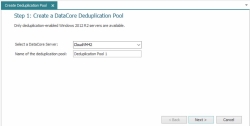
- Step 1: Create a deduplication pool:
- Select the DataCore Server on which the deduplication pool should be created.
- Enter the name of the deduplication pool to be created.
- Click Next to continue.
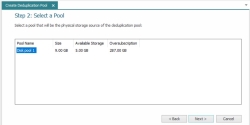
- Step 2: Select a Pool
- In the list, select the existing DataCore SANsymphony disk pool to be used as the storage source of the deduplication pool.
- Click Next to continue.
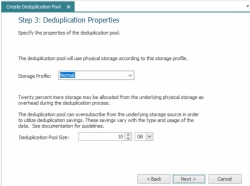
- Step 3: Specify the properties of the Deduplication Pool.
- Select the storage profile to use for the physical storage taken from the storage source pool. This underlying storage will be used to create the deduplication pool.
- Specify the size of the deduplication pool.
- The size of the deduplication pool can be oversubscribed in anticipation of estimated savings to be realized in the deduplication process.
Note: Savings will vary considerably based on the type and usage of the data.
- 20% more space than the size specified will be subscribed, but not necessarily allocated, from the storage source pool. For example, if the size of the deduplication pool is 100 GB, 120 GB will be subscribed from the storage source pool. This additional space is required to support the deduplication process.
- The size of the deduplication pool can be oversubscribed in anticipation of estimated savings to be realized in the deduplication process.
- Click Next to continue.
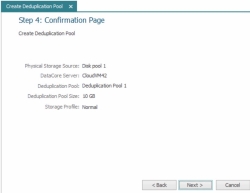
- Step 4: Confirmation Page
- Confirm your selections for the deduplication pool and click Next to continue.
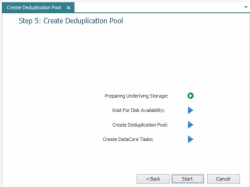
- Click Start to begin the process of creating the deduplication pool. Creating the pool may take some time. Progress is indicated on the wizard page. Green check marks represent completed actions and a green circular arrow represents the current action being performed.
- When all tasks have been completed, click Finished to close the wizard.
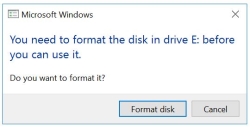
- During pool creation, the operating system on the DataCore Server where the pool was created will find a new disk which will generate a message asking if you would like to format it. Click Cancel on the message.
- Disable scheduled optimization for the volume created as the source of the deduplication pool.
- Find the drive letter of the volume in Disk Management (the volume will have the same name as the deduplication pool) or in tasks (the task description will identify the pool and drive).
- Open the Windows Defragment and Optimize Drives utility. Change the settings for the scheduled optimization so the drive is not selected for optimization. See Microsoft documentation for more information.
