Managing SANsymphony Storage in Proxmox VE
Explore this Page
Overview
This page explains how to manage SANsymphony storage in Proxmox VE using the SANsymphony Storage Plugin for Proxmox. It covers essential tasks such as creating and managing virtual machines, attaching and resizing virtual disks, configuring LVM storage classes, and removing resources. Both the Proxmox web interface and the ssy-plugin CLI are used to perform these operations.
Managing SANsymphony Storage Plugin for Proxmox
This section explains how to use the Proxmox Web Interface with the SANsymphony Storage Plugin for Proxmox to perform daily tasks such as accessing storage, creating virtual machines, adding disks, and resizing them.
Accessing the Custom Storage
- Open your web browser and navigate to the Proxmox VE web interface.
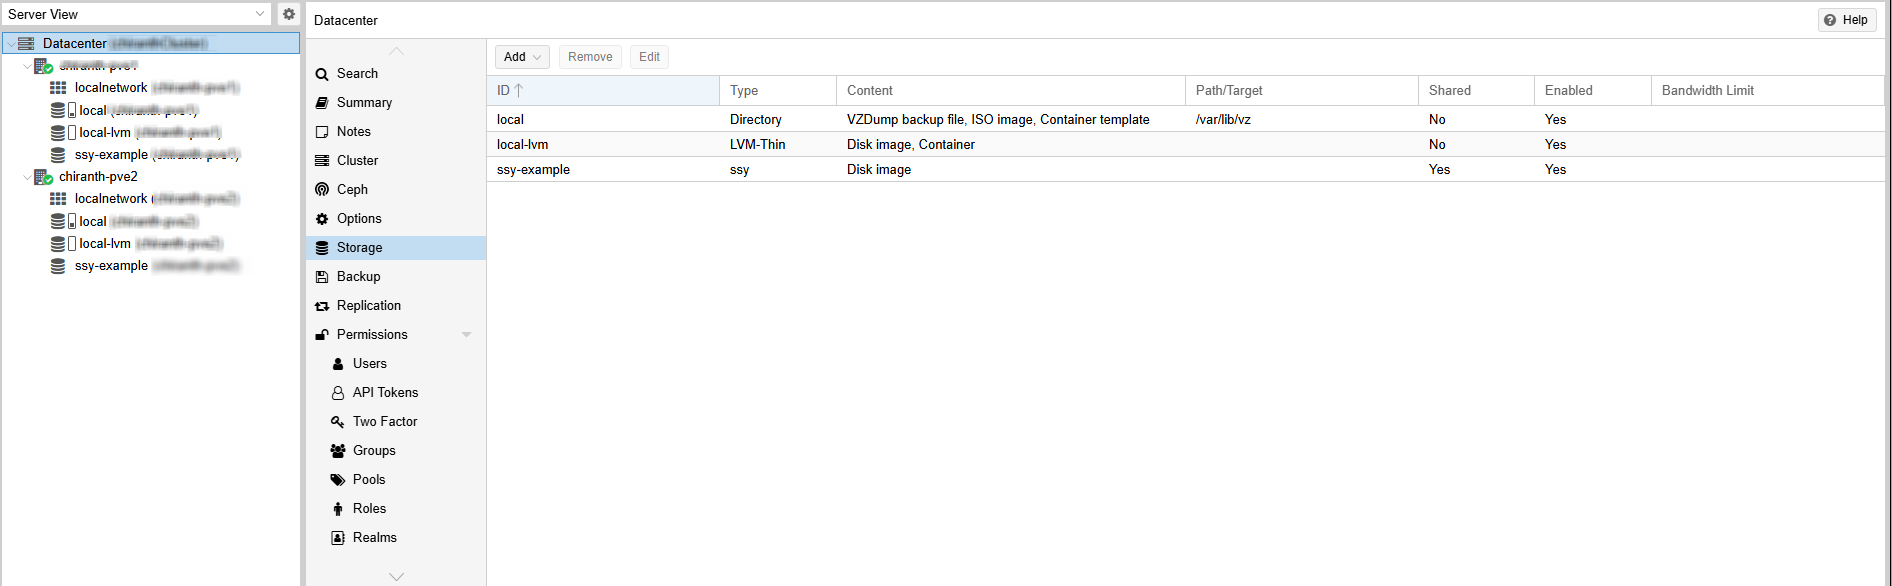
- Go to Datacenter > Storage in the Proxmox interface. Verify that your custom storage is listed and available.
Creating a Virtual Machine with SANsymphony Storage
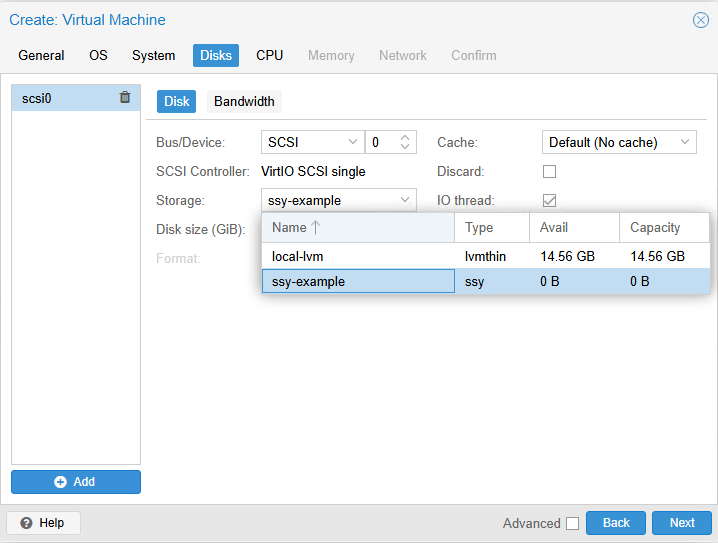
- Create a virtual machine and navigate to the Disks tab.
- Select the SSY Storage type and enter the desired Disk size (GiB). A SANsymphony virtual disk of the specified size is created and presented to Proxmox.
Adding Multiple Virtual Disks
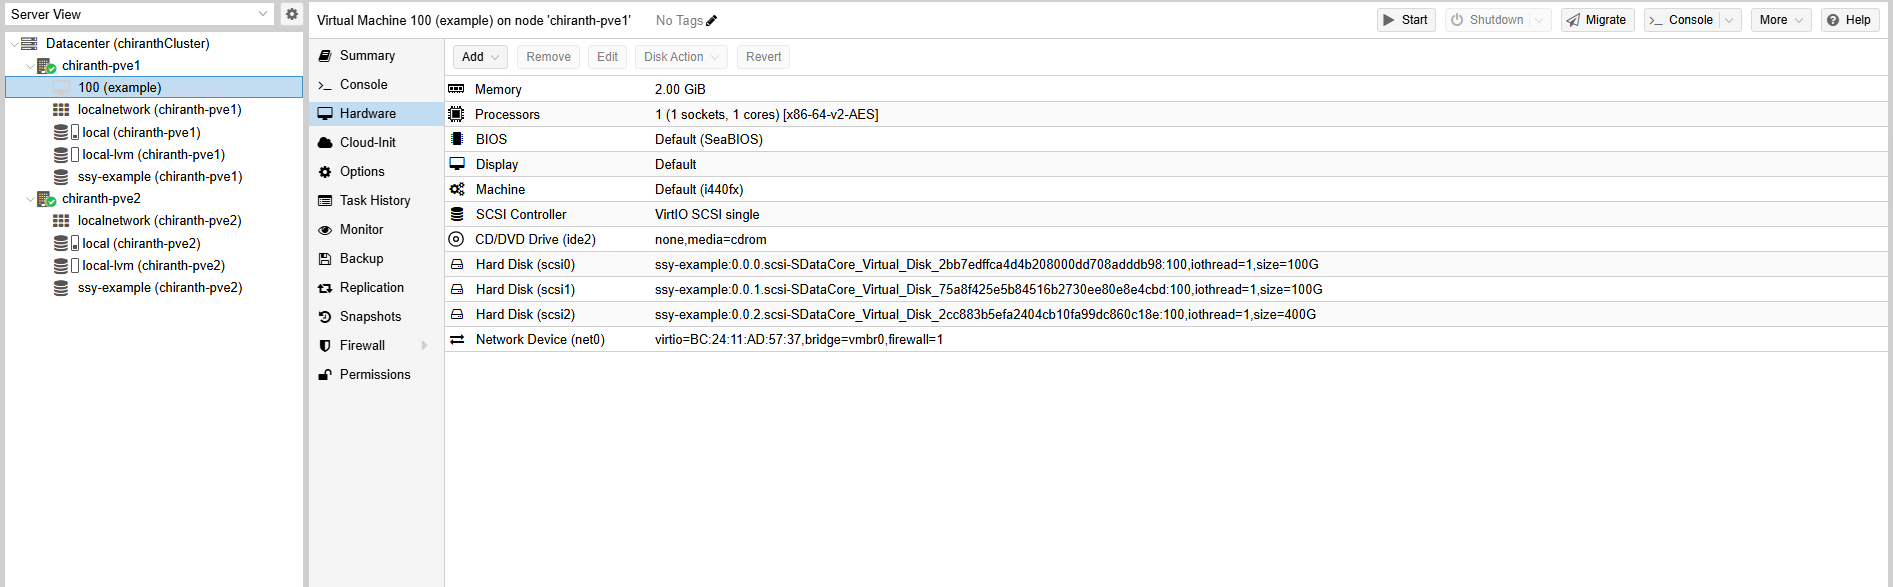
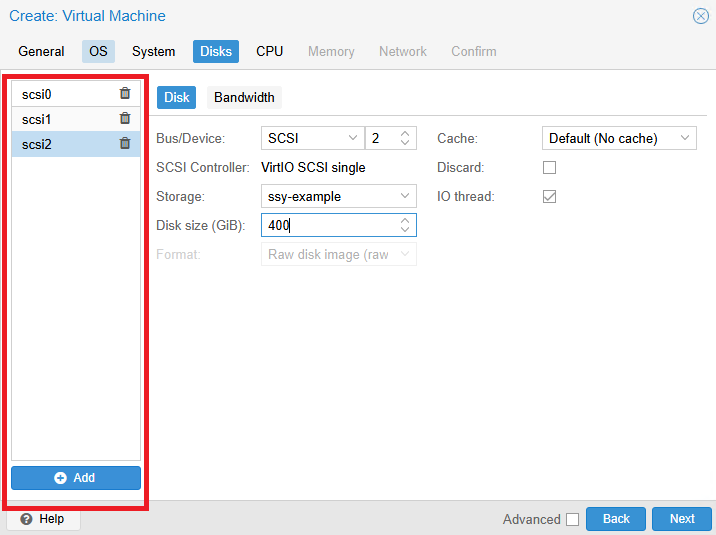
- Navigate to the virtual machine from the left pane, click Hardware > Hard Disk, and then click Add.
- Select SSY as the storage type and specify the disk size.
- Each added disk creates a new SANsymphony virtual disk and attaches it to the virtual machine.
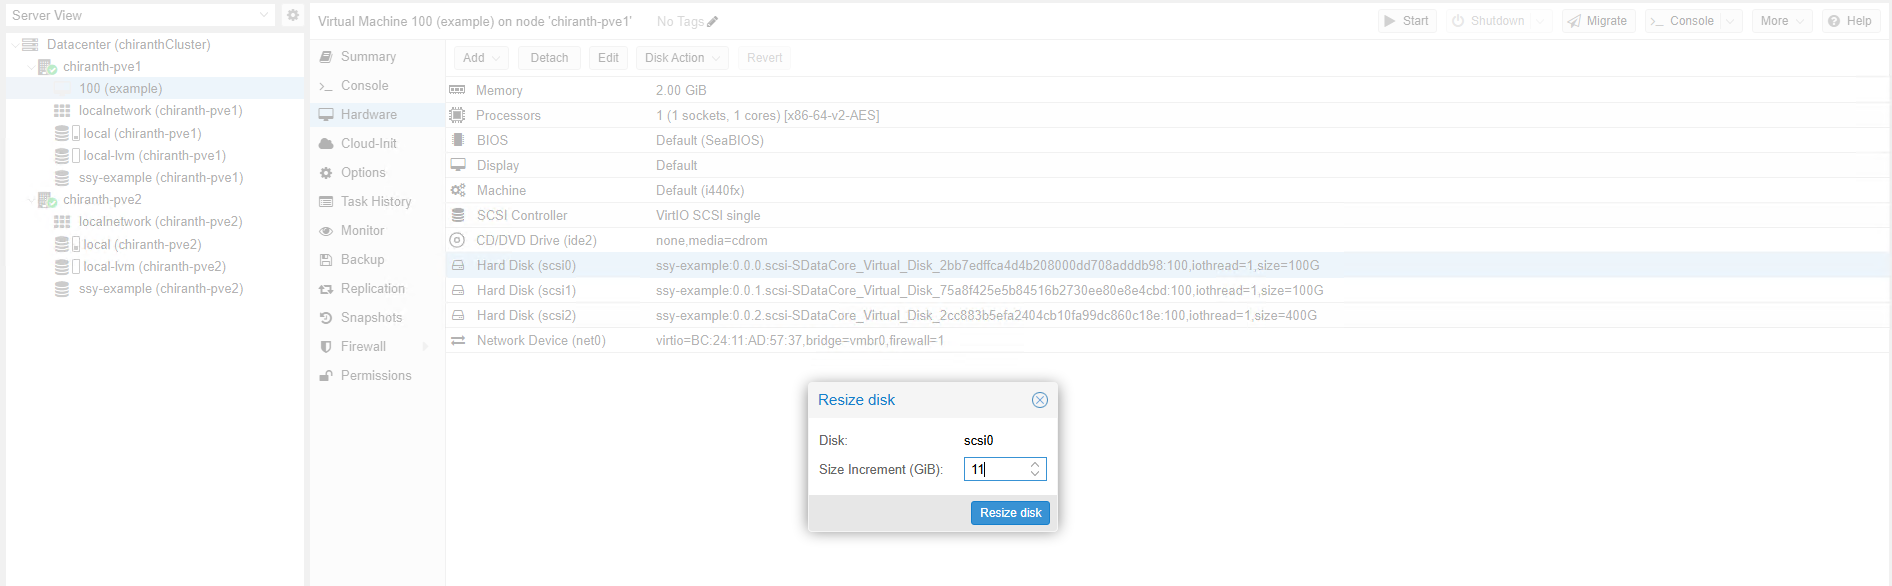
Extending a Virtual Disk
- Go to Hardware, select the target disk, then select Disk Action > Resize.
- Provide the incremental disk size in GiB and click Resize Disk.
- The SANsymphony virtual disk automatically expands to the new size.
- Resizing in Proxmox updates the corresponding SANsymphony virtual disk accordingly.
Managing Storage and Virtual Disks
This section describes how to manage virtual disks and storage classes in Proxmox with SANsymphony. It includes tasks such as creating, listing, and, removing virtual machines, configuring LVM storage classes, and displaying multipath details.
List Volumes
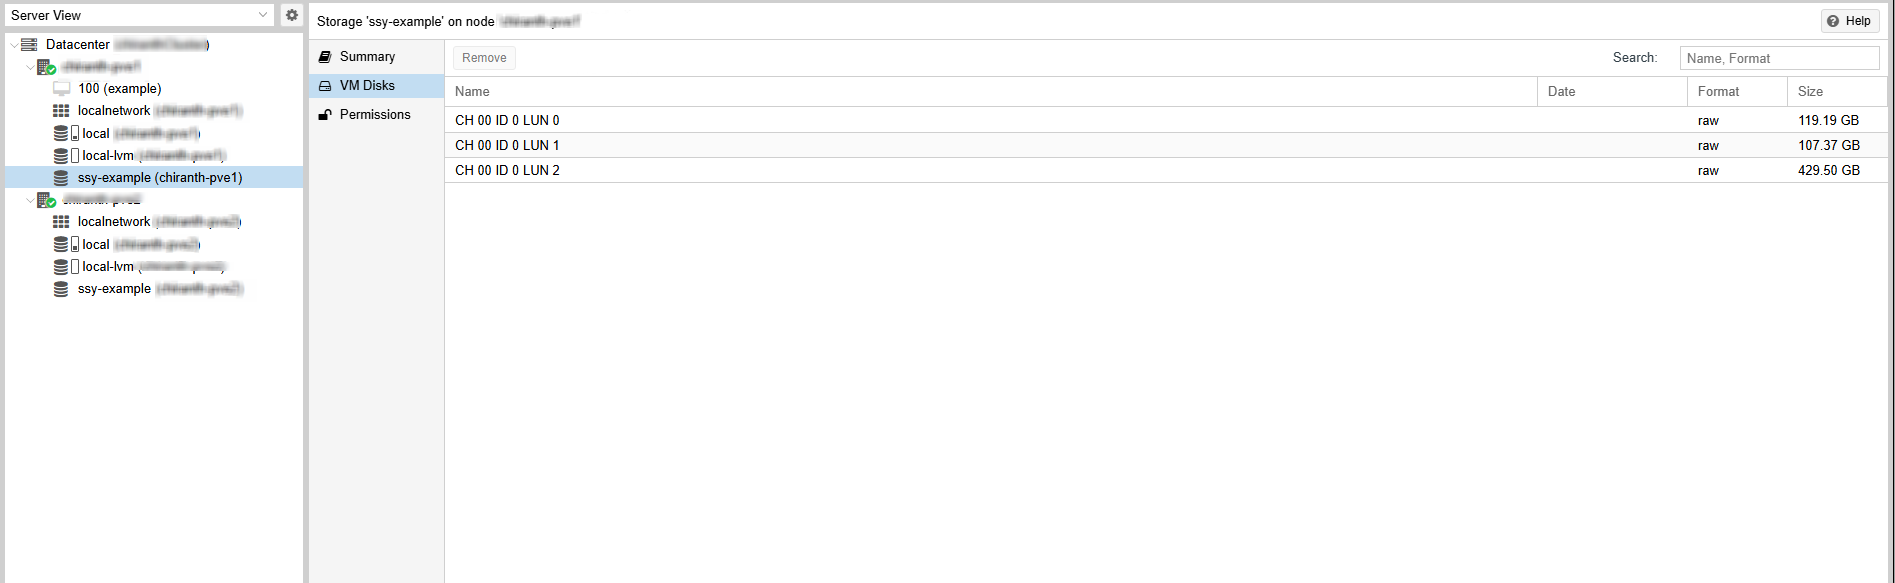
Navigate to SANsymphony Storage Class > VM Disks to list all volumes attached to a virtual machine.
This command displays all referenced and unreferenced SANsymphony virtual disks attached to the virtual machine. Any virtual disks used internally for LVM creation will not be listed.
Delete a Virtual Machine
In the Proxmox UI, select the virtual machine and click More > Remove. This action deletes the virtual machine and all SANsymphony virtual disks attached to it, including both referenced and unreferenced disks.
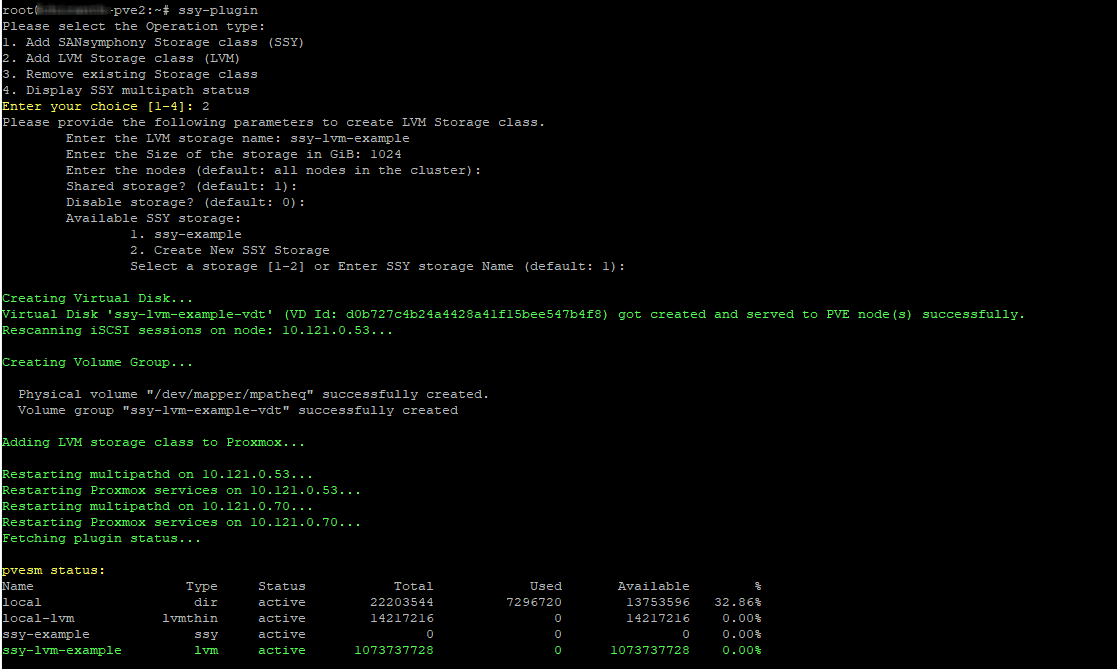
Create an LVM Storage Class Using SANsymphony Storage
- You can create an LVM storage class by using a SANsymphony virtual disk (VD) through the ssy-plugin wrapper command line tool.
- Select option 2 (Add LVM Storage Class).
- The process performs the following steps automatically:
- Creates a SANsymphony virtual disk (for example: test-lvm-MR).
- Detects the multipath device.
- Creates a Physical Volume (PV) and Volume Group (VG).
- Adds the new LVM storage class to Proxmox.
- Verify the storage class status by running the command:
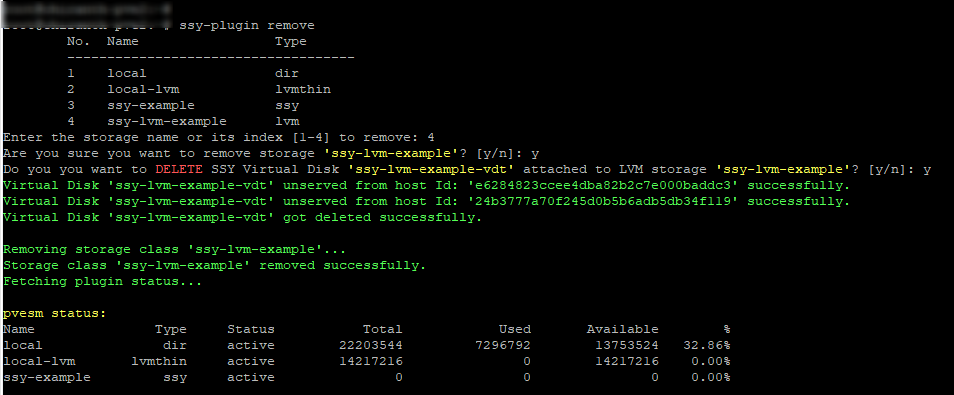
Remove an LVM Storage Class
- To remove an LVM storage class, use the ssy-plugin wrapper CLI.
- Select option 3 (Remove Storage Class).
- Select the LVM storage class you want to remove (example: demo-lvm).
- Choose whether to:
- Remove the LVM storage class from Proxmox, or
- Remove the attached SANsymphony virtual disk (example: demo-lvm-MR).
- Verify the removal using the command:

Display Multipath Details
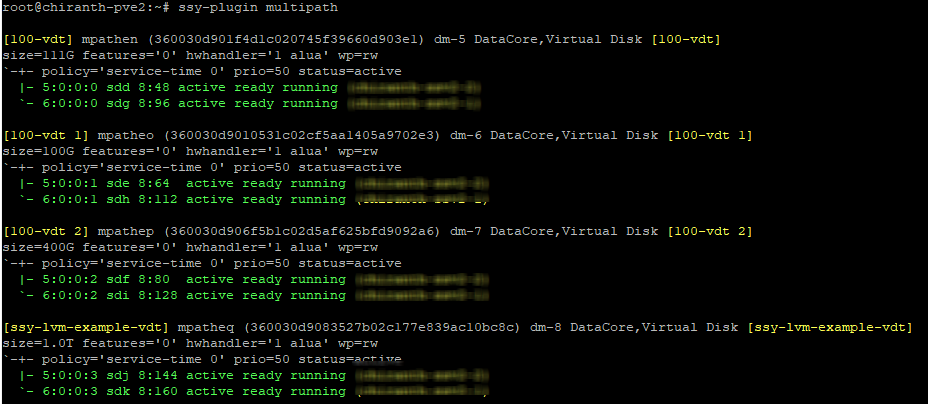
You can display the SANsymphony multipath details by using the ssy-plugin wrapper CLI.
The command output:
- Lists all SANsymphony virtual disks (for example, 101-MR, 100-MR, test-lvm-MR) with their multipath configuration.
- Displays all iSCSI connections, with color codes for easier identification.
Learn More