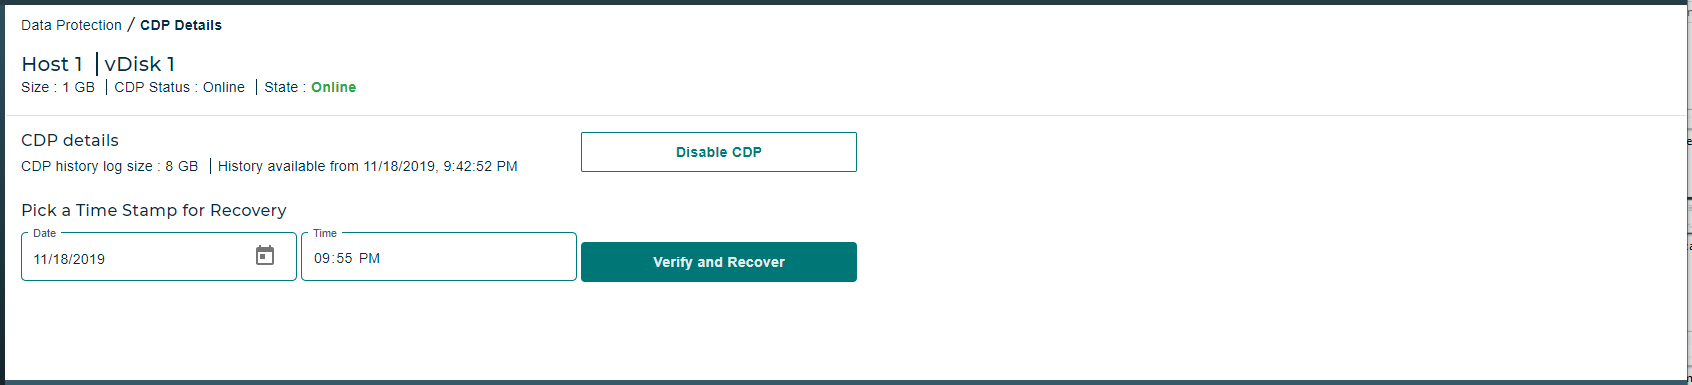
View and Recover from CDP
- Click the Actions icon for the selected virtual disk and select View CDP from the menu.
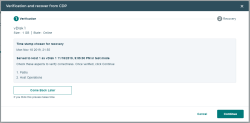
- On the CDP Details page, pick a time stamp for recovery and click Verify and Recover.

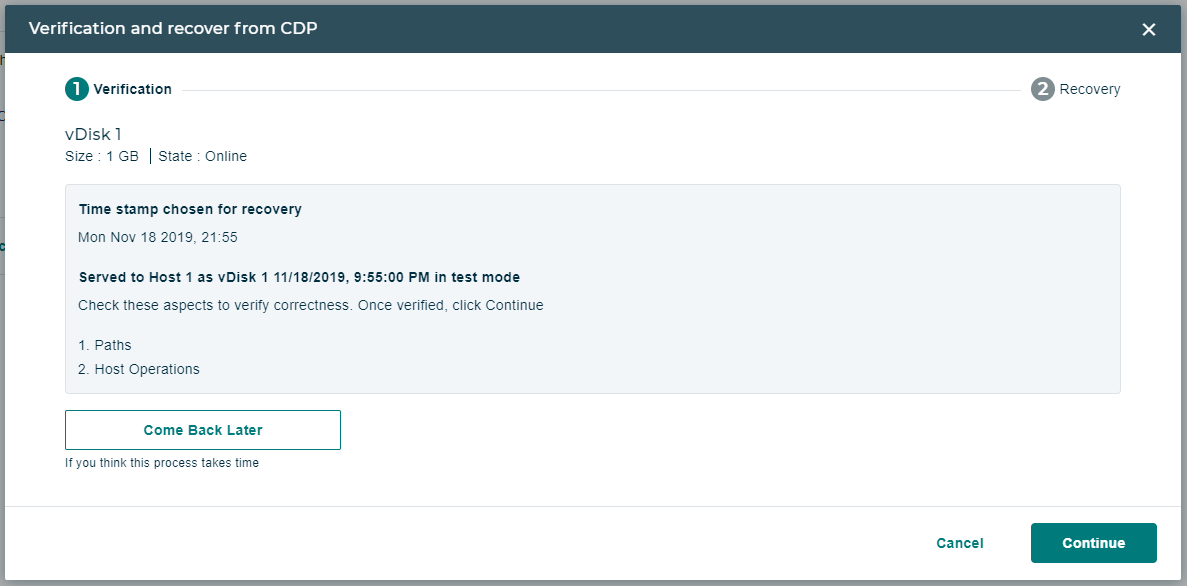
- In the Verification and Recover from CDP confirmation, click the pencil icon to edit the timestamp (if needed) and click Verify.
- If you want to return to the recovery process later, then click Come Back Later, otherwise click Continue.
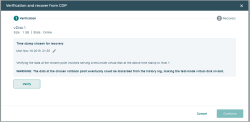
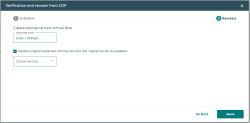
- Enter a name for the new virtual disk. There are two ways to proceed at this point:
- Replace the original virtual disk (the original will be unassigned and retained): To do this, select the Replace original virtual disk with this new disk check box and click Serve.
- Serve the new virtual disk to another host: To do this, clear the Replace original virtual disk with this new disk check box, select a host from the drop-down list, and click Serve.
The new virtual disk will be created and served, and a confirmation message will be displayed.