Create Shared SMPA Pool
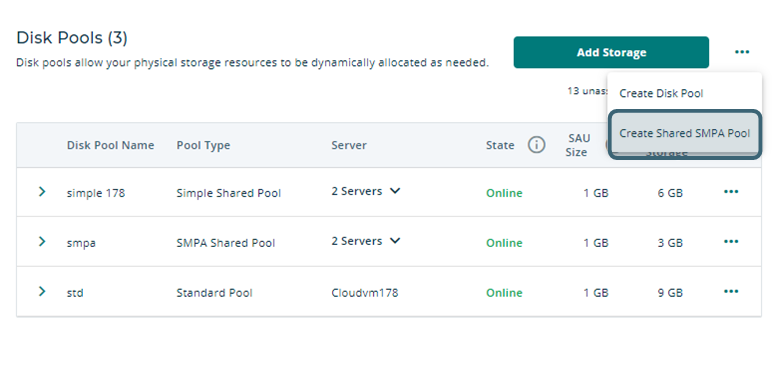
- Click the Actions icon next to Add Storage.

- Select Create Shared SMPA Pool from the drop-down menu.
If the Create Shared SMPA Pool option is not available, you may not have a license for it. Follow the link in the message displayed for more information.
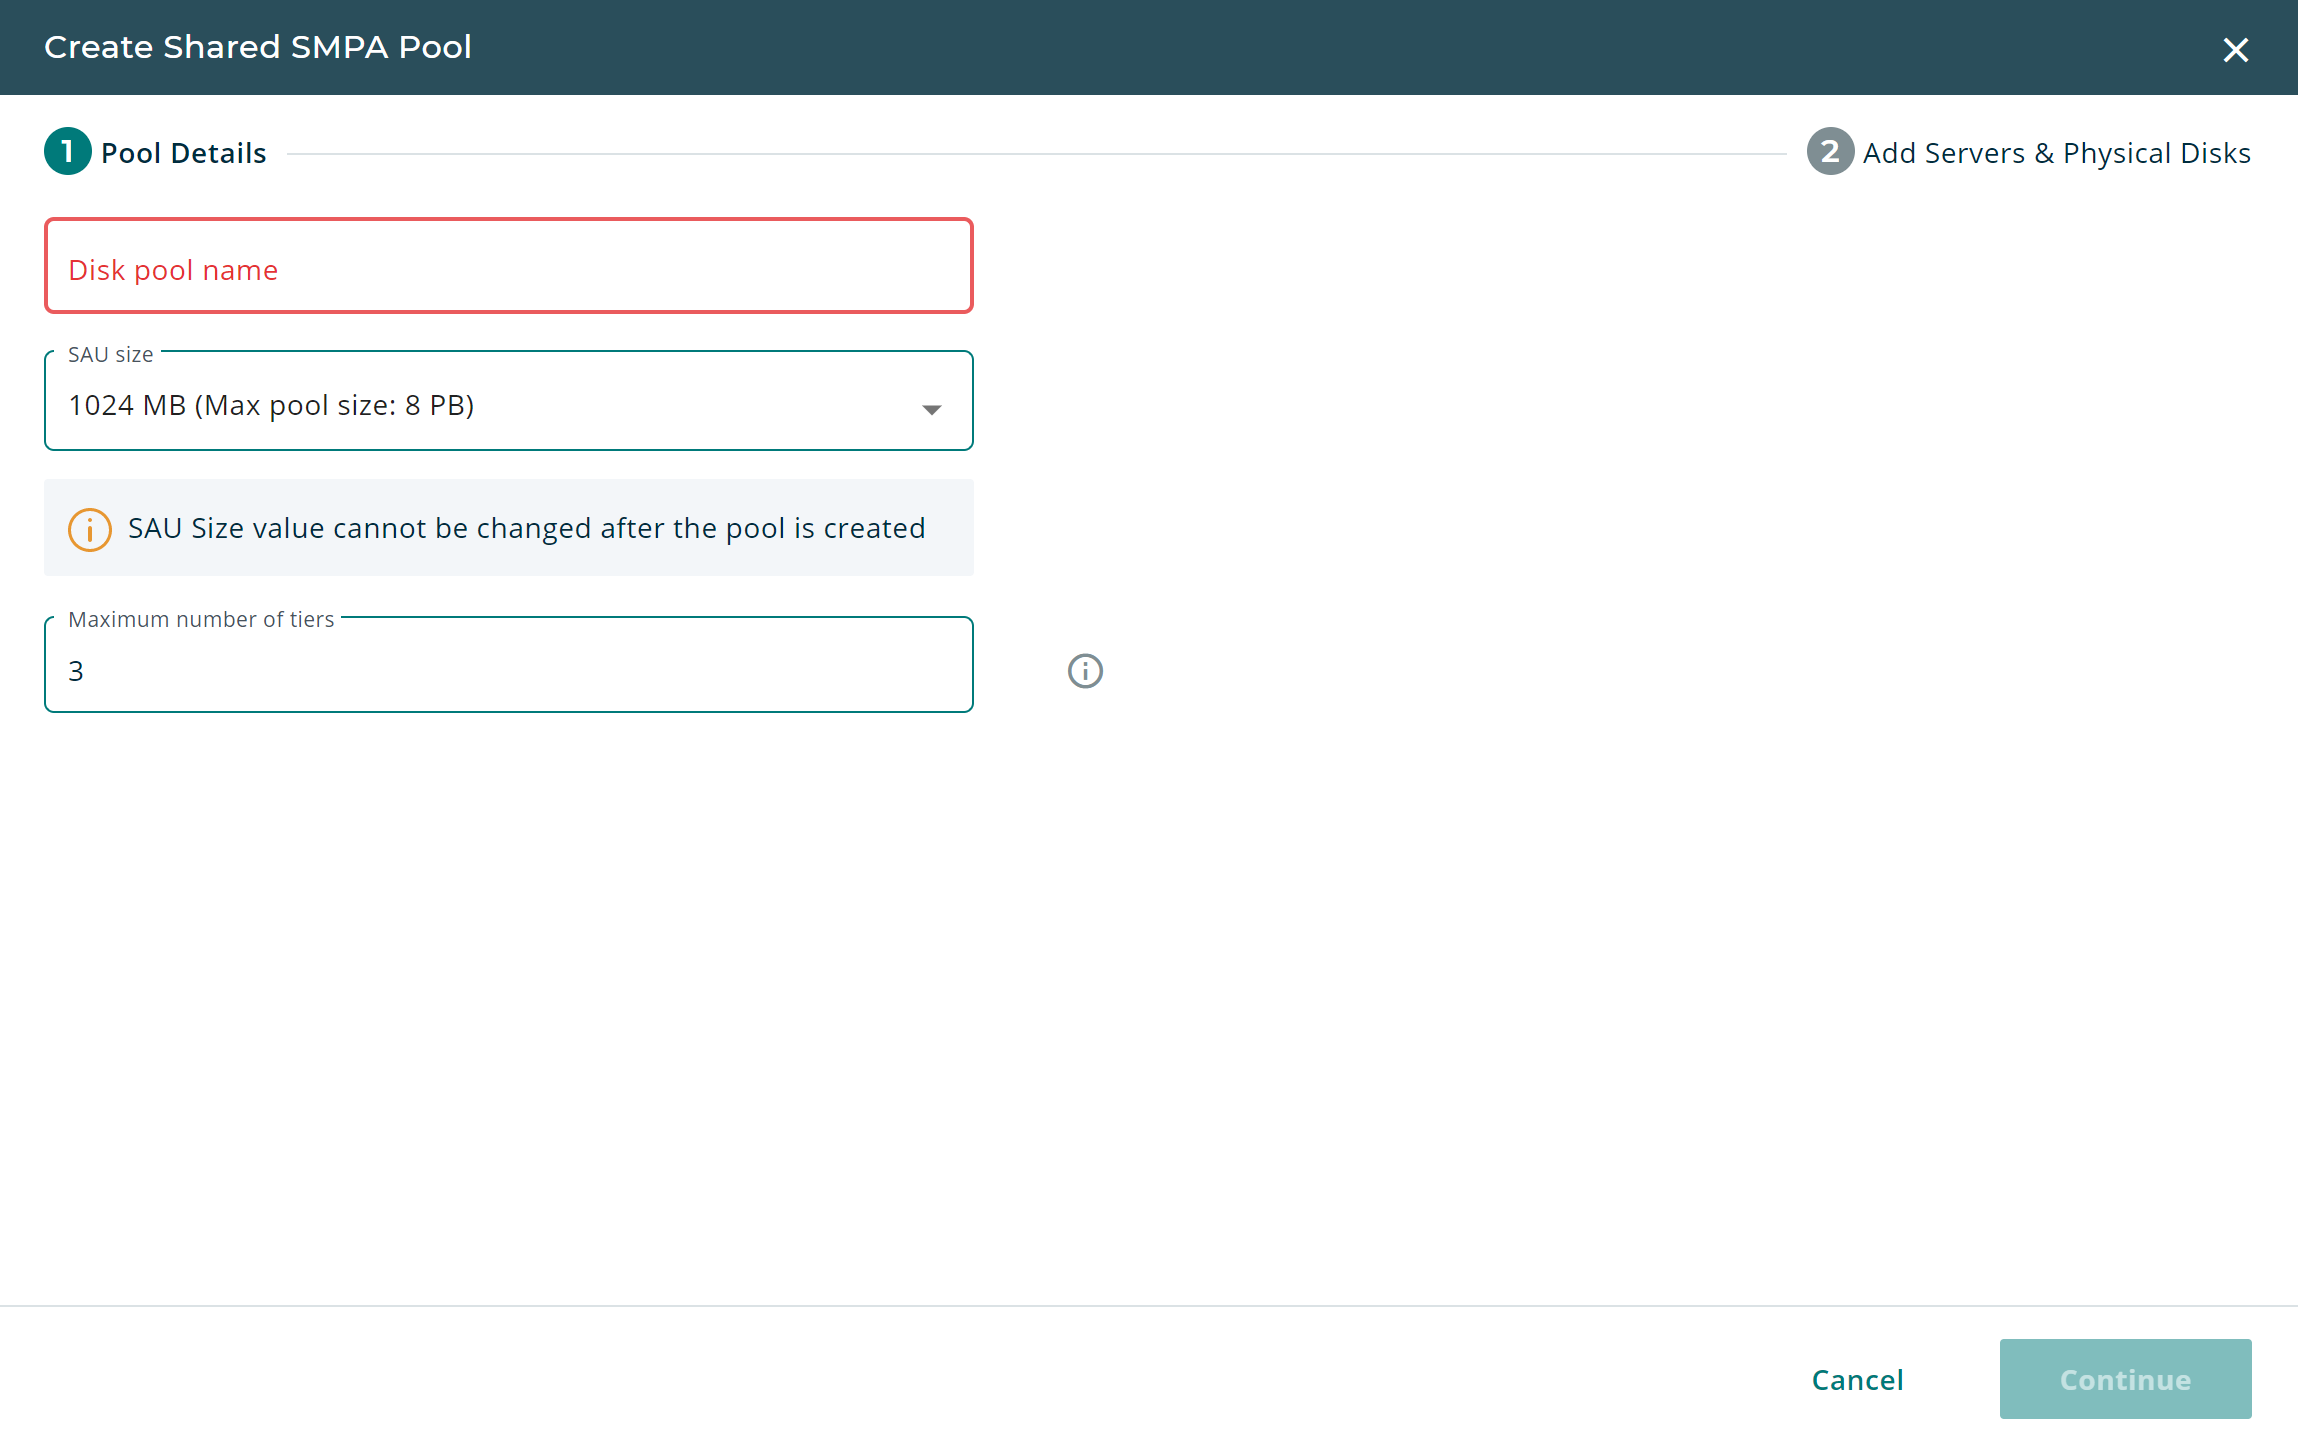
- In the Create Shared SMPA Pool dialog, under Pool Details:
- Enter the name of the pool.
- Select the storage allocation unit (SAU) size.
The storage allocation unit cannot be changed after the pool is created.
- Select how many tiers physical disks can be in.
- Click Continue.

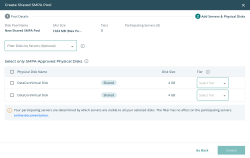
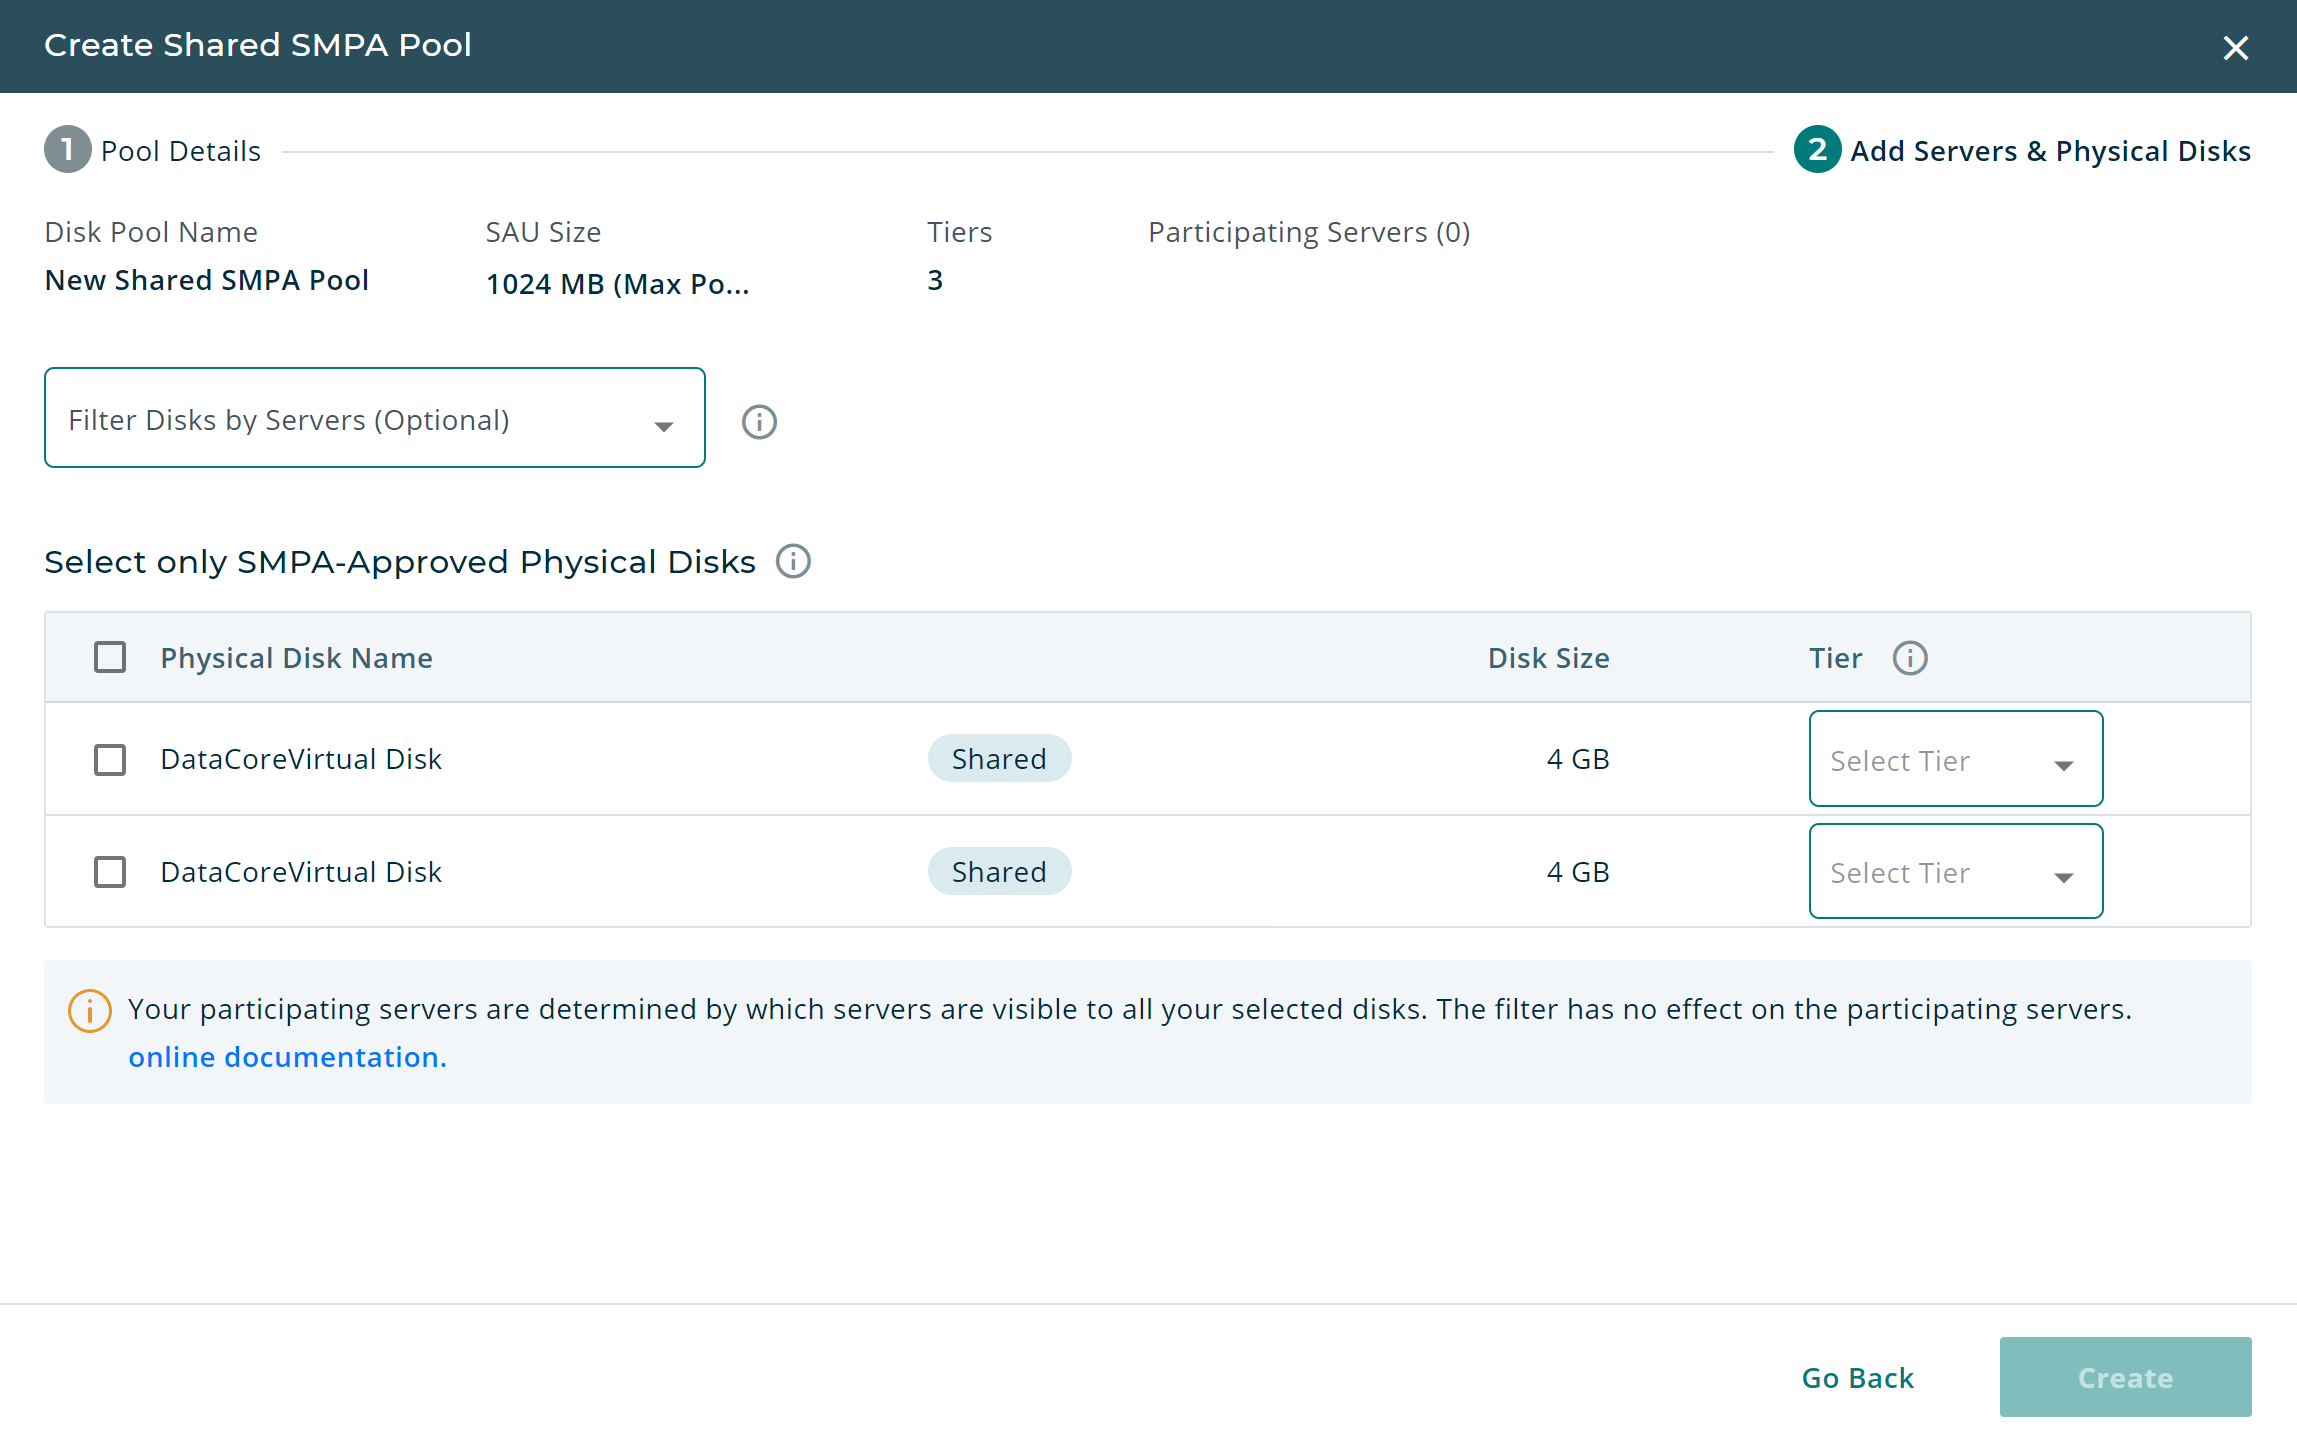
- In the Create Shared SMPA Pool dialog under Add Servers & Physical Disks:
- To filter the list of physical disks, use the FiIter Disks by Servers drop-down list. If there is a server that cannot be part of the pool because it cannot see all of the currently selected disks, that server will be disabled in the drop-down list. This filter has no impact on list of participating servers.
- Select the SMPA-approved disks to add to the pool and assign a tier to each one. The Participating Servers list will update accordingly; click the More drop-down (if visible) to see additional servers. If disks are made shareable to other servers or what is shareable is reduced outside of DataCore Web Console, the pool automatically updates to use what is available.
For a list of SMPA-approved hardware, see Shared Multi-Port Array (SMPA) Tested Configurations. To verify hardware that is not on the list, please follow these instructions to request an SMPA Validation Toolkit: Qualifying a Storage for use as a Shared Multi-Port Array (SMPA).
- Click Create and a confirmation message will appear.