Add Storage
To add physical disks to an existing pool, follow these steps:
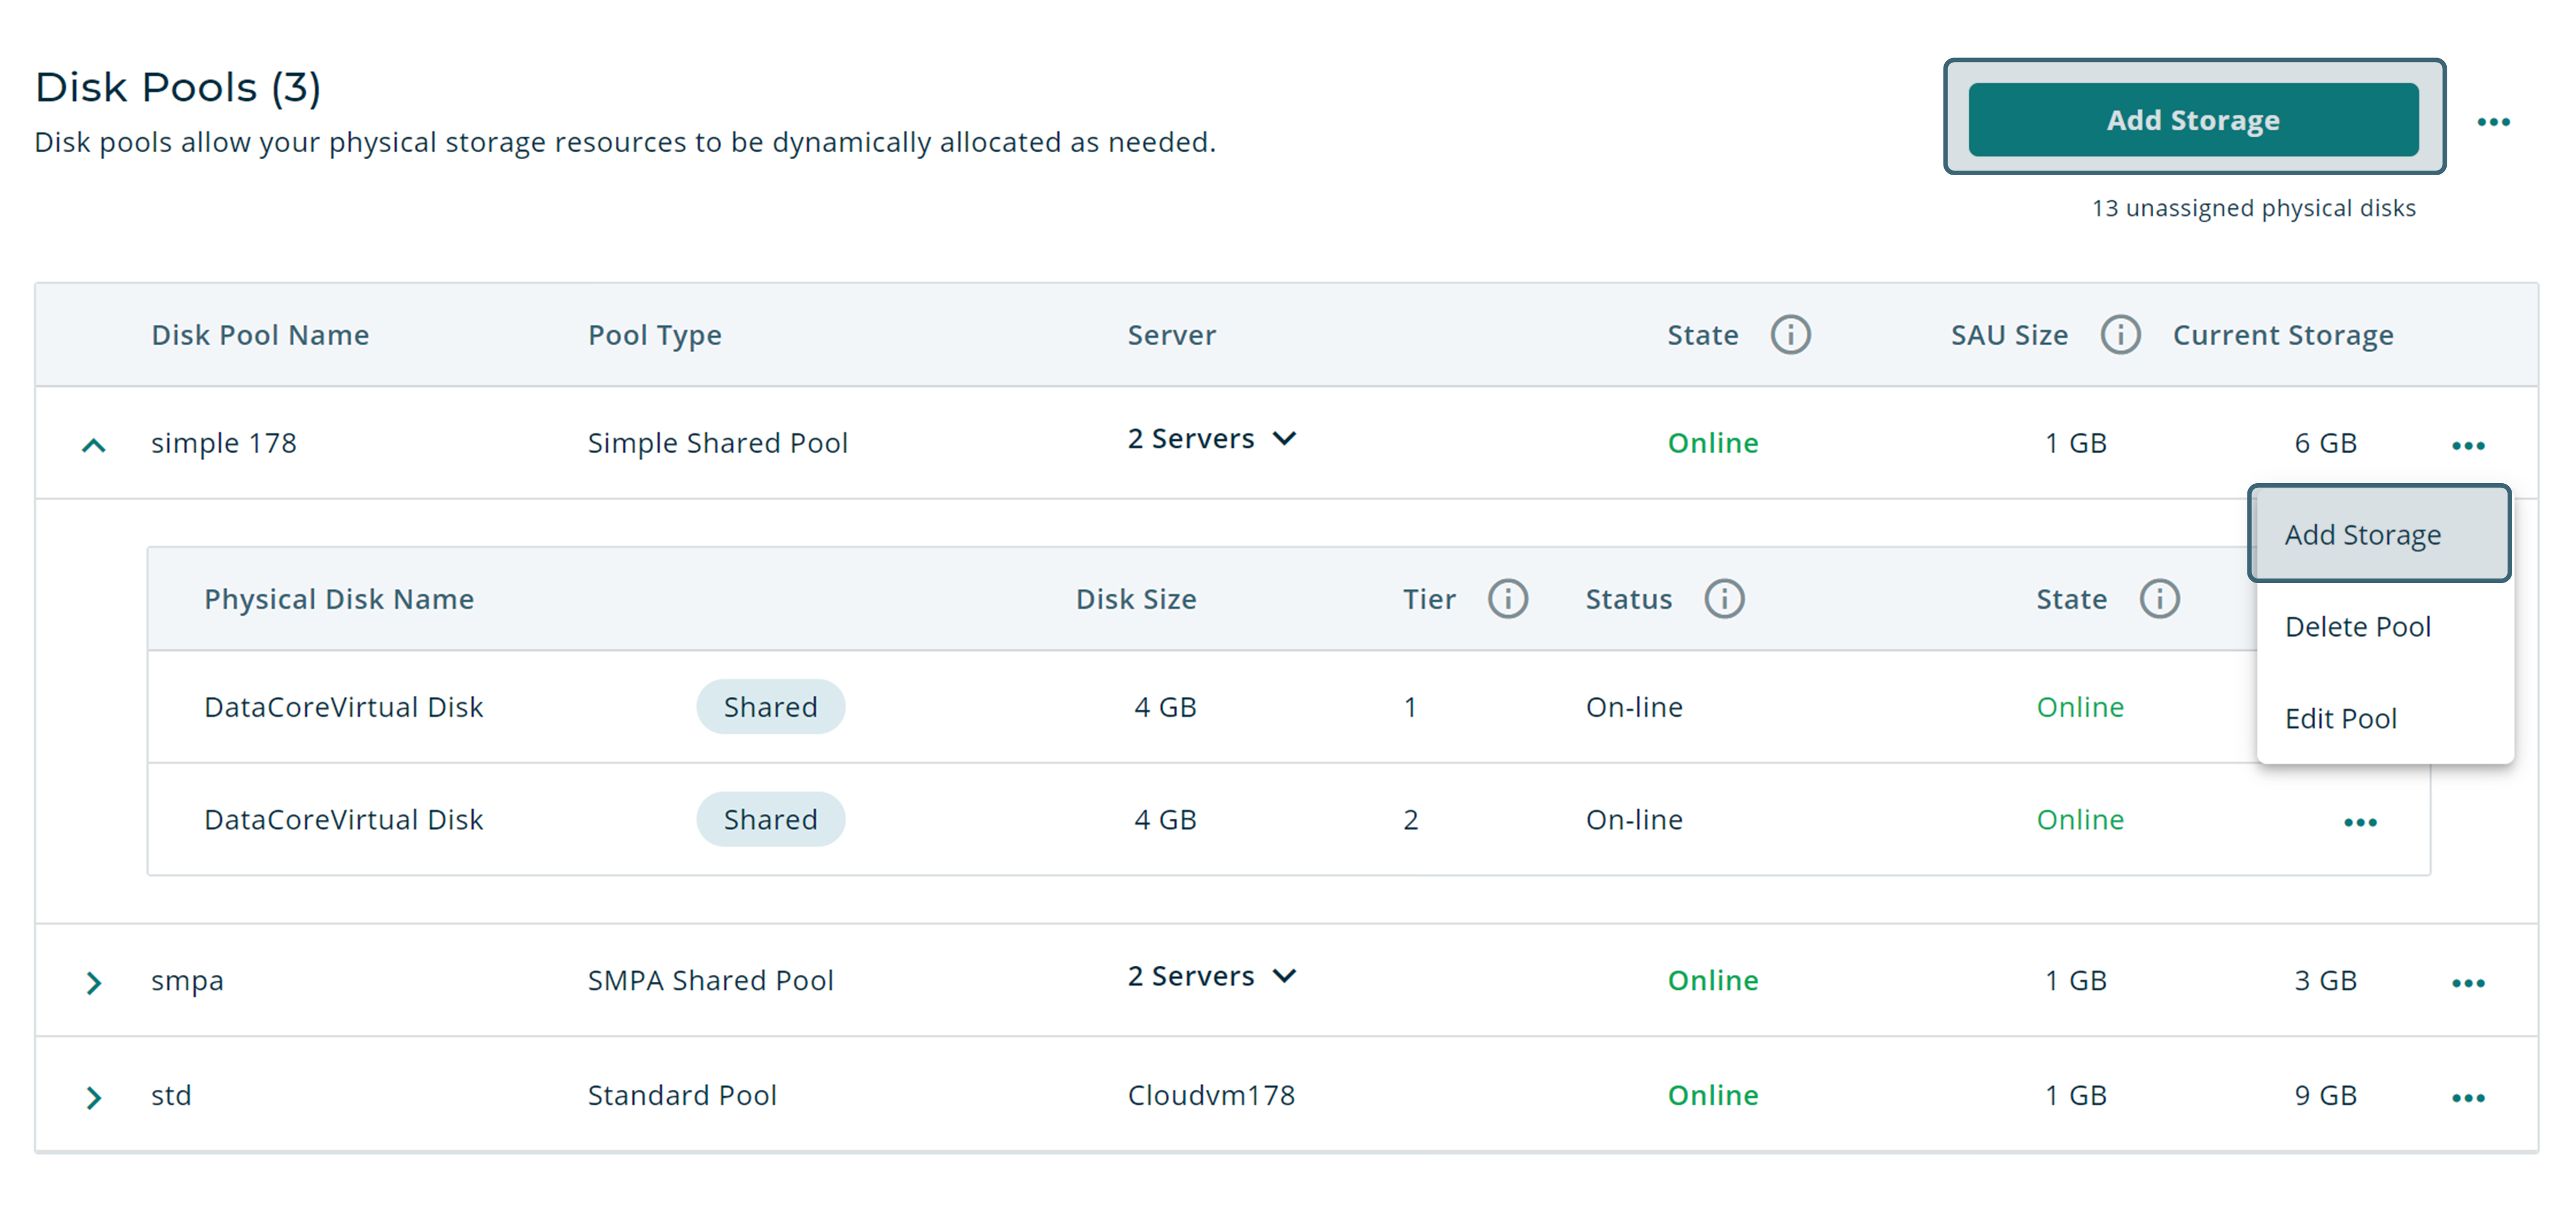
- Click Add Storage or click the icon on in a disk pool row and then Add Storage.
- In the Add Physical Disk dialog, select a disk pool from the Disk Pool Name drop-down list.
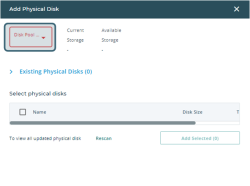
- Select one or more physical disks from the table. You may update the table by clicking Rescan. The disks shown depend on the type of pool the selected physical disks belong to:
- For standard pools, the available disks will be any that can be seen by the pool’s server, including shared disks.
If you add a shared disk to a standard pool, the disk will change the pool to a simple shared pool and a message will be displayed that one of the disks is not shared across all servers. See Shared Multi-port Array Support for more on the limitations of non-shared storage.
- For simple shared pools, the available disks will include all disks that can be seen by the active server, shared or not. The active and passive servers for the pool will also be listed at the top of the table.
- For SMPA pools, only disks that all the servers can share will be available. Participating servers are shown in the top section of the table.
- For standard pools, the available disks will be any that can be seen by the pool’s server, including shared disks.
- For each selected disk, set the tier from the Tier drop down list.
- When you are finished selecting disks, click Add Selected. A confirmation message will be displayed.
- Click Close when you are finished adding physical disks to pools.